Cake Decorating Tutorials  (How To's) Tortas Paso a Paso
Cake Decorating Tutorials (How To's) Tortas Paso a Paso
Вернуться   Cake Decorating Tutorials (How To's) Tortas Paso a Paso > Figure making tutorials > Flowers Trees Tutorials
Перезагрузить страницу подсолнухи,sunflowers, slunečnice, tournesols, Sonnenblumen, girasoli, girassóis, gir
Старый 29.11.2012, 17:32
Ariana Ariana вне форума
Администратор
Регистрация: 07.09.2010
Сообщений: 7,940
По умолчанию
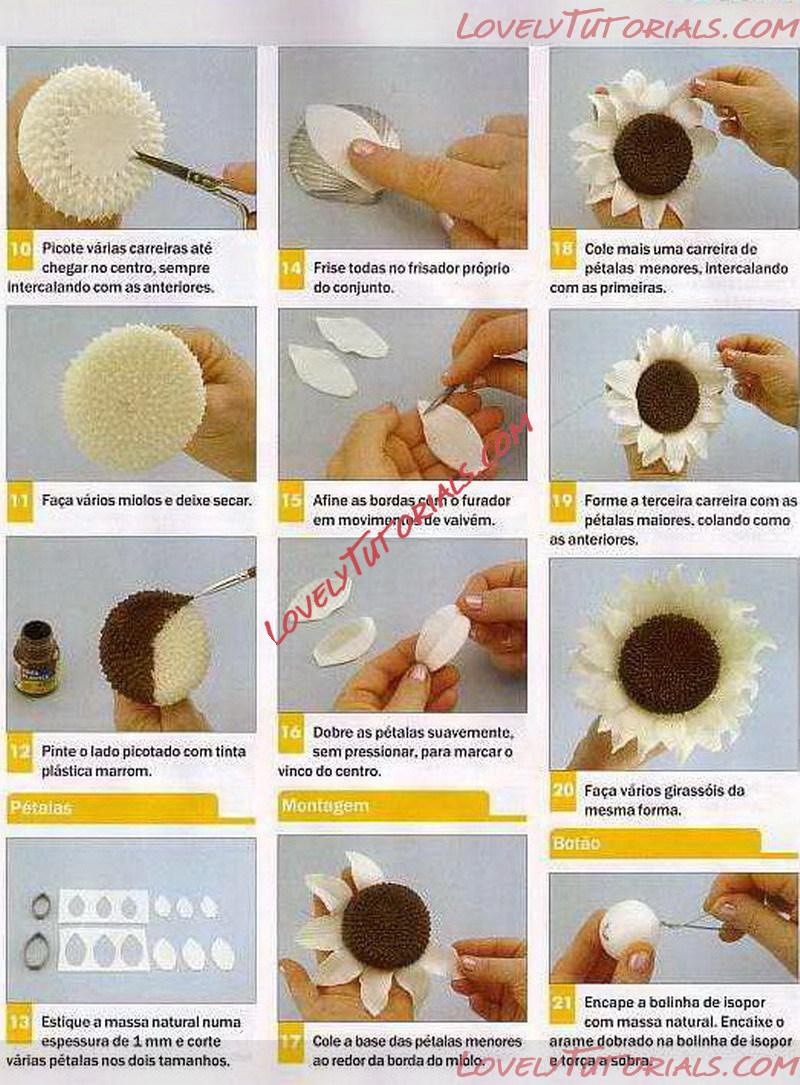
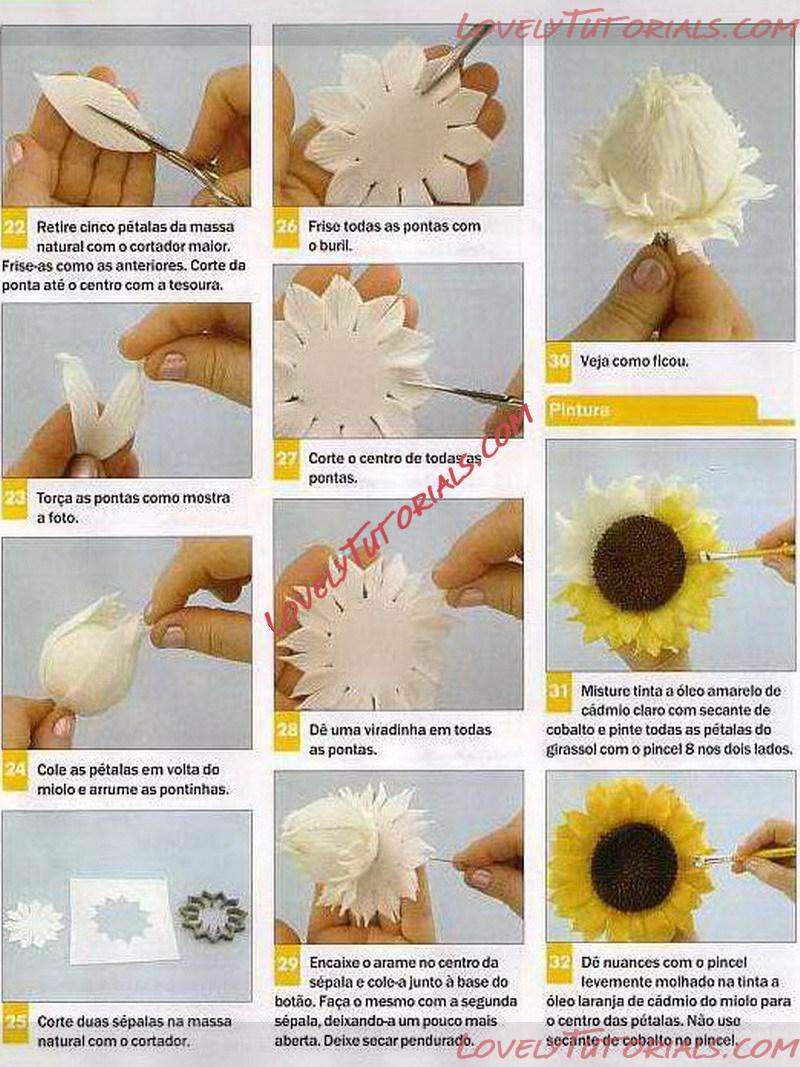
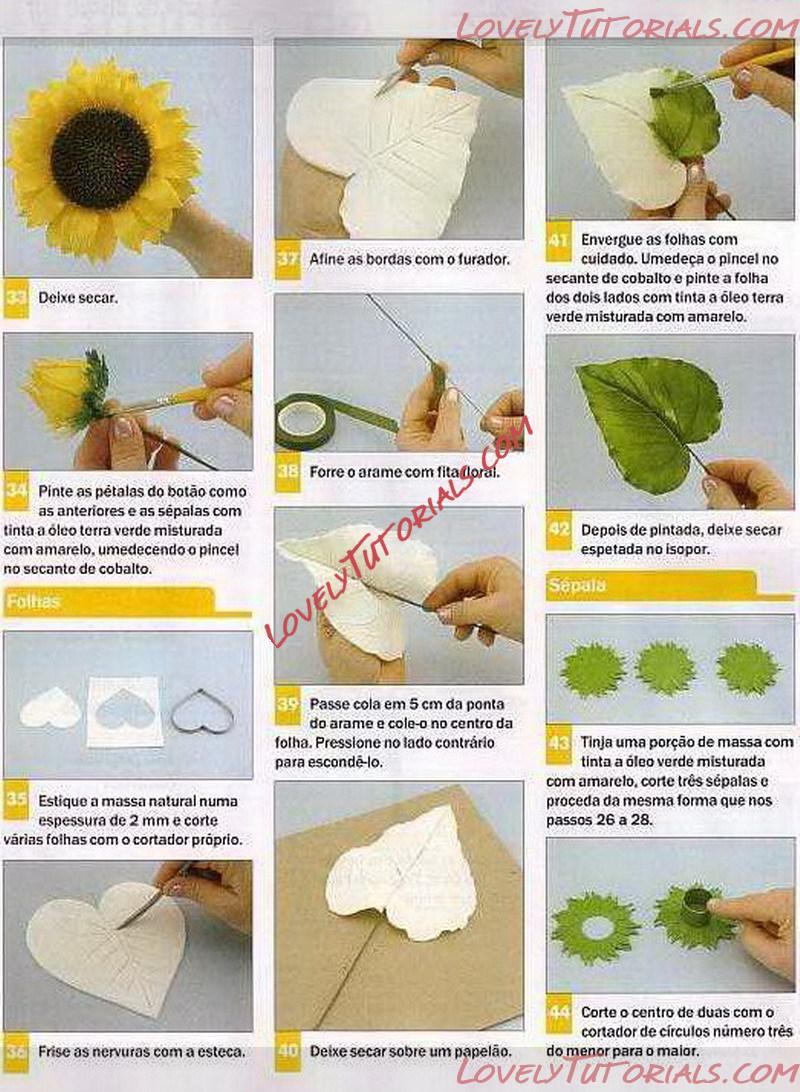
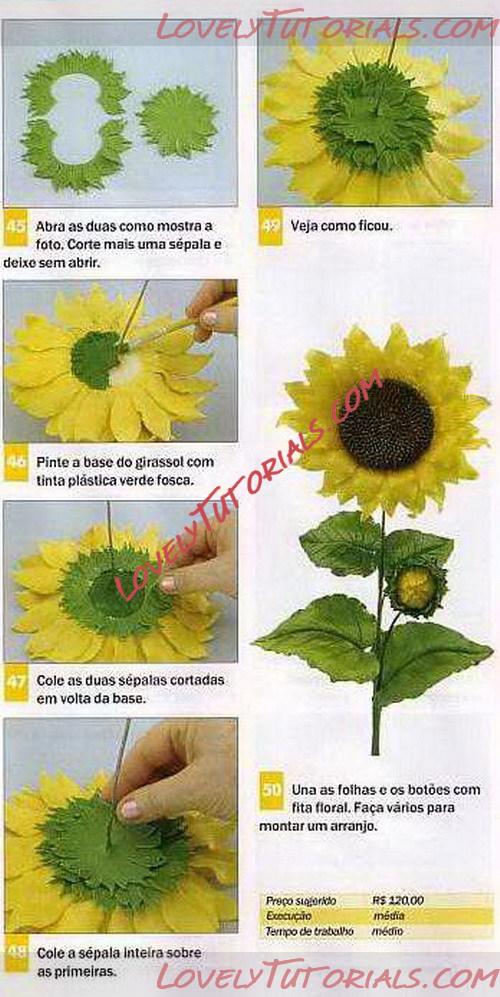
Огромная благодарность Автору-Anna Modugno за МК

Название: 10.jpg
Просмотров: 1

Размер: 145.6 Кб

Название: 11.jpg
Просмотров: 7

Размер: 252.3 Кб

Название: 12.jpg
Просмотров: 1

Размер: 242.3 Кб

Название: 13.jpg
Просмотров: 4

Размер: 252.3 Кб

Название: 14.jpg
Просмотров: 2

Размер: 148.1 Кб
Старый 27.08.2013, 22:11
Arianchik Arianchik вне форума
Местный
Регистрация: 14.08.2013
Сообщений: 1,101
По умолчанию
Огромная благодарность Автору SadiesCakes за Мастер-класс
Название: 1.jpg
Просмотров: 0

Размер: 54.5 Кб
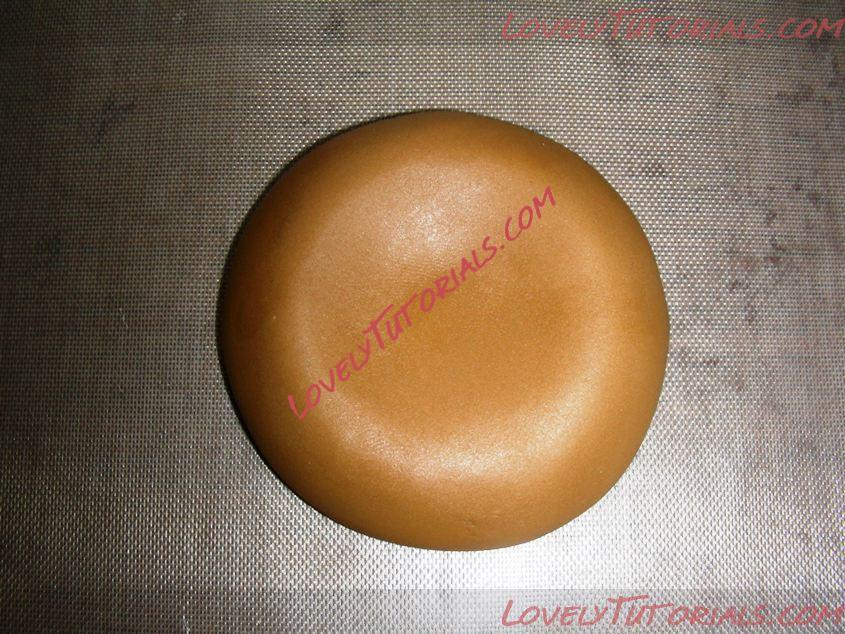
I’ve never done a tutorial before, so please bare with me and if anything isn’t clear, I’d be happy to answer questions about any of the steps. I chose to do a tutorial on my sunflower because I’ve had the most requests asking how to make them. Next will be my lion or elephant figurine, but my favorite thing to make are flowers.
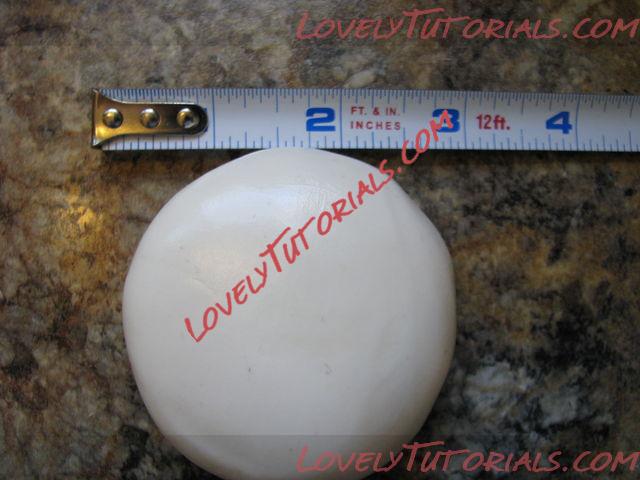
#1 Begin with a slightly flattened ball of gumpaste or fondant/gumpaste mix.
Название: 2.jpg
Просмотров: 2

Размер: 43.3 Кб
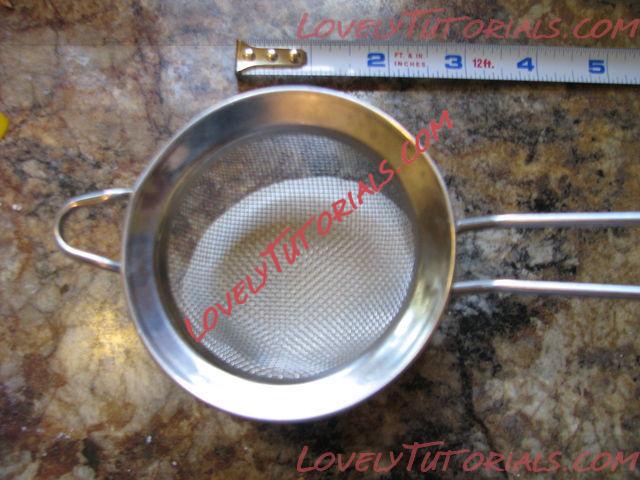
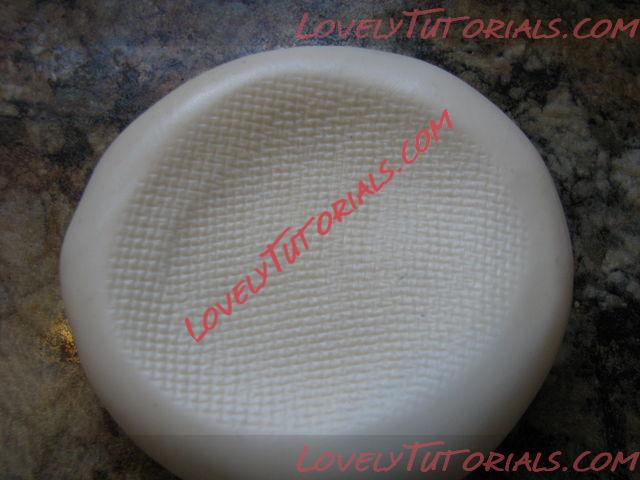
#2 Use a small strainer and press down to make an impression on the flattened round.
Название: 3.jpg
Просмотров: 2

Размер: 59.3 Кб
Название: 4.jpg
Просмотров: 2

Размер: 39.8 Кб
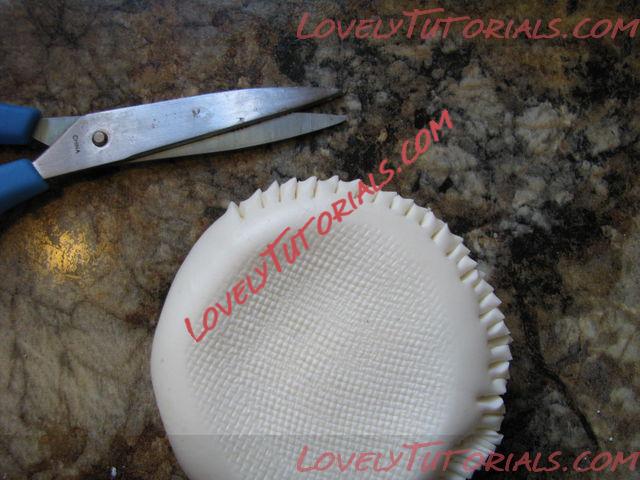
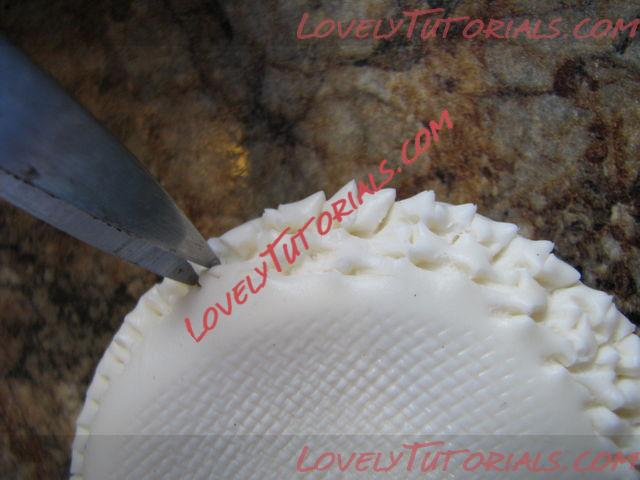
#3 Use scissors with a pointed tip to make little snips all around the edge of the flattened round. (I have two little girls so we have a lot of “safety” scissors, but you’ll need to use the ones that are not rounded on the end)
Название: 5.jpg
Просмотров: 2

Размер: 55.9 Кб
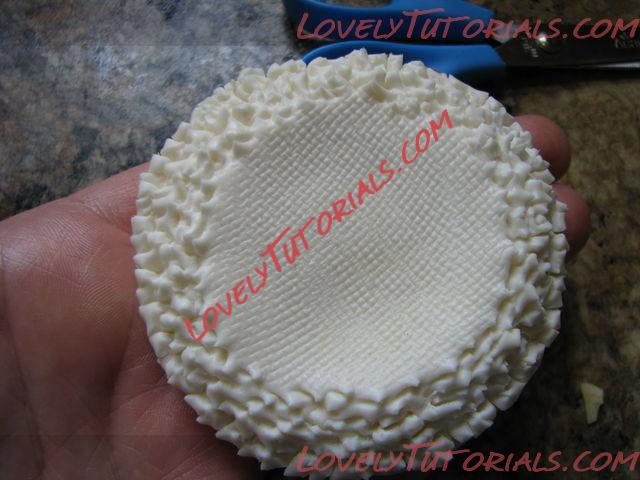
#4 After going around the outside, continue inward leaving a bit of space in the center where the impression of the strainer is.
Название: 6.jpg
Просмотров: 2

Размер: 40.4 Кб
Название: 7.jpg
Просмотров: 0

Размер: 49.8 Кб
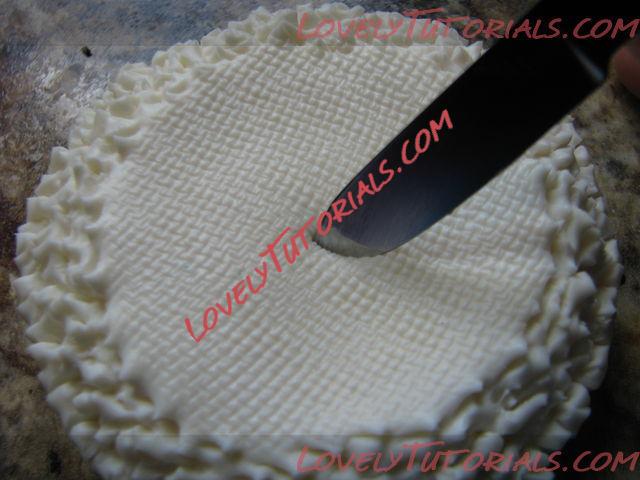
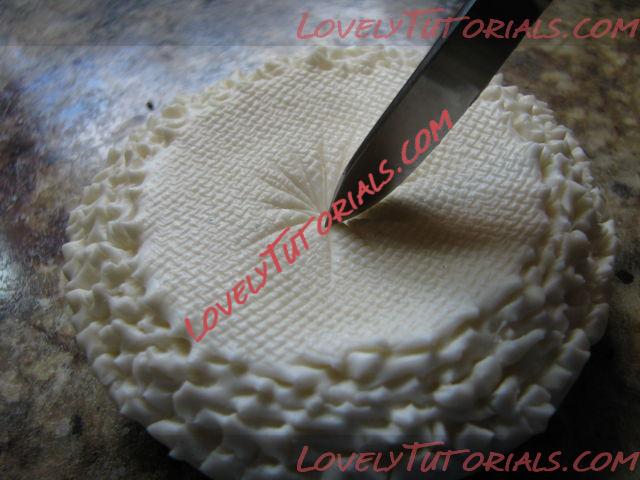
#5 Use a sharp knife to make a star-like design in the center.
Название: 8.jpg
Просмотров: 0

Размер: 46.6 Кб
Название: 9.jpg
Просмотров: 0

Размер: 48.6 Кб
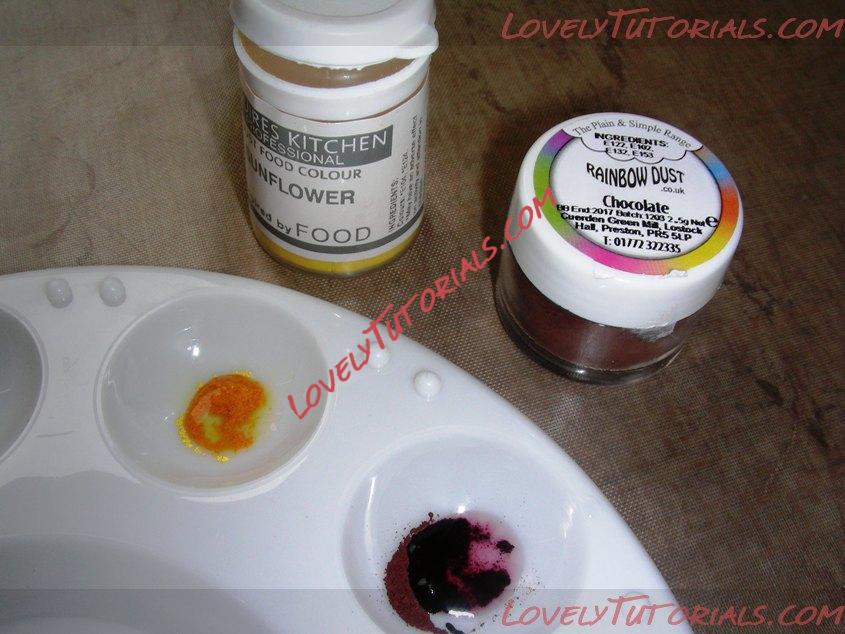
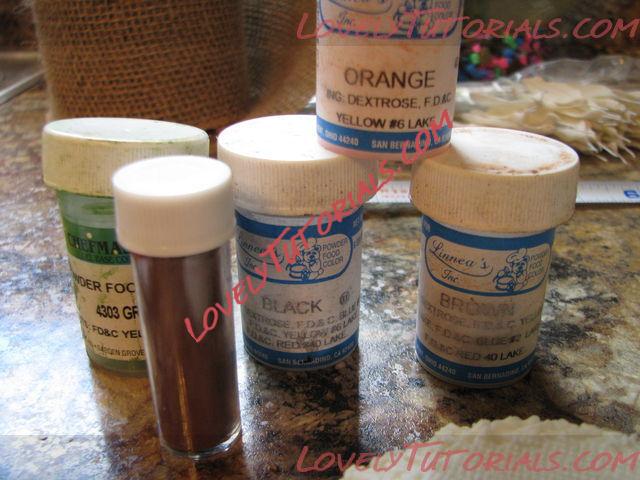
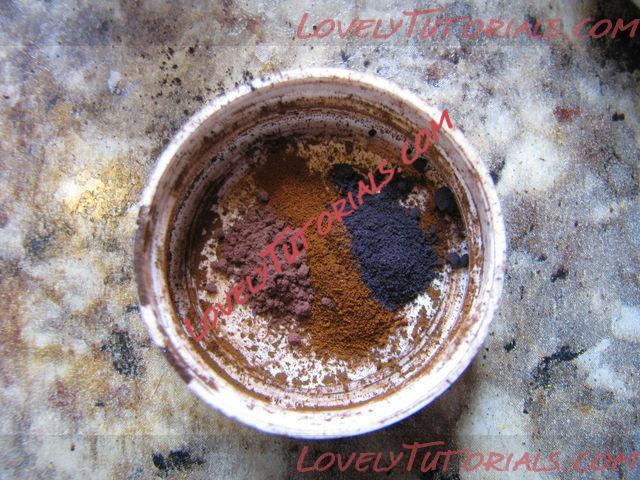
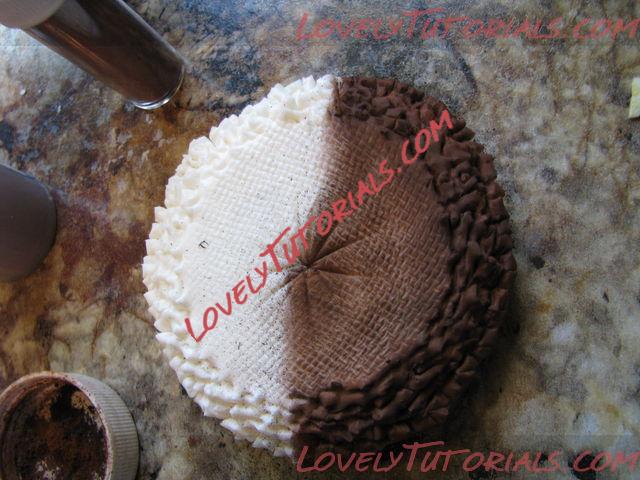
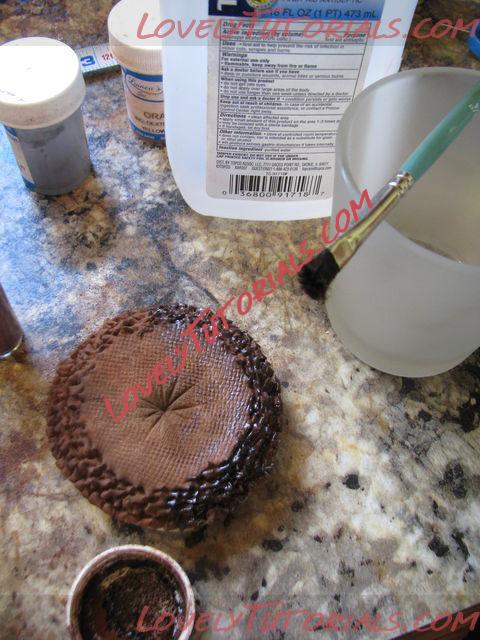
#6 Next you’ll be adding color to the center. I use these powder colors that I picked up from a chocolate factory in Lititz, PA. They are exactly like the Wilton color dust, only you get 5X as much for a fraction of the cost. The skinny vile in this picture is the Wilton brown, the others are from Lititz. Then just begin by choosing the blacks/browns and tans that you want to use for the center and brush them in an outward motion from the center.
Название: 10.jpg
Просмотров: 0

Размер: 61.0 Кб
Название: 11.jpg
Просмотров: 3

Размер: 92.1 Кб
Название: 12.jpg
Просмотров: 2

Размер: 65.4 Кб
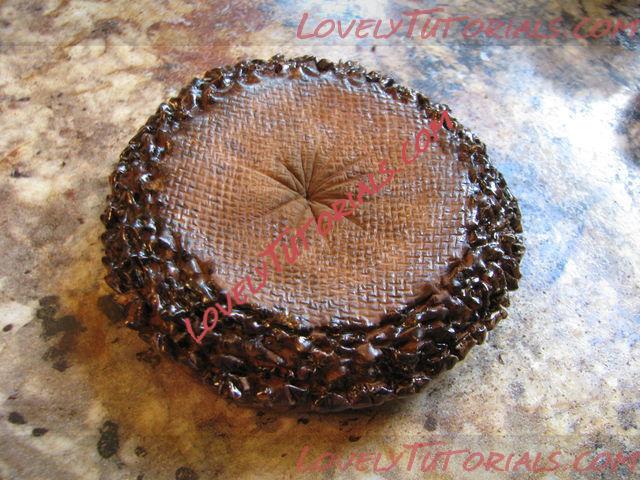
#7 The last step of the Sunflower center is to add a bit of moisture to the powder color and just dab over the dry paint you’ve already brushed on. You can use your liquid of choice, some folks use vodka or alcohol. Anything that dries off quickly would work. After this step, you can let your center set to dry a bit, but don’t allow it to dry out completely because you’ll need it to be a bit soft so you can insert your petals. I cover mine with a bowl until my petals are ready to insert.
Название: 13.jpg
Просмотров: 2

Размер: 67.9 Кб
Название: 14.jpg
Просмотров: 1

Размер: 85.9 Кб
Petals
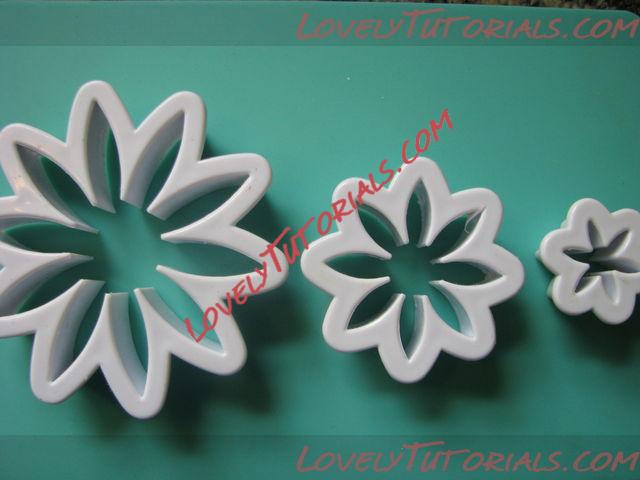
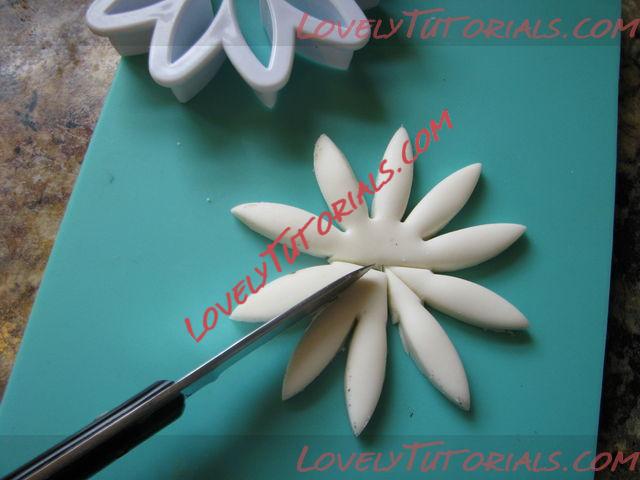
#1 To begin, I use the largest of the Wilton daisy cutter set (around $3.99 from most craft stores)
Название: 15.jpg
Просмотров: 0

Размер: 31.6 Кб
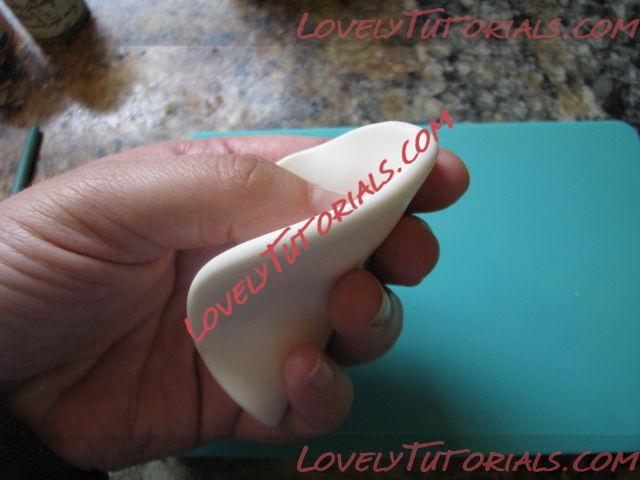
#2 Roll gumpaste somewhat thickly, since you’ll be flattening it out.
Название: 16.jpg
Просмотров: 0

Размер: 32.4 Кб
#3 Cut out the flower shape, then using a sharp knife, separate each petal. Cover and set aside the petals that you are not working on so they don’t dry out.
Название: 17.jpg
Просмотров: 1

Размер: 35.0 Кб
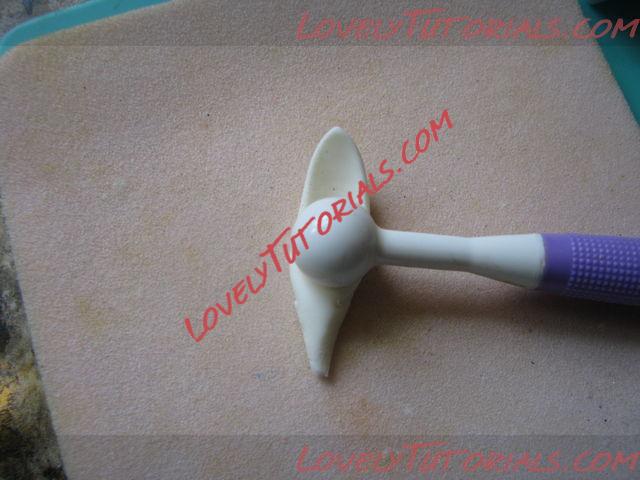
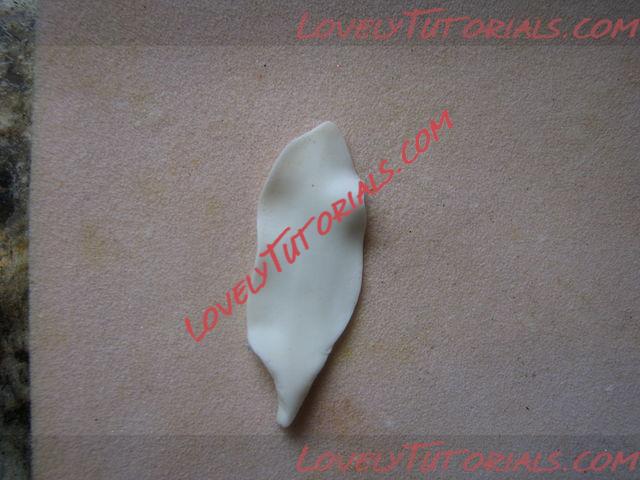
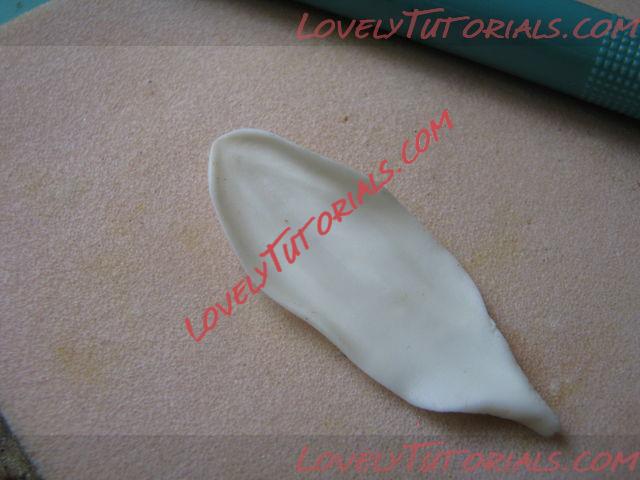
#4 Using a ball rolling tool, roll down the center, then soften the edges.
Название: 18.jpg
Просмотров: 1

Размер: 41.7 Кб
Название: 19.jpg
Просмотров: 1

Размер: 44.3 Кб
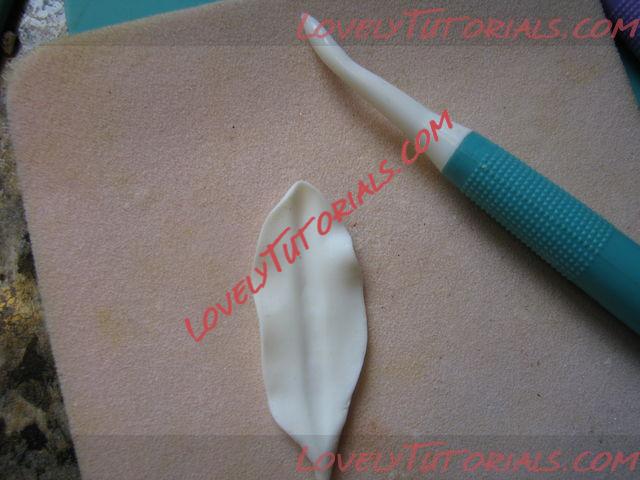
#5 Use any veining tool you’d like to create some creases in your petal. I usually run one vein down the center, then starting at the tip of the petal, I press down and near the edges to create a unique look for each petal.
Название: 20.jpg
Просмотров: 0

Размер: 43.3 Кб
Название: 21.jpg
Просмотров: 0

Размер: 38.4 Кб
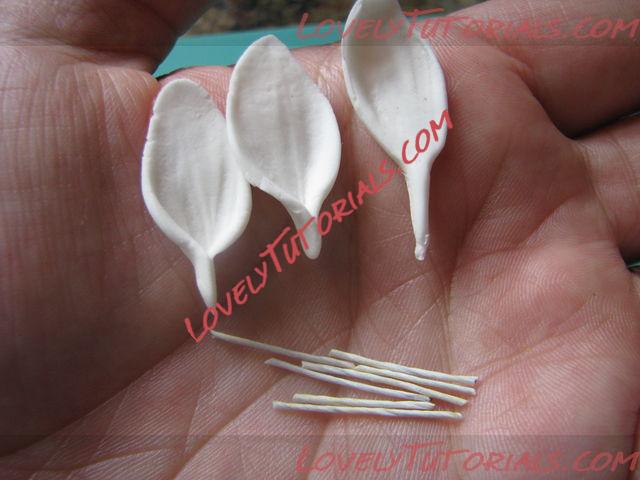
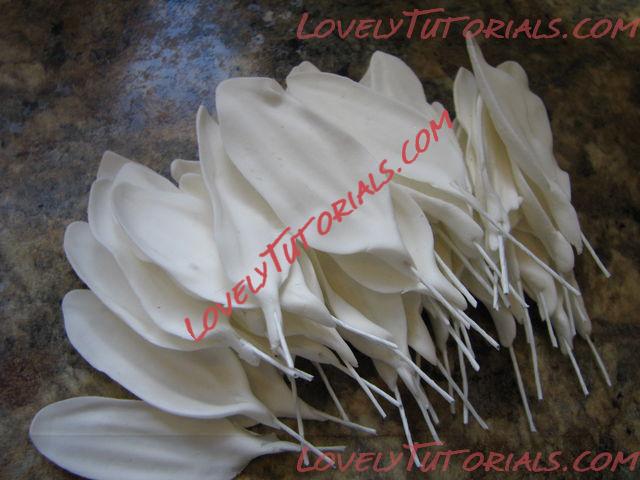
#6 Now you may choose to either pull at the base of your petals to lengthen them and create a point to stick into the center of the flower, or cut small pieces of floral wire and insert them into the base of the petal. It’s your preference, but if your gumpaste dries extremely hard, then wires may not be necessary.
Название: 22.jpg
Просмотров: 0

Размер: 40.3 Кб
Название: 23.jpg
Просмотров: 1

Размер: 47.2 Кб
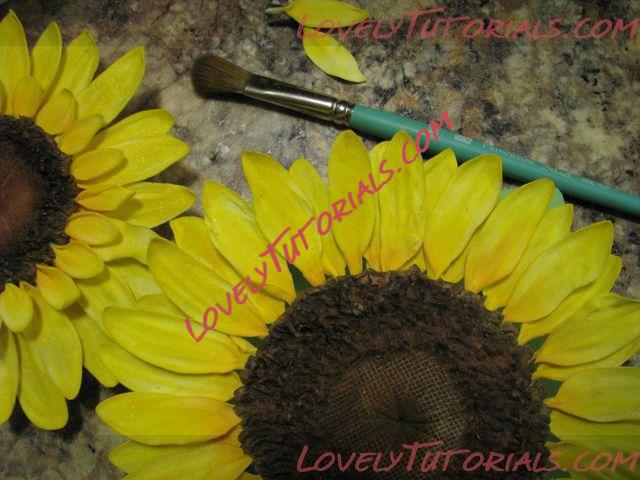
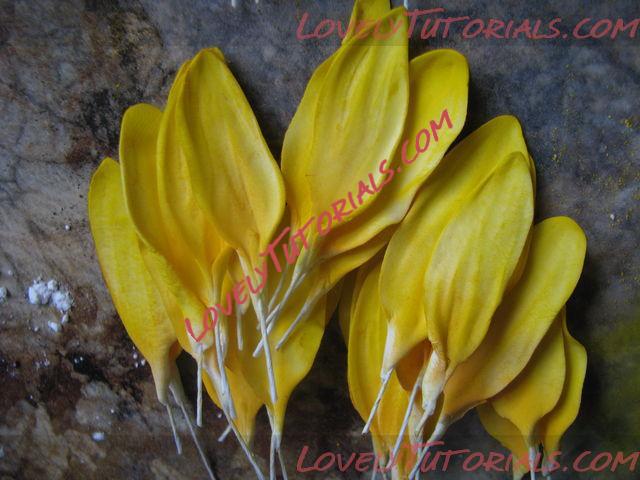
#7 After the petals have dried overnight (or until you feel they’re dry enough), you can go on to the painting. I use the powder color I spoke of before in just a lemony yellow and a bit of orange at the base of the petal. I think the orange adds interest and depth to the flower. Just brush the powder on from base to tip.
Название: 24.jpg
Просмотров: 2

Размер: 56.5 Кб
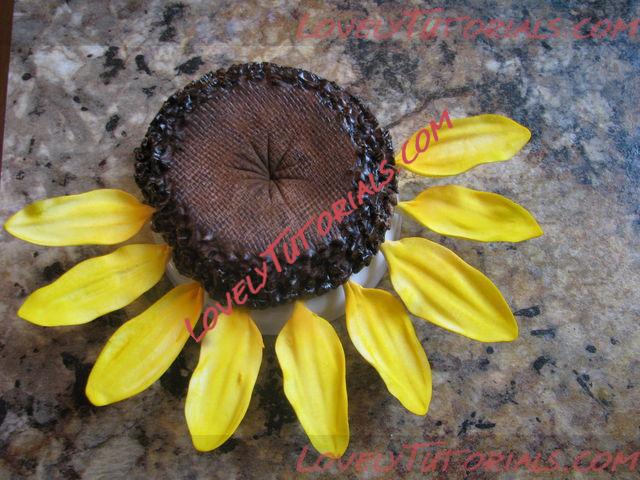
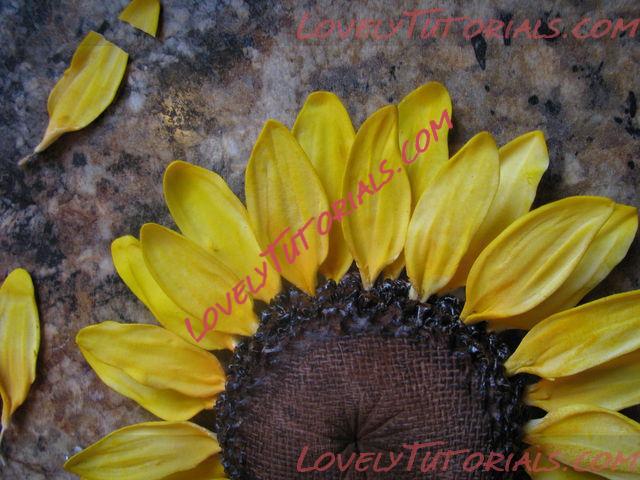
#8 Now for the fun part! Start by insert a single layer of petals around the edge of your sunflower center. (I separate all my petals out by similar size before this step, so they look kind of uniform… since all of my petals usually end up being different shapes and sizes.
Название: 25.jpg
Просмотров: 1

Размер: 73.8 Кб
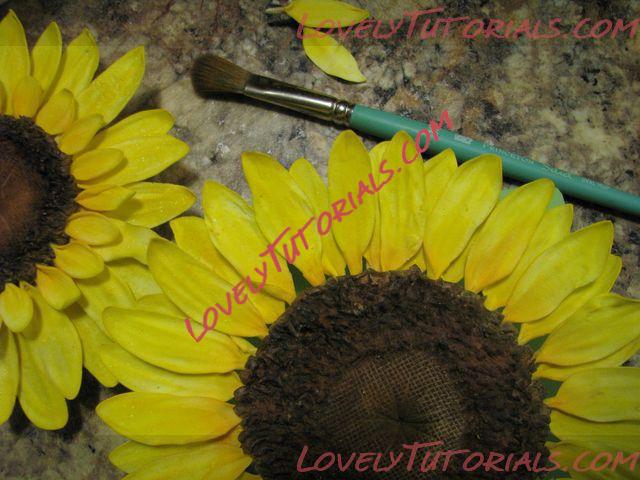
#9 Lastly, go back around the center of the flower inserting another layer of petals. I’ve done three layers before, but sometimes two is enough.
Название: 26.jpg
Просмотров: 1

Размер: 66.3 Кб
Название: 27.jpg
Просмотров: 1

Размер: 54.5 Кб
I realized after taking all of these pictures, that some of you may be wondering if the flower has a stem. This one didn’t and I’m sorry if you were hoping for instructions on doing that. I usually don’t put stems on my sunflowers because I’ve never had to have them stick out from the cake. I’ve always been able to attach them with royal icing or a skewer.
Старый 31.03.2014, 18:06
Arianchik Arianchik вне форума
Местный
Регистрация: 14.08.2013
Сообщений: 1,101
По умолчанию
Огромная благодарность Автору ofenkieker за Мастер-класс
Название: 1.jpg
Просмотров: 1

Размер: 297.4 Кб

Название: 2.jpg
Просмотров: 0

Размер: 137.8 Кб

Название: 3.jpg
Просмотров: 0

Размер: 102.6 Кб

Название: 4.jpg
Просмотров: 0

Размер: 78.5 Кб

Название: 5.jpg
Просмотров: 0

Размер: 128.6 Кб


Material

Blütenpaste in gelb und hellbraun
Puderfarben in warmen Gelb- und Brauntönen (z.B. Sunflower, Daffodil, Marrigold & Copper, Aubergine, Chocolate)
mittelfeine gelbe Blütenpollen
klarer Alkohol (z.B. Vodka)
Glanzspray aus Lebensmittellack

Werkzeug

Ausstecher für Lilien (d.h. spitz-oval z.B. Nr. 24 JEM-Set 2)
Modellierwerkzeug, insb. Ball-Tool, Messer und Veining-Tool
Pinzette
Tulpen-Veiner z.B. von Squires Kitchen
Sieb oder besser passende Mould für Blütenmitten
Foam-Pad
Noppen-Schaum, Alufolie, Küchenpapier o.ä.
Ausrollstab, glatte Unterlage, Frischhaltefolie, Palmin, Zuckerkleber

Anleitung

Zunächst bereiten wir die Blütenmitte vor, da diese mindestens eine Woche trocknen sollte. Dazu wird zunächst ein flacher runder Taler aus brauner Blütenpaste geformt. Die Kanten schön abrunden und in die Mitte eine Mulde drücken. Achtung! Die Größe der Mitte sollte natürlich zu dem Ausstecher für die Blütenblätter und zur Torte passen

Taler mit Mulde formen

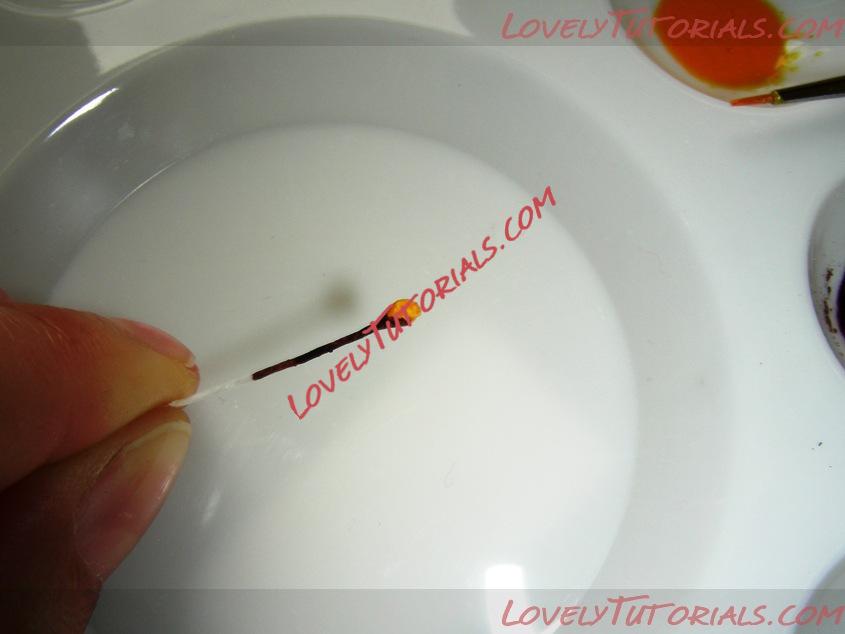
Die Blütenpollen werden in der Mitte geteilt, so dass die Pollen einzeln sind. Dann wird etwas dunkelbraune Puderfarbe in Alkohol gelöst. Damit wird bei allen Blütenpollen der weiße Draht gefärbt. Bei einem Teil der Pollen wird außerdem das Köpfchen ebenfalls braun gefärbt (weil ich nur weiße Pollen hatte, habe ich die restlichen Köpfchen gelb bemalt). Am besten bereitet man sich einige Pollen vor und färbt dann nach Bedarf nach. Die Pollen gut trocknen lassen.

Farbe für Blütenpollen Blütenpollen bemalen

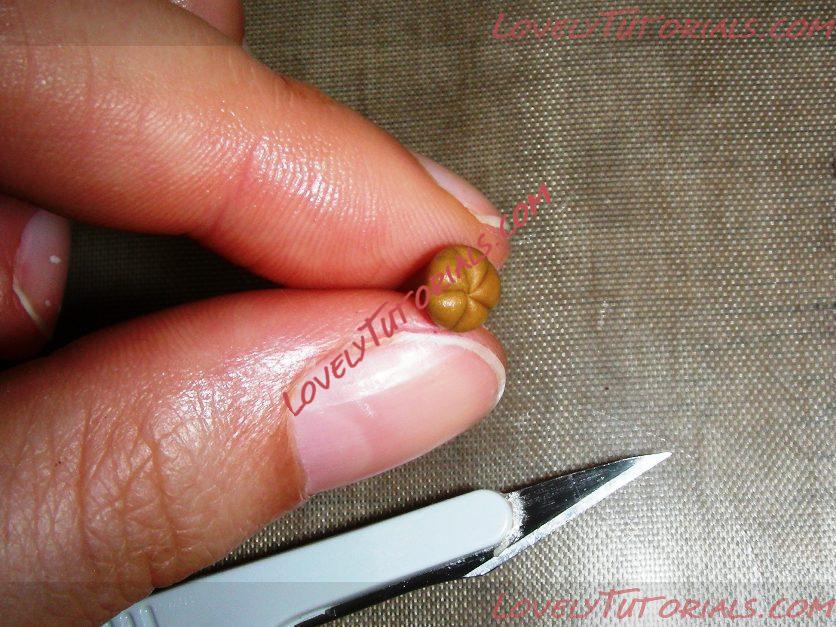
Nun formen wir die äußeren kleinen braunen Blüten. Dafür wird ein kleine Menge braune Blütenpaste zu einer Kugel gerollt. Diese wird oben 5x eingeschnitten. Mit dem abgerundeten Veining-Tool wird nun aus jedem 5tel ein Blütenblatt geformt. Das muss nicht sonderlich sorgfältig gemacht werden, schließlich braucht man so einige dieser Blüten. Die Blüten sollten so klein wie irgend möglich gearbeitet werden. Die Blüten schließlich eng nebeneinander an den Rand der Blütenmitte kleben. In jede Blüte eine braun gefärbte Blütenpolle stecken (dadurch hält die Blüte auch gut am Platz).

Kügelchen 5x einschneiden Blütenblätter formen Blüten ankleben

Je nach Größe 1-2 Reihen arbeiten.

weitere Blüten ankleben erste Reiehe fertig

Die nächsten Reihen werden gelb werden. Dazu kleine Kugeln formen, diese platt drücken und gekräuselt als kleine flache Blüten auf die Blütenmitte kleben. In jede Blüte eine gelbe Blütenpolle stecken. Auf diese Weise je nach Größe 2-3 Reihen arbeiten. Der äußere Wulst der Blütenmitte sollte nun bedeckt sein.

Kügelchen flach drücken gelbe Blüten ankleben zweite gelbe Reihe

Für das Innerste der Blütenmitte wird eine relativ dicke Scheibe braune Blütenpaste in ein Sieb gedrückt. Das Sieb vorher leicht fetten. Wahrscheinlich müsst ihr diesen Schritt ein paar Mal üben, aber es funktioniert tatsächlich! Der Trick ist, die Blütenpaste dick genug zu belassen und nur leicht ins Sieb zu drücken. Alternativ kann man natürlich auch eine passende Mould benutzen.

Blütenpaste durch das Sieb drücken

Das Innerste dann passend zuschneiden und auf die Blütenmitte kleben – vorsichtig, sonst geht das Muster wieder kaputt. Die Blütenmitte dann mindestens eine Woche trocknen lassen.

Innerstes aufkleben

Ist die Oberfläche der Blütenmitte angetrocknet, kann man die Blütenmitte färben. Dazu die äußeren braunen Blüten mit verschiedenen Brauntönen abpudern. Dabei wird auch braune Puderfarbe auf die gelben Blüten kommen, das ist aber sogar gewollt. Mit gelber Puderfarbe die gelben Blüten abpudern. Mit hellen Brauntönen die Kontraste verwischen. Auch das Innerste mit Brauntönen abpudern.

Puderfarben braun abpudern gelb abpudern und Kontraste verwischen

Für die äußeren gelben Blütenblätter wird gelbe Blütenpaste dünn ausgerollt. Mit einem passenden Ausstecher werden nun die Blätter ausgestochen. Die Ränder mit dem Ball-Tool ausdünnen. Anschließend werden die Blütenblätter im Tulpen-Veiner geprägt.

Blütenblätter ausstechen ausdünnen prägen mit dem Tulpen-Veiner

Die Blütenblätter leicht gewellt auf Noppenschaum oder geknüllte Alufolie legen und etwas antrocknen lassen.

gewellt trocknen lassen

Nun ordnet man die Blütenblätter an der Basis leicht überlappend kreisförmig an. Am besten zeichnet man sich vorher einen Kreis in der Größe der Blütenmitte auf und probiert auch mal aus, ob die Blütenmitte zur Blüte passt. Zum Testen einfach die Blütenmitte mit Frischhaltefolie auf die Blütenblätter legen. So klebt nichts zu früh fest.

Blütenblätter zum Kreis anordnen Größe testen

Jeweils zwischen zwei Blütenblätter ein zweites Blütenblatt legen, so dass eine zweite Lage entsteht. Mit Küchenpapier die Blütenblätter stützen, so dass Bewegung in der Blüte bleibt. Schließlich wird die Blütenmitte vorsichtig mit etwas Zuckerkleber in die Mitte geklebt. Die Blüte so mindestens 2-3 Tage trocknen lassen.

zweite Lage Mitte aufkleben

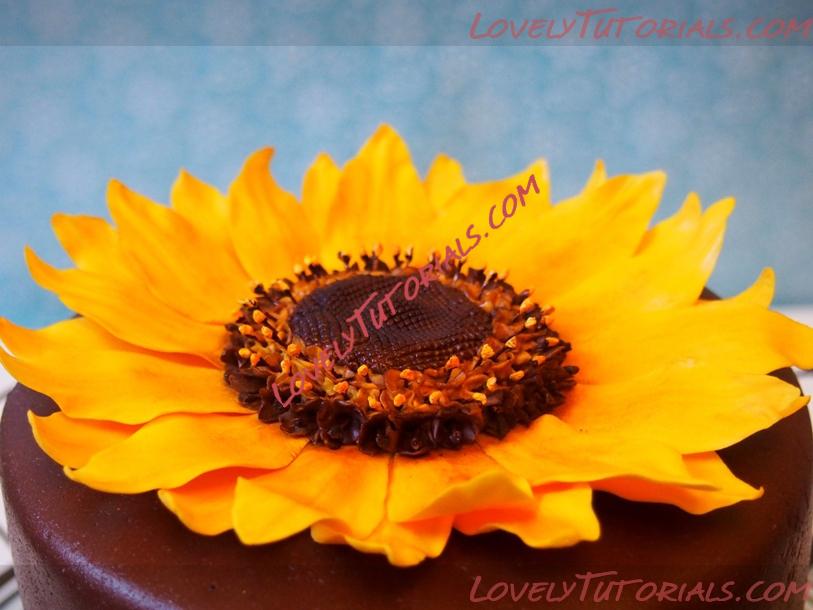
Mit warmen Gelbtönen die gelben Blütenblätter abpudern. Mit brauner Puderfarbe etwas Tiefe erzeugen, in dem der Rand zur Blütenmitte etwas dunkler getönt wird. Schließlich wird die Farbe mit dünn aufgesprühtem Glanzspray fixiert.
Старый 31.03.2014, 18:07
Arianchik Arianchik вне форума
Местный
Регистрация: 14.08.2013
Сообщений: 1,101
По умолчанию
Название: 6.jpg
Просмотров: 2

Размер: 93.3 Кб

Название: 7.jpg
Просмотров: 0

Размер: 144.2 Кб

Название: 8.jpg
Просмотров: 7

Размер: 115.5 Кб

Название: 9.jpg
Просмотров: 11

Размер: 139.1 Кб

Название: 10.jpg
Просмотров: 0

Размер: 113.4 Кб
Старый 31.03.2014, 18:07
Arianchik Arianchik вне форума
Местный
Регистрация: 14.08.2013
Сообщений: 1,101
По умолчанию
Название: 11.jpg
Просмотров: 13

Размер: 124.6 Кб

Название: 12.jpg
Просмотров: 0

Размер: 135.1 Кб

Название: 13.jpg
Просмотров: 0

Размер: 163.2 Кб

Название: 14.jpg
Просмотров: 26

Размер: 136.2 Кб

Название: 15.jpg
Просмотров: 2

Размер: 89.6 Кб
Старый 31.03.2014, 18:08
Arianchik Arianchik вне форума
Местный
Регистрация: 14.08.2013
Сообщений: 1,101
По умолчанию
Название: 16.jpg
Просмотров: 1

Размер: 102.8 Кб

Название: 17.jpg
Просмотров: 1

Размер: 101.3 Кб

Название: 18.jpg
Просмотров: 6

Размер: 97.4 Кб

Название: 19.jpg
Просмотров: 5

Размер: 89.9 Кб

Название: 20.jpg
Просмотров: 0

Размер: 110.9 Кб
Старый 31.03.2014, 18:08
Arianchik Arianchik вне форума
Местный
Регистрация: 14.08.2013
Сообщений: 1,101
По умолчанию
Название: 21.jpg
Просмотров: 1

Размер: 138.0 Кб

Название: 22.jpg
Просмотров: 21

Размер: 106.8 Кб

Название: 23.jpg
Просмотров: 14

Размер: 117.6 Кб

Название: 24.jpg
Просмотров: 1

Размер: 108.4 Кб

Название: 25.jpg
Просмотров: 0

Размер: 111.7 Кб

Название: 26.jpg
Просмотров: 2

Размер: 116.5 Кб

Название: 27.jpg
Просмотров: 2

Размер: 108.8 Кб

Название: 28.jpg
Просмотров: 8

Размер: 98.1 Кб
anlegget, anläggning, armado de los ramos, arranjo, artesanatos passo a passo, augalas, auringonkukat, ayçiçeği, baking, biljka, bitki, blad, blade, blader, bladeren, blatt, bloem, bloemen, blomma, blommor, blomst, blomster, blume, blumen, blüten, blütenpaste, blätter, boeket, bouquet, buchet, buket, bukett, bukiet, buquê, cake decorating, cake decorating techniques, cerâmica plástica, chiodi di garofano, clavo de olor, clous de girofle, cloves, cold porcelain, cold porcelain figurines, cold porcelain flowers, confeitando bolos, csokor, cukrinių gėlių, curso completo de flores, curso de modelado, cvijet, cvijeće, decoracion de pasteles, decoración de tortas, decorare le torte, decorazioni, deko fondant, dekorace na dort, dekoracija, dekoracije, dekorasyon, dekorácie, el abc del armado de ramos, feuille, feuilles, fimo, fimo flowers, fiore, fiori, fleurs, floare, floarea-soarelui, flogistica, flor, floral inspirations, flores, flores azucar, flores e folhas, flori, floristics, floristik, floristikk, floristique, florística, flower, flower paste, flowering plants, flowers, flowers on a wire, foglia, foglie, folha, folhas, folhas pintadas, fondan, fondant, fondente, fotopostup, frunze, girasoles, girasoli, girassóis, gum pasta, gum paste, gum paste flowers, gumpaste, gumpaste flowers class, gėlė, gėlės, hand painting, handmade, handmodelliert, hideg porcelán, hladno porculan, hoja, hojas, how to, how to make sunflower, how tцветы на проволоке, how-to's, hřebíček, impianto, jak na, kage dekoration, kagedekoration, kakebaking, kaldt porselen, kallt porslin, kalt porzellan, kasvi, kolde porcelæn, koud porselein, krok za krokem, kukka, kukkakimppu, kukkia, kvetina, kvety, květina, květiny, kwiat, kwiaty, kylmä posliini, kytica, la modélisation, lapai, lapas, leaf, leaves, lehdet, lehti, levelek, levél, list, listí, lišće, liście, liść, lístia, lístky na drátku, making sugar flowers, marshmallow, masa flexible, mazzo, modelado, modelagem, modelare, modeling, modeling paste, modeliranje, modellazione, modelleme, modellering, modellieren, modellierpaste, modelləşdirmə, modelovanie, modelování, modelowanie, montando, motivtorten, napraforgós, nelken, návody a postupy, návody na květy a lístky, növény, oasis o esponja de floristeria, pap, paso a paso, passo a passo, passo-a-passo, pasta flexible, pflanze, plant, planta, plante, plantes, plantă, pocelana fria, polymer clay, polymer clay flowers tutorial, porcelaine froide, porcelana fria, porcelana fría, porcellana fredda, postup klinček, postupak za ukrasavanje, puokštė, ramo, rastlina, rece porţelan, rododendron, rostlina, roślina, saulėgrąžomis, schritt für schritt anleitung, schritt-für-schritt, sculpey flowers, sculpting, simple, slnečnica, slunečnice, solrosor, solsikker, sonnenblumen, soğuk porselen, stamens, steg for steg, step by step, step-by-step, strauß, studený porcelán, styrofoam, sugar cane flowers, sugar cloves, sugar flower, sugar flowers, sugar flowers for cake decorating, sugar paste flowers, sugarcraft, sugarpaste, sukker art, suncokreti, sunflowers, słoneczniki, technique utilisée fleurs en sucre cru, tecnicas de decoracion, tecniche, thai flowers, torte, torte decorate, torten dekorieren, torti, tournesols, trin for trin, trin-for-trin, trinn for trinn, tutorial, tutorijal, ukrašavanje torti, uputstvo za dekoraciju, virág, virágok, wedding cake, wedding cakes, wire, yaprak, yapraklar, zimno porcelany, zonnebloemen, zuckerblumen, ดอกไม้, सजा केक, मॉडलिंग, モデル, çiçek, çiçek modelleme, šalto porceliano, 建模, 裝飾蛋糕, 진달?, κρύα πορσελάνη, μπουκέτο, αζαλέα, ηλιοτρόπια, λουλούδι, λουλούδια, τα φύλλα, φύλλα, φυτό, кветка, кветкі, квіти, квітка, керамическая флористика, куст, гвоздика, подсолнух на проволоке, подсолнухи, полимерная глина, полевые цветы, пошагово, природа, мк, моделиране, майстер-класи, маршмеллоу, мастика, мастер-класс, мастер-класс по лепке, азалия, азалія, букет, завод, листа, листья, листя, лепим цветы, лепка, лепка из глины, лепка из пластики, лепка цветов, ліплення, лісце, рослина, растение, растения, украшение тортов, украшение торта, соняшники, свадебный торт, сахарная мастика, сахарный клей, сланечнікі, слънчогледи, уроки прикрашання, студен порцелан, торт, фимо, флористика, флора, холодного порцеляни, холодного фарфора, холодный фарфор, халоднага фарфору, цветок, цветочная паста, цвете, цветя, цветы, цветы из полимерной глины, цветы из холодного фарфора, цветы на торт, цветы ручной работы, шаг за шагом


©2022 Lovely Tutorials
Content Relevant URLs by vBSEO