Cake Decorating Tutorials  (How To's) Tortas Paso a Paso
Cake Decorating Tutorials (How To's) Tortas Paso a Paso
Вернуться   Cake Decorating Tutorials (How To's) Tortas Paso a Paso > Cake Decorating Tutorials > Sport Cake Tutorials
Перезагрузить страницу как сделать торт мяч ровным и гладким -Icing a Ball Cake Tutorial
Старый 01.05.2012, 07:41
Ariana Ariana вне форума
Администратор
Регистрация: 07.09.2010
Сообщений: 7,940
По умолчанию как сделать торт мяч ровным и гладким -Icing a Ball Cake Tutorial
Огромная благодарность Tea Party Cakes за Мастер-класс

Supplies you will need:

- 2L pop bottle
- serrated knife
- scissors
- small angled spatula
- buttercream
- ball cake
Название: Ball Cake Tutorial.jpg
Просмотров: 5

Размер: 39.1 Кб
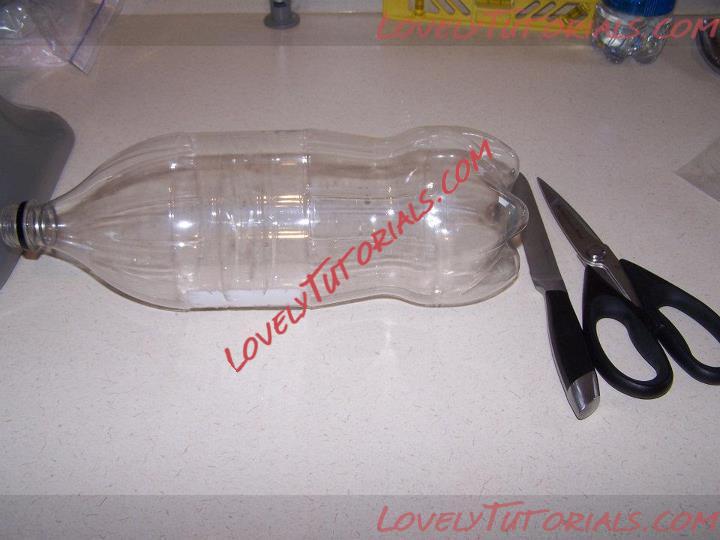
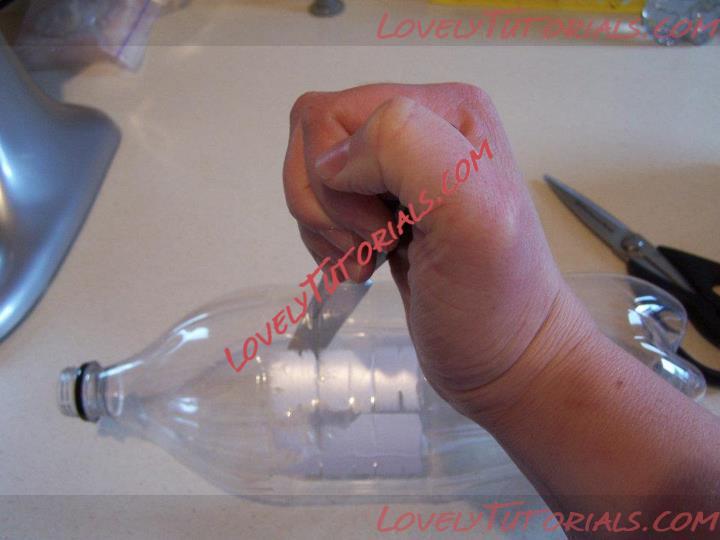
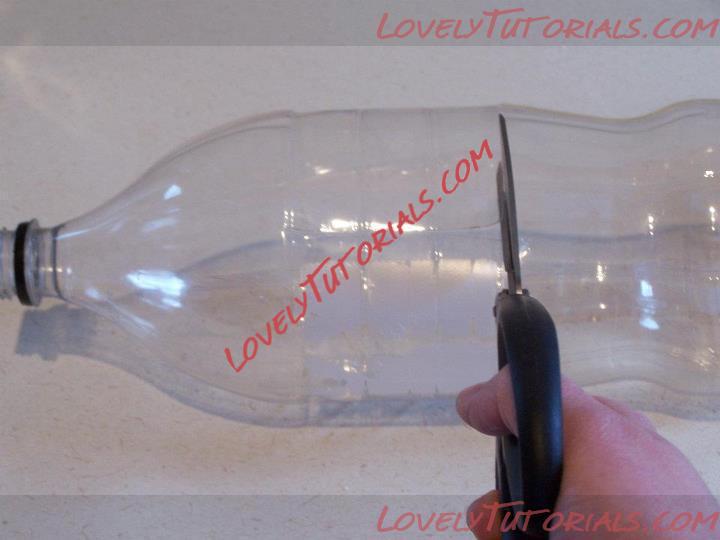
Use a serrated knife with a sharp point to start your cut in the 2L pop bottle.
Название: Ball Cake Tutorial 2.jpg
Просмотров: 5

Размер: 32.0 Кб
Then use scissors to finish cutting out approximately a 4 inch piece from the smooth middle portion of the pop bottle.
Название: Ball Cake Tutorial 3.jpg
Просмотров: 8

Размер: 27.5 Кб
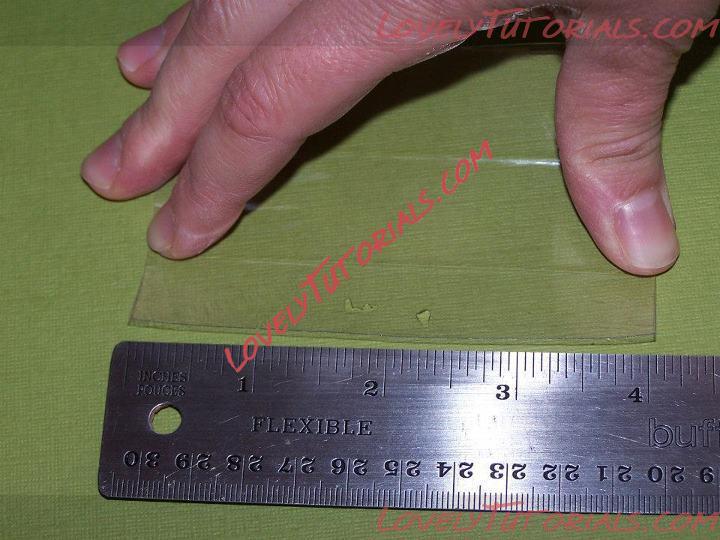
Make sure to trim the edges with your scissors so that they are perfectly smooth.
Название: Ball Cake Tutorial 4.jpg
Просмотров: 7

Размер: 59.0 Кб
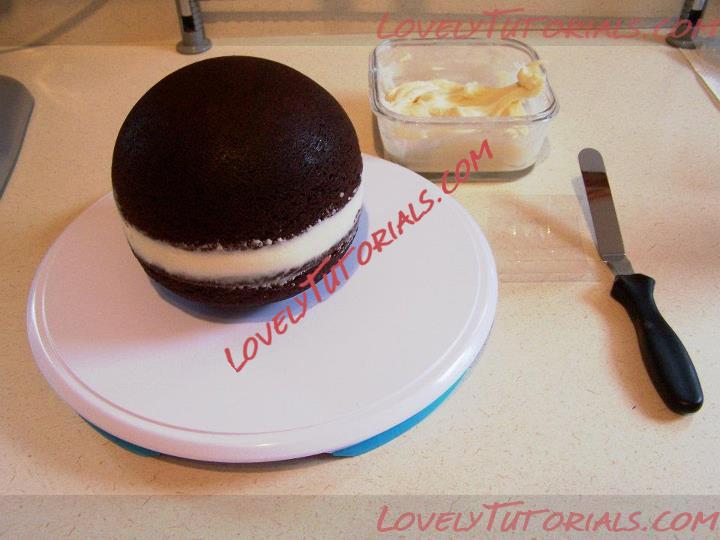
Once you have washed and dried the pop bottle piece you can ice your ball cake.
Название: Ball Cake Tutorial 5.jpg
Просмотров: 5

Размер: 40.9 Кб
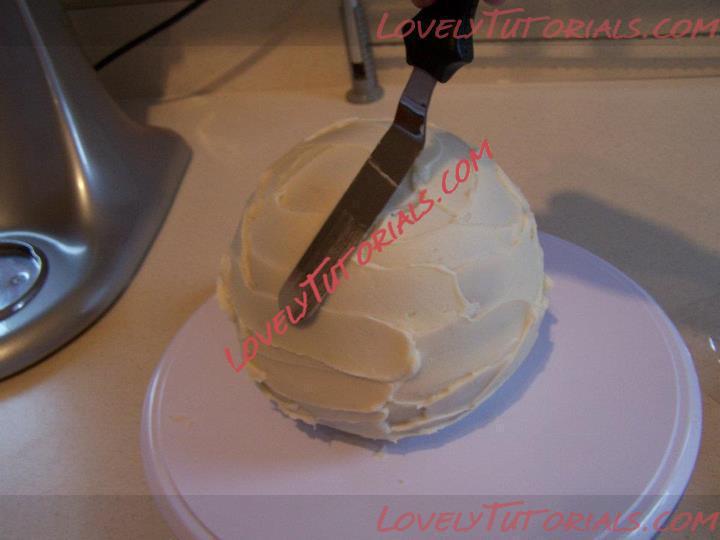
Using the small angled spatula ice the ball cake. Smooth as best is possible before moving on to the next step.
Название: Ball Cake Tutorial 6.jpg
Просмотров: 5

Размер: 28.8 Кб
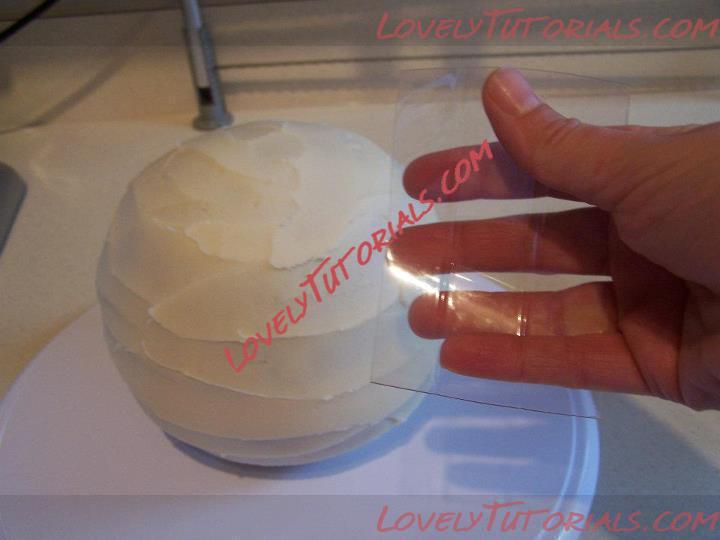
Next use the piece of pop bottle. Hold the plastic with your three middle fingers on the back and your thumb and pinkie finger on the front. You want to flex the plastic so that it is a bit straighter.
Название: Ball Cake Tutorial 7.jpg
Просмотров: 3

Размер: 27.6 Кб
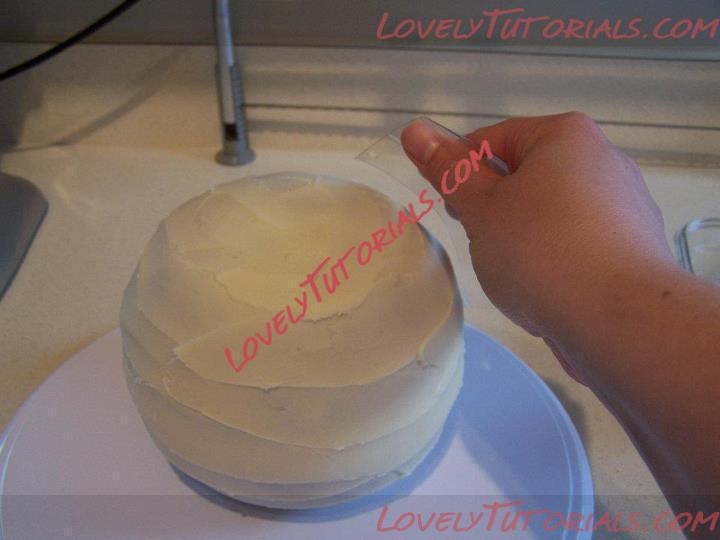
Now gently scrape off the excess buttercream. Remember to keep the plastic slightly flexed so that it doesn't curl too much and muck up your buttercream.
Название: Ball Cake Tutorial 8.jpg
Просмотров: 2

Размер: 27.0 Кб
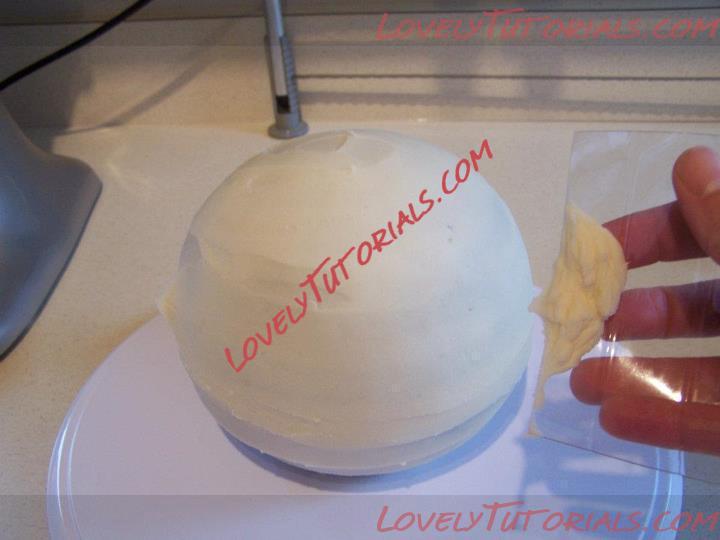
See how it smooths the buttercream!
Название: Ball Cake Tutorial 9.jpg
Просмотров: 3

Размер: 28.4 Кб
Keep smoothing until you are satisfied with the results.
Название: Ball Cake Tutorial 10.jpg
Просмотров: 1

Размер: 23.1 Кб
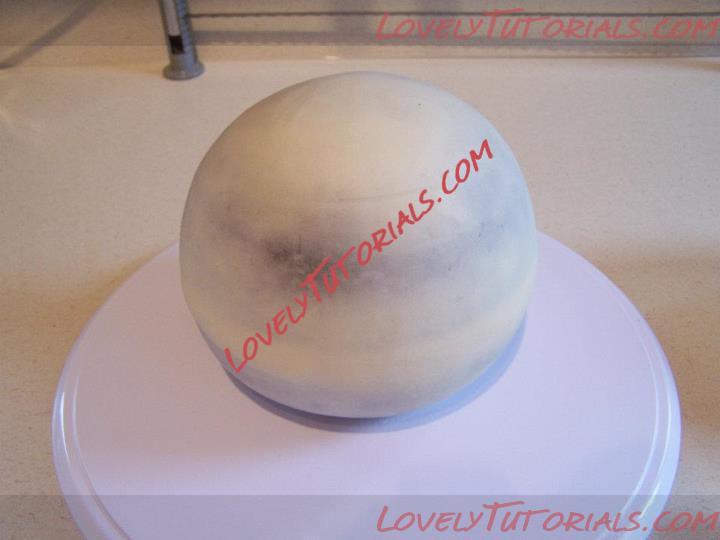
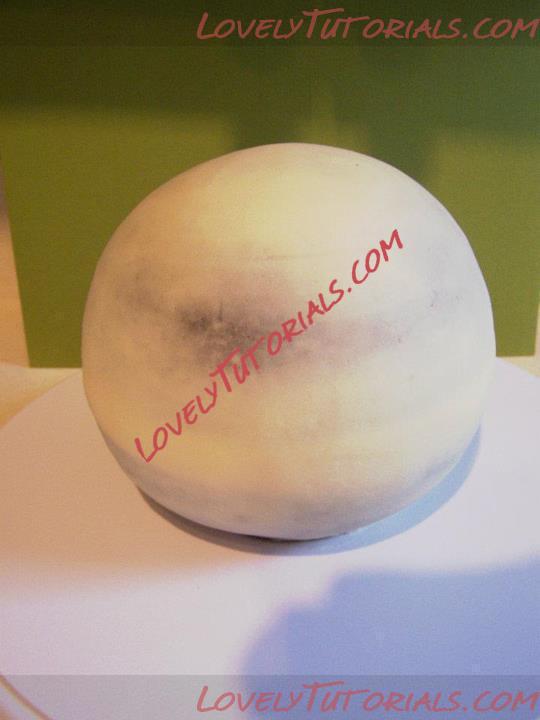
Here is a picture of the smoothed cake against a coloured background so that you can see how smooth the cake is. Refrigerate the cake until firm. Then you can either cover the cake in fondant or put a second coat of buttercream on and resmooth.
Название: Ball Cake Tutorial 11.jpg
Просмотров: 2

Размер: 23.5 Кб
Старый 11.10.2012, 08:27
Ariana Ariana вне форума
Администратор
Регистрация: 07.09.2010
Сообщений: 7,940
По умолчанию
Огромная благодарность Автору rosebakes за Мастер-класс
Название: 1.jpg
Просмотров: 0

Размер: 51.8 Кб

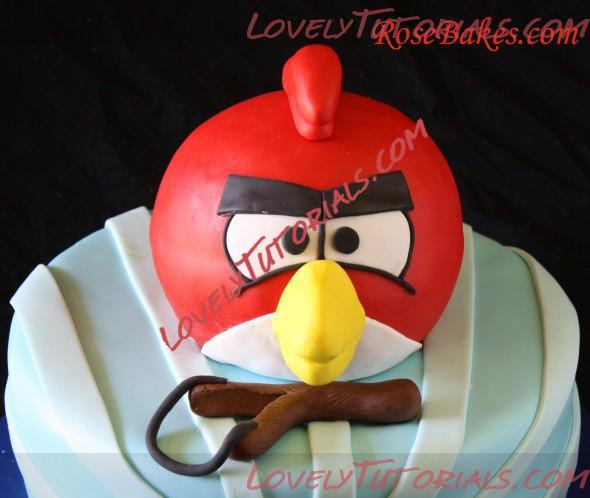
But in the end, if I wait around for perfection, I’ll never get anything posted, so here goes!! I hope somebody can learn something from this…
Название: 2.jpg
Просмотров: 0

Размер: 58.9 Кб
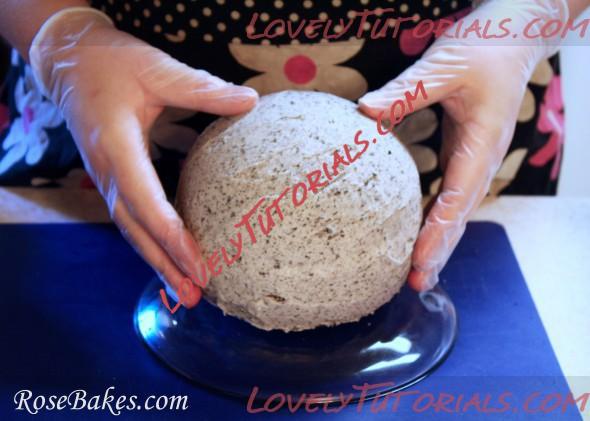
For this cake, I baked a chocolate cake in the Wilton Sports Ball pan. I filled it with Oreo Cream Filling, covered it in a thick crumb coat, and then I chilled it for about 30 minutes in the frig – so it was good and cold.
When I got it out of the frig, I set it on an upside down saucer so I’d have a little more work room with my fingers (you can see that later on), then I smoothed on a fresh thin coat of buttercream so the fondant would stick.
Название: 3.jpg
Просмотров: 0

Размер: 39.3 Кб
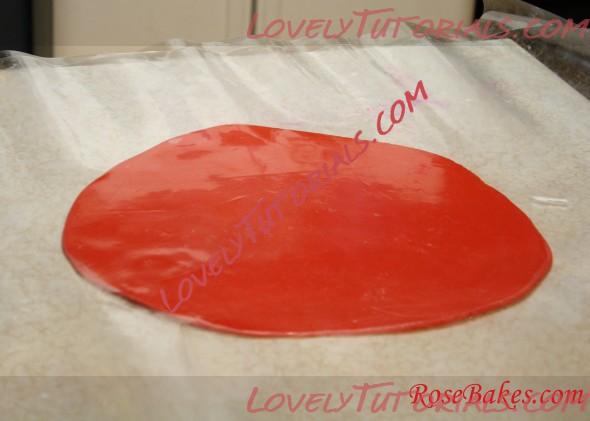
While it was in the frig, I rolled out my Satin Ice Red Vanilla fondant on The Mat. If you don’t use The Mat, roll out your fondant however you normally do and have it ready to cover the ball when it comes out of the frig (I’ve used marshmallow fondant too and covered rice cereal shapes).
Название: 4.jpg
Просмотров: 0

Размер: 52.0 Кб
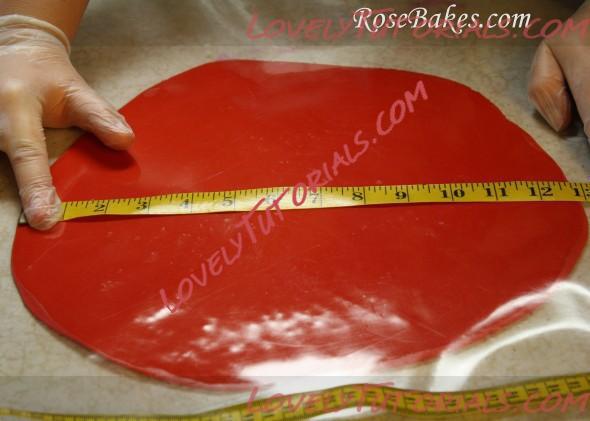
For this 6″ ball, I rolled mine to about 13″ round and that was plenty!
Название: 5.jpg
Просмотров: 1

Размер: 35.9 Кб
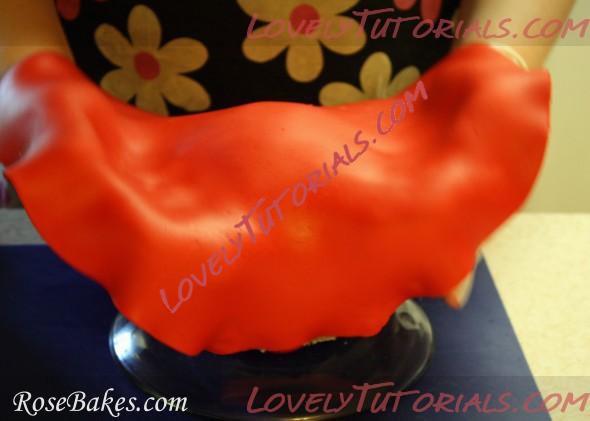
Then just pick up the fondant and lay it over the ball – centering it as best you can!
Название: 6.jpg
Просмотров: 0

Размер: 38.9 Кб
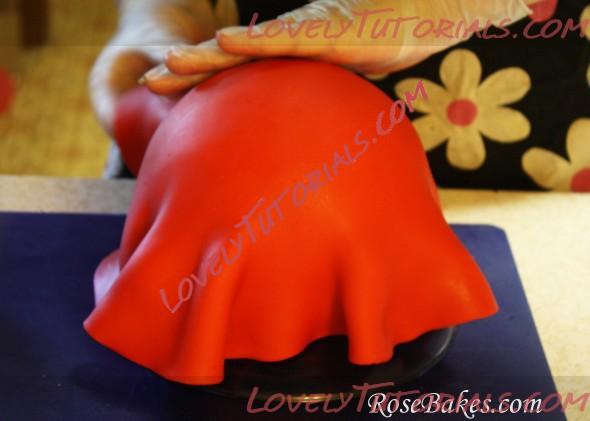
Just lay it over and let it droop down, then smooth it as far as you can without causing wrinkles… it should stick to the fresh buttercream and I can usually work about two-thirds of the way down the ball.
Название: 7.jpg
Просмотров: 1

Размер: 43.1 Кб
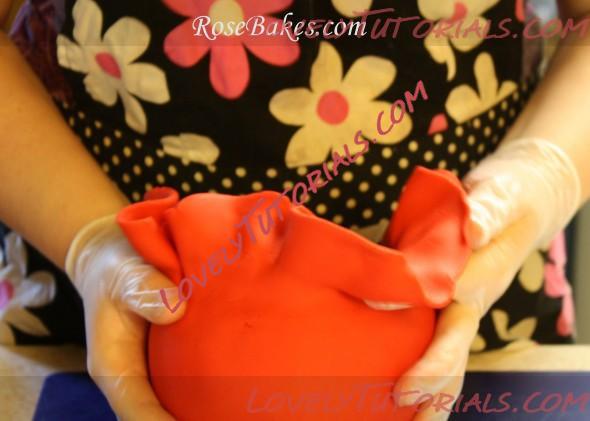
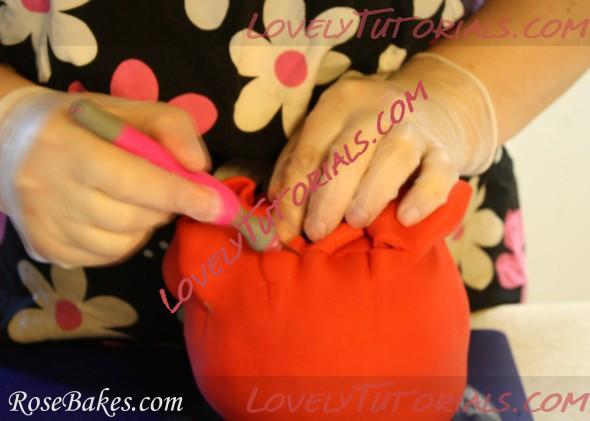
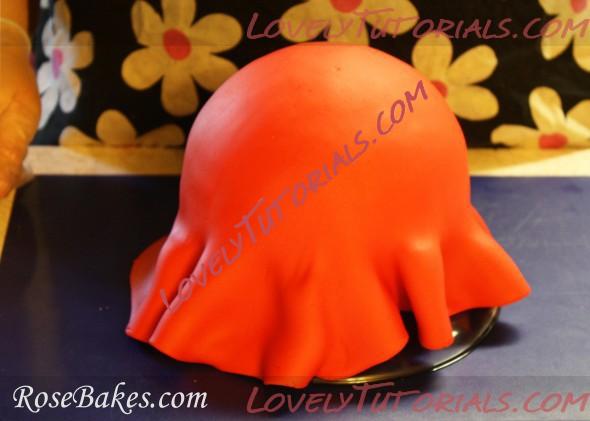
When it gets to this point, you’ll have to start stretching the fondant, smoothing it down a bit, stretch, smooth, turn, stretch, smooth turn. I am sorry these pics are so bad!
Название: 8.jpg
Просмотров: 1

Размер: 44.4 Кб
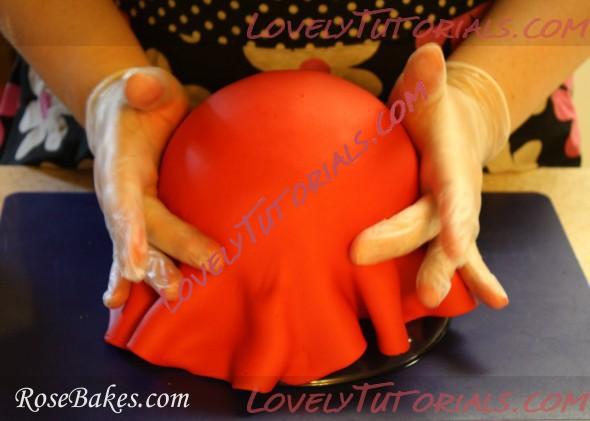
I need to do a video for you to really see this, but I generally get it as near to the bottom as possible, then use my fingers to work around the bottom of the cake, as near to the plate as possible
Название: 9.jpg
Просмотров: 2

Размер: 45.6 Кб
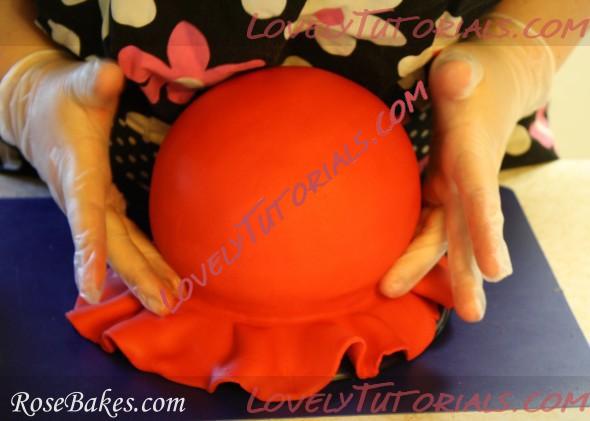
Then… here’s the fun part, and another reason the cake needs to be cold… I pick up the cake…
Название: 10.jpg
Просмотров: 0

Размер: 44.0 Кб
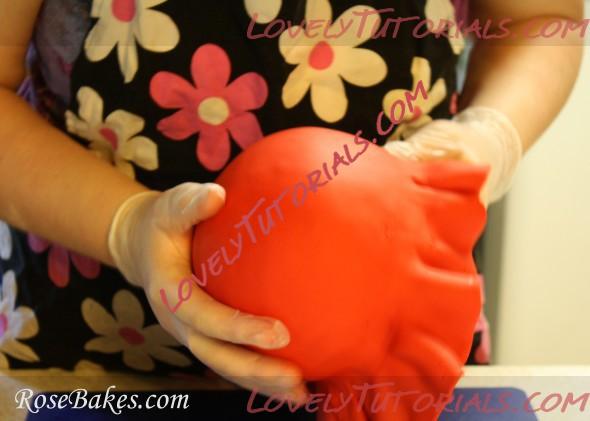
and flip it upside down!
Название: 11.jpg
Просмотров: 1

Размер: 49.6 Кб
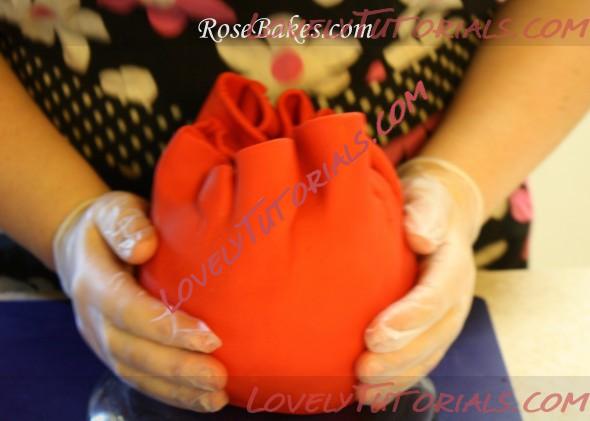
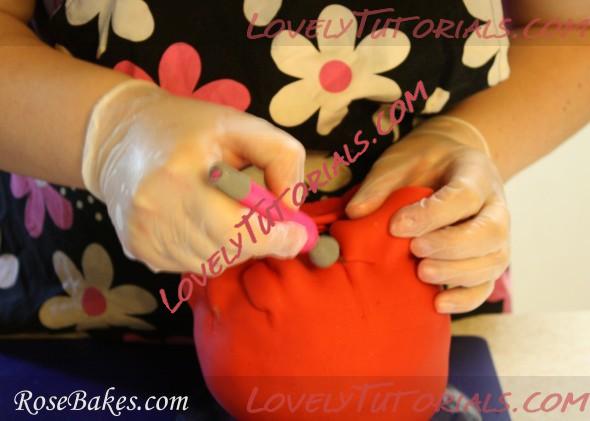
Then I start smoothing the fondant toward the middle of the bottom of the ball. I don’t try to cover it all – I’ve never been able to do that, but I try to get it far enough under the edges that it won’t show when the ball is sitting on the board or another cake tier.
Название: 12.jpg
Просмотров: 0

Размер: 42.2 Кб
When I get it smoothed, then I cut away the excess with an Xacto knife.
Название: 13.jpg
Просмотров: 2

Размер: 45.2 Кб
Название: 14.jpg
Просмотров: 0

Размер: 42.9 Кб
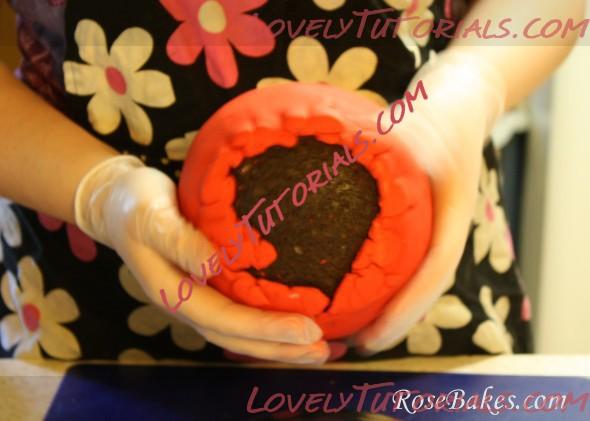
When that’s all done, the cake is peeking out of the bottom (and usually I get it a little tighter than this, but it was not my best day). Bad pictures. Not my best work. Why, again, did I choose to share this?
Название: 15.jpg
Просмотров: 1

Размер: 48.3 Кб
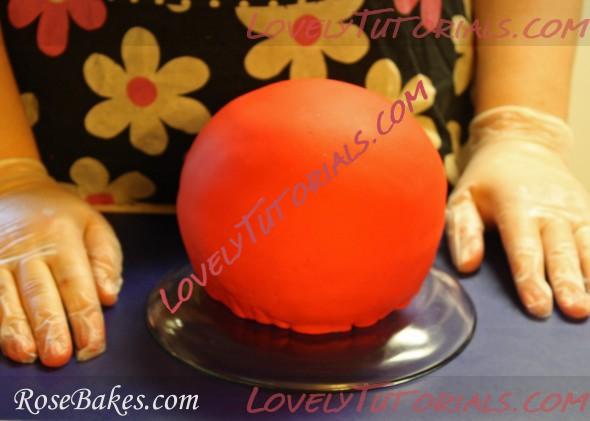
Then it’s done! Assume it’s much prettier, with less wrinkles, less blur, better light… you get the (better) picture, right?? I sure hope so!!
Название: 16.jpg
Просмотров: 1

Размер: 45.1 Кб
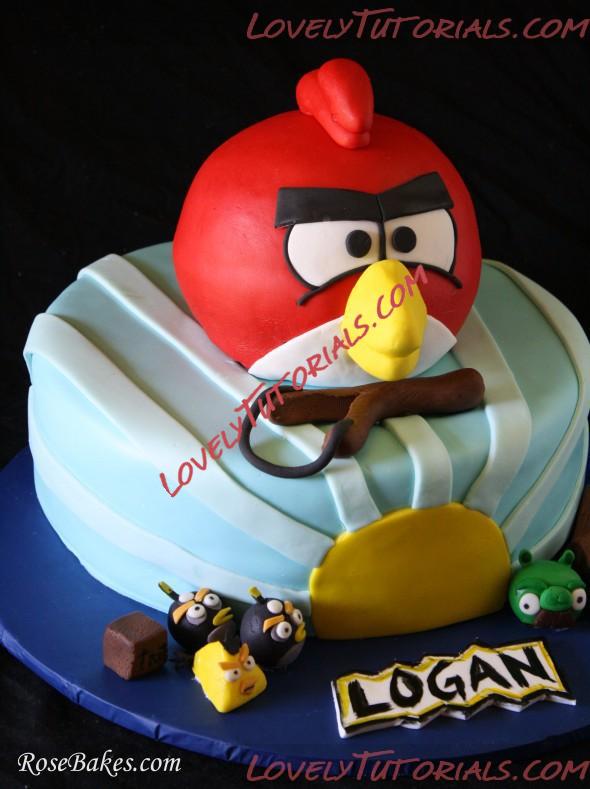
And that’s it. I let this rest for a few hours before decorating so the fondant will harden a bit and be less likely to tear when adding decorations (especially for this cake – adding the beak and feathers).
Название: 17.jpg
Просмотров: 3

Размер: 83.3 Кб
3d bizcocho, 3d bolo, 3d cake, 3d dort, 3d kage, 3d kager, 3d kake, 3d kek, 3d pastel, 3d tarta, 3d torta, 3d torte, 3d torti, 3d torty, 3d κέικ, addım-addım təlimat, adım, adım adım yönergeler, artesanatos passo a passo, ball cake, ball торта, bemutató, bola pastel, bolando bolos, bolo bola, cake decorating, cake decorating techniques, confeitando bolos, decoracion de pasteles, decoración de tortas, decorada en fondant, decorare le torte, decorazioni, deko fondant, dekorace na dort, dekoracija, dekoracije, dekorasyon, dekorácie, eier-kuchen, fender, fimo, flower paste, fondan, fondant, fondente, fondente di zucchero, fotopostup, foundant, gebak, glazuur, gum pasta, gum paste, gumpaste, gâteau boule, hand-made, handmade, how to, how-to's, icing a ball cake tutorial, instrucţiuni, instrukcijas, instrukcje, jak na, kage dekoration, kagedekoration, kakebaking, kamuolys pyragas, korak, korak za korakom navodila, korak-po-korak upute, koristeet ja koristelu, krok, krok po kroku, krok za krokem, krok-za-krokem, las instrucciones, las técnicas, le tecniche, les techniques, lopta torta, lopta tortu, lukie, marshmallow, masa flexible, master-class, master-klasse, master-klasy, meistras klasės, metodikas, mistr třídy, modeling paste, modelling past, motivtorten, míč dort, návod, opplæringen, palla cake, pamoka, pap, pas, pas-cu-pas, paso, paso a paso, passo, passo a passo, passo-a-passo, passo-passo le istruzioni, pasta de miel, placek piłka, postup na 3d torty, postupak za ukrasavanje, pâtisserie, schmelzend, schritt für schritt anleitung, schritt-für-schritt, schritt-für-schritt-anleitungen, stap, stap-voor-stap, stap-voor-stap instructies, steg for steg, steg-för-steg, steg-för-steg-instruktion, step, step by step, step-by-lépésre, step-by-step, step-by-step instructions, sugarcraft, sugarpaste, suikerglazuur, technieken, techniken, techniki, techniky, technikák, techniques, tecnicas de decoracion, tecniche, tehnici, tehnike, teknikker, teknikler, tips och trix, top kek, tort minge, torte, torte decorate, torten dekorieren, torti, trin, trin for trin, trin-for-trin, trin-for-trin instruktioner, trinn, trinn for trinn, trinn-for-trinn-instruksjoner, tutorial, tutoriale, tutorias, tutorias/ideas para decorar los bizcochos, tutoriel, tutorijal, tårtbottnen, tårtor, técnicas, ukrašavanje torti, uputstvo za dekoraciju, zuckermasse, सजा केक, ट्यूटोरियल मास्टर वर्ग, कदम, कदम दर कदम निर्देश, तकनीक, étape, étape par étape les instructions, öğretici, žingsnis, žingsnis po žingsnio, 宗師級教程,一步,一步一步的指示 �技術,udžbenik, 裝飾蛋糕, κέικ μπάλα, βήμα, βήμα προς βήμα οδηγίες, οδηγίες βήμα βήμα, παντεσπάνι art, τεχνικές, φροντιστήριο, инструкция, как сделать, как сделать торт мяч ровным и гладким, крок за кроком, крок за крокам, покроково, пошагово, пошаговые фотки, пакрокава, м'яч торт, миниатюра, мк, майстор-класа урок, майстар-клас, майстер-клас, майстер-класи, маршмеллоу, мастика, мастер-класс, мяч торт, зд торт, зд торта, ручной работы, ручная работа, украшение тортов, сахарная мастика, уроки прикрашання, стъпка, стъпка по стъпка инструкции, техники, техника, техніка, туториал, туторіал, тэхніка, шаг за шагом, інструкцыя, інструкція


©2022 Lovely Tutorials
Content Relevant URLs by vBSEO