Cake Decorating Tutorials  (How To's) Tortas Paso a Paso
Cake Decorating Tutorials (How To's) Tortas Paso a Paso
Вернуться   Cake Decorating Tutorials (How To's) Tortas Paso a Paso > Figure making tutorials > Flowers Trees Tutorials
Перезагрузить страницу МК лепка "Калла" --Gum paste (fondant, polymer clay)Calla Lily Flower making tutorial
Старый 22.05.2012, 12:42
Ariana Ariana вне форума
Администратор
Регистрация: 07.09.2010
Сообщений: 7,940
По умолчанию
Название: 709157f75ceefe51b38319188bb7f814.jpg
Просмотров: 12

Размер: 247.6 Кб
Старый 19.07.2012, 15:14
Ariana Ariana вне форума
Администратор
Регистрация: 07.09.2010
Сообщений: 7,940
По умолчанию
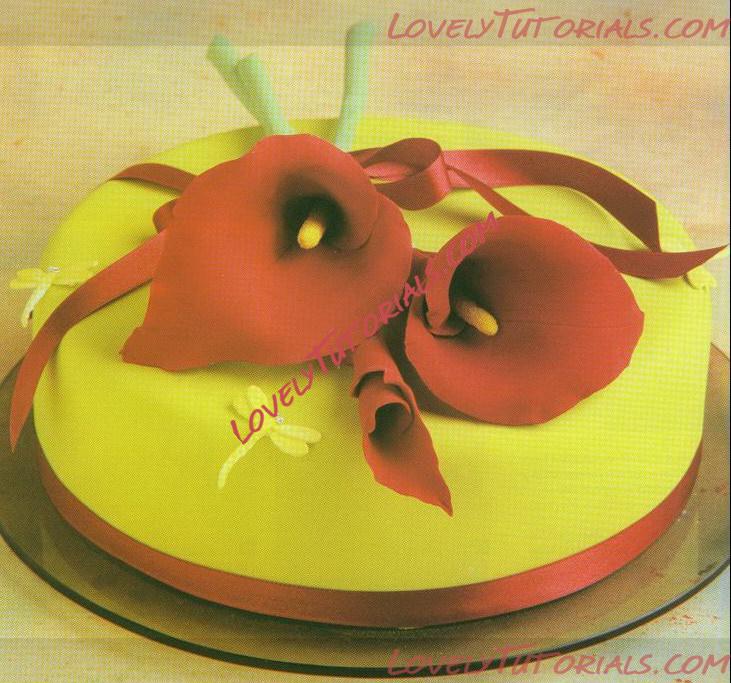
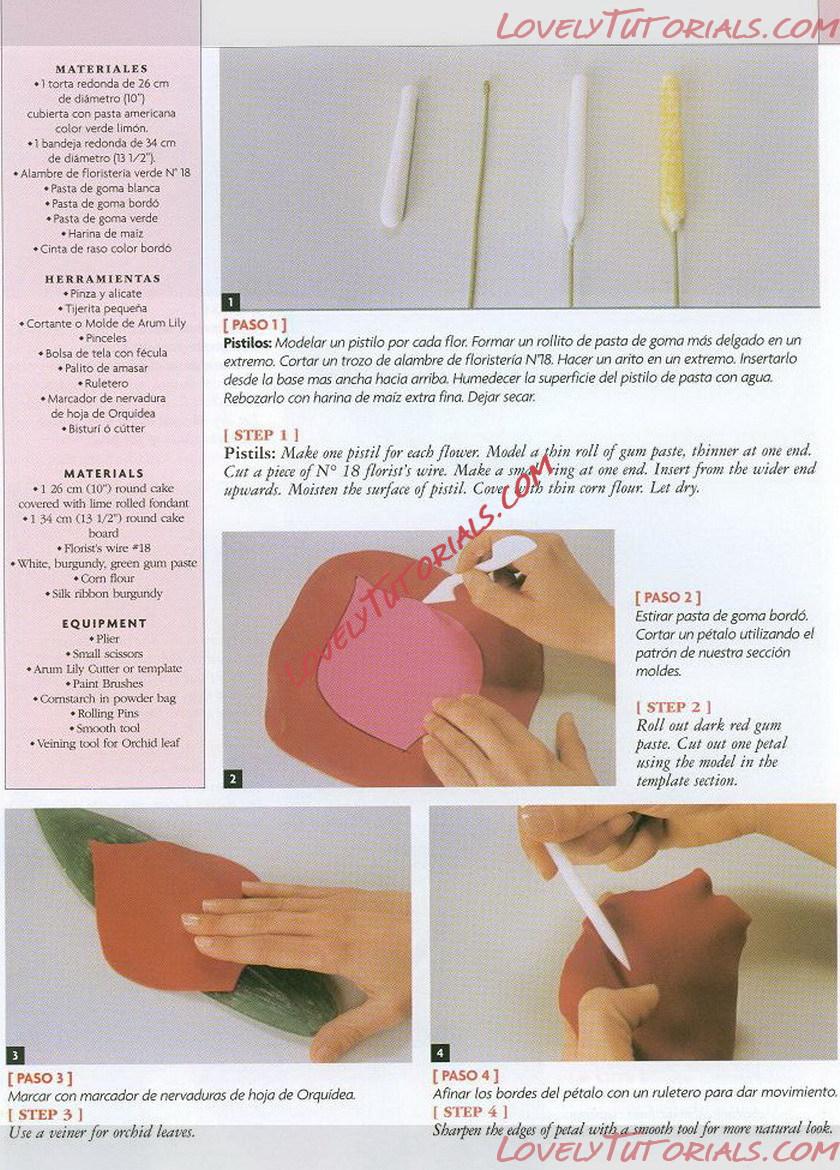
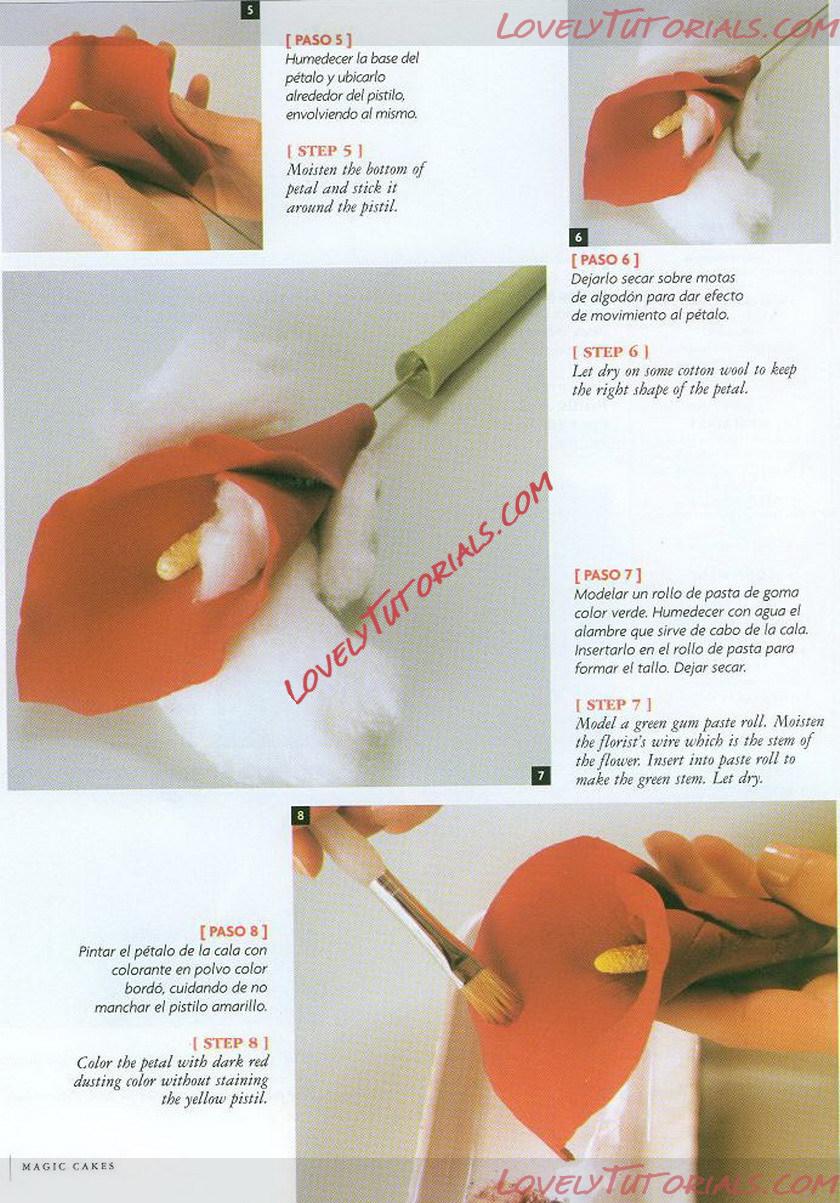
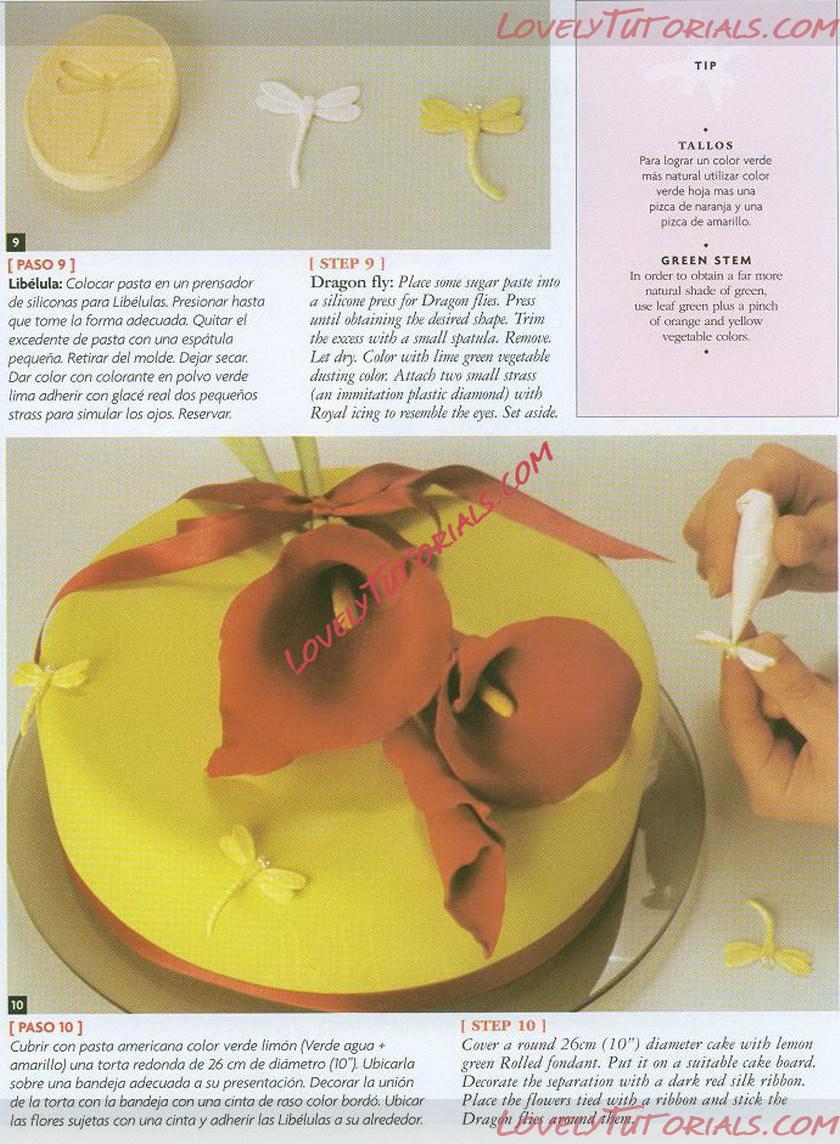
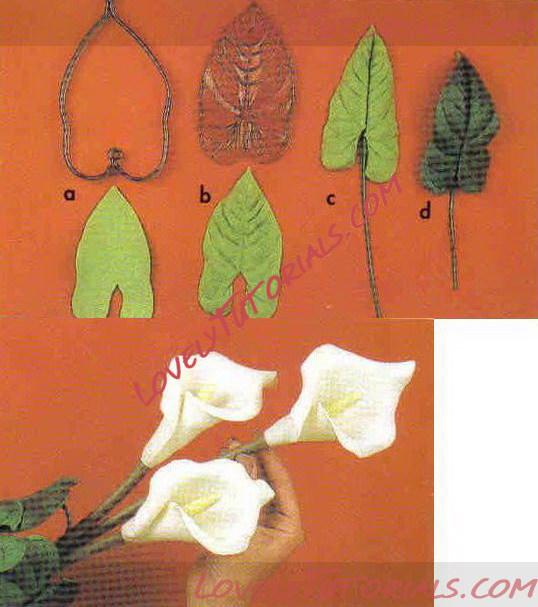
МК из журнала "Magic cakes". Спасибо Автору за МК

Название: 1.jpg
Просмотров: 3

Размер: 166.9 Кб

Название: MC11.jpg
Просмотров: 7

Размер: 346.0 Кб

Название: MC12.jpg
Просмотров: 5

Размер: 314.3 Кб

Название: MC13.jpg
Просмотров: 2

Размер: 329.4 Кб
Старый 23.08.2012, 18:56
Ariana Ariana вне форума
Администратор
Регистрация: 07.09.2010
Сообщений: 7,940
По умолчанию
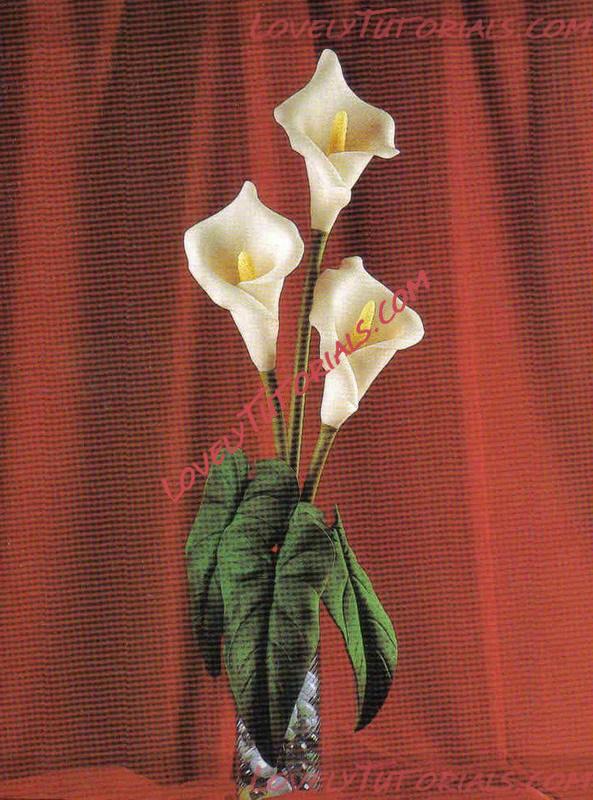
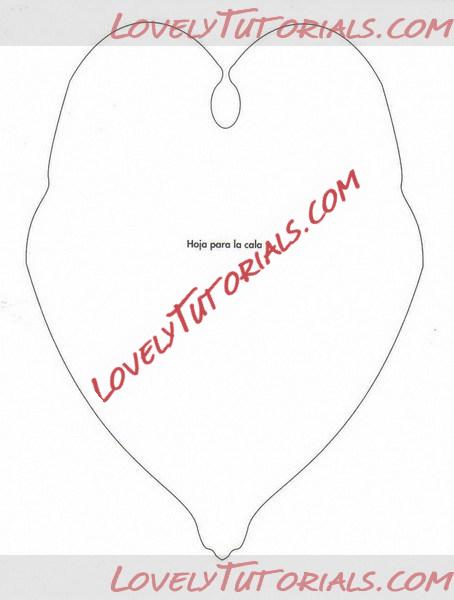
Огромная благодарность Автору за Мастер-класс

Название: 0.jpg
Просмотров: 3

Размер: 177.6 Кб

Название: untitled.jpg
Просмотров: 0

Размер: 95.0 Кб

Название: untitled2.jpg
Просмотров: 3

Размер: 75.4 Кб

Название: 3.jpg
Просмотров: 0

Размер: 21.9 Кб

Название: 4.jpg
Просмотров: 1

Размер: 16.3 Кб
Старый 05.09.2012, 13:04
Ariana Ariana вне форума
Администратор
Регистрация: 07.09.2010
Сообщений: 7,940
По умолчанию
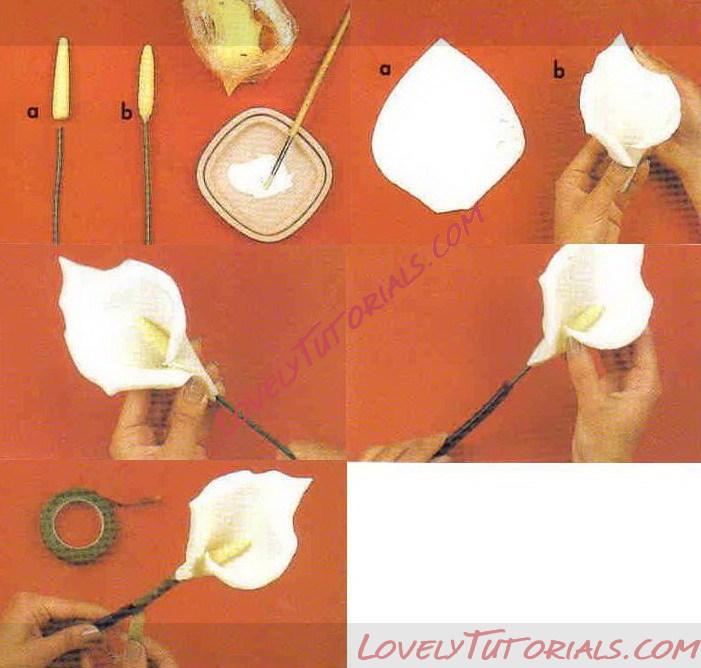
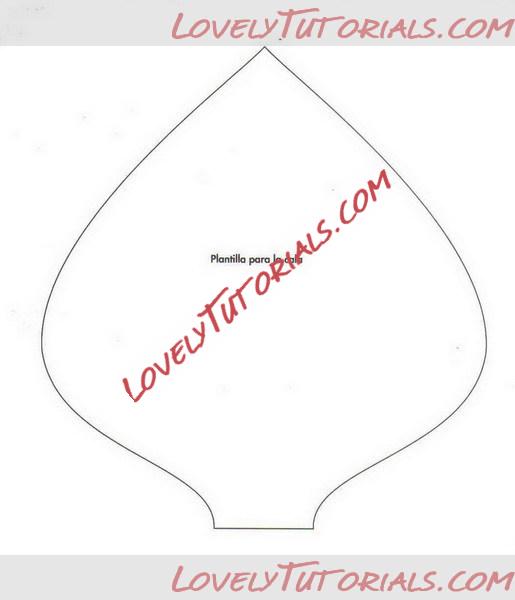
Огромная благодарность Автору Lorna за Мастер-класс

Название: Cala Lily flower tutorial 1.jpg
Просмотров: 2

Размер: 75.6 Кб

Название: Cala Lily flower tutorial 2.jpg
Просмотров: 0

Размер: 49.2 Кб

Название: Cala Lily flower tutorial 3.jpg
Просмотров: 0

Размер: 55.3 Кб

Название: Cala Lily flower tutorial 4.jpg
Просмотров: 0

Размер: 22.6 Кб

Название: Cala Lily flower tutorial 5.jpg
Просмотров: 1

Размер: 25.0 Кб

Название: Cala Lily flower tutorial 6.jpg
Просмотров: 1

Размер: 24.6 Кб

Название: Cala Lily flower tutorial 7.jpg
Просмотров: 0

Размер: 52.5 Кб

Название: Cala Lily flower tutorial 8.jpg
Просмотров: 0

Размер: 48.9 Кб

Название: Cala Lily flower tutorial 9.jpg
Просмотров: 0

Размер: 23.8 Кб

Название: Cala Lily flower tutorial 10.jpg
Просмотров: 0

Размер: 24.3 Кб

Название: Cala Lily flower tutorial 11.jpg
Просмотров: 0

Размер: 31.5 Кб

Название: Cala Lily flower tutorial 12.jpg
Просмотров: 0

Размер: 30.4 Кб

Название: Cala Lily flower tutorial 13.jpg
Просмотров: 0

Размер: 43.4 Кб

Название: Cala Lily flower tutorial 14.jpg
Просмотров: 0

Размер: 53.3 Кб

Название: Cala Lily flower tutorial 15.jpg
Просмотров: 0

Размер: 59.1 Кб

Название: Cala Lily flower tutorial 16.jpg
Просмотров: 0

Размер: 35.5 Кб

Название: Cala Lily flower tutorial 17.jpg
Просмотров: 0

Размер: 30.8 Кб

Название: Cala Lily flower tutorial 18.jpg
Просмотров: 0

Размер: 36.5 Кб

Название: Cala Lily flower tutorial 19.jpg
Просмотров: 1

Размер: 32.5 Кб

Название: Cala Lily flower tutorial 20.jpg
Просмотров: 1

Размер: 15.2 Кб
Старый 27.03.2014, 09:39
Arianchik Arianchik вне форума
Местный
Регистрация: 14.08.2013
Сообщений: 1,101
По умолчанию
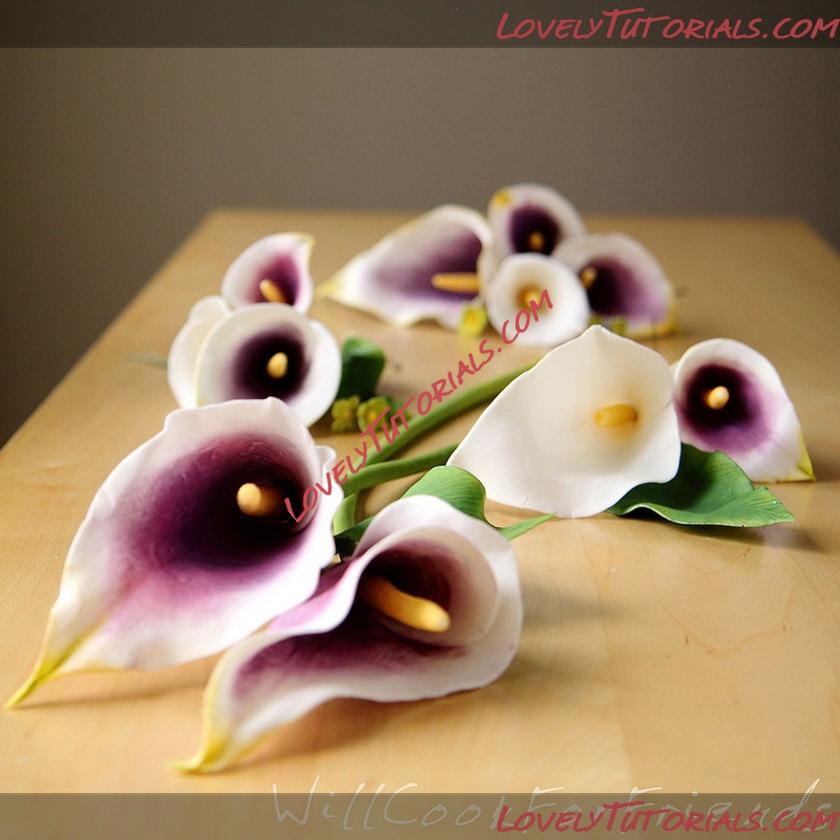
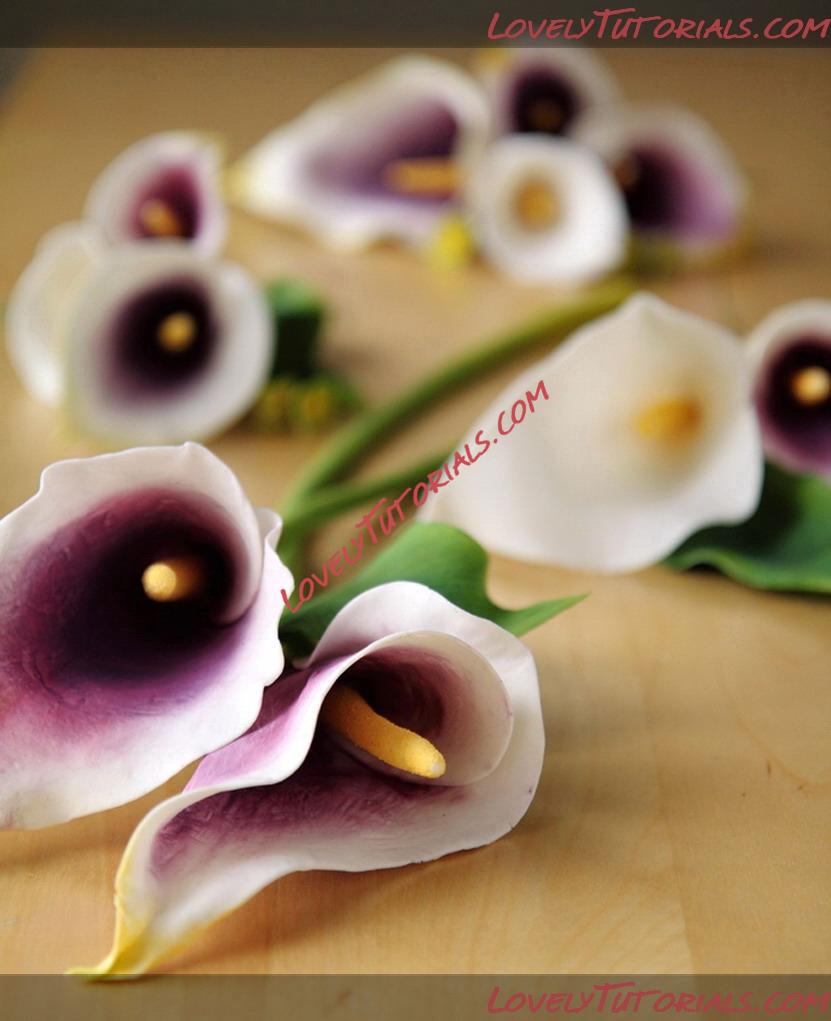
Огромная благодарность Автору willcookforfriends за Мастер-класс
Название: 1.jpg
Просмотров: 0

Размер: 342.7 КбНазвание: 2.jpg
Просмотров: 0

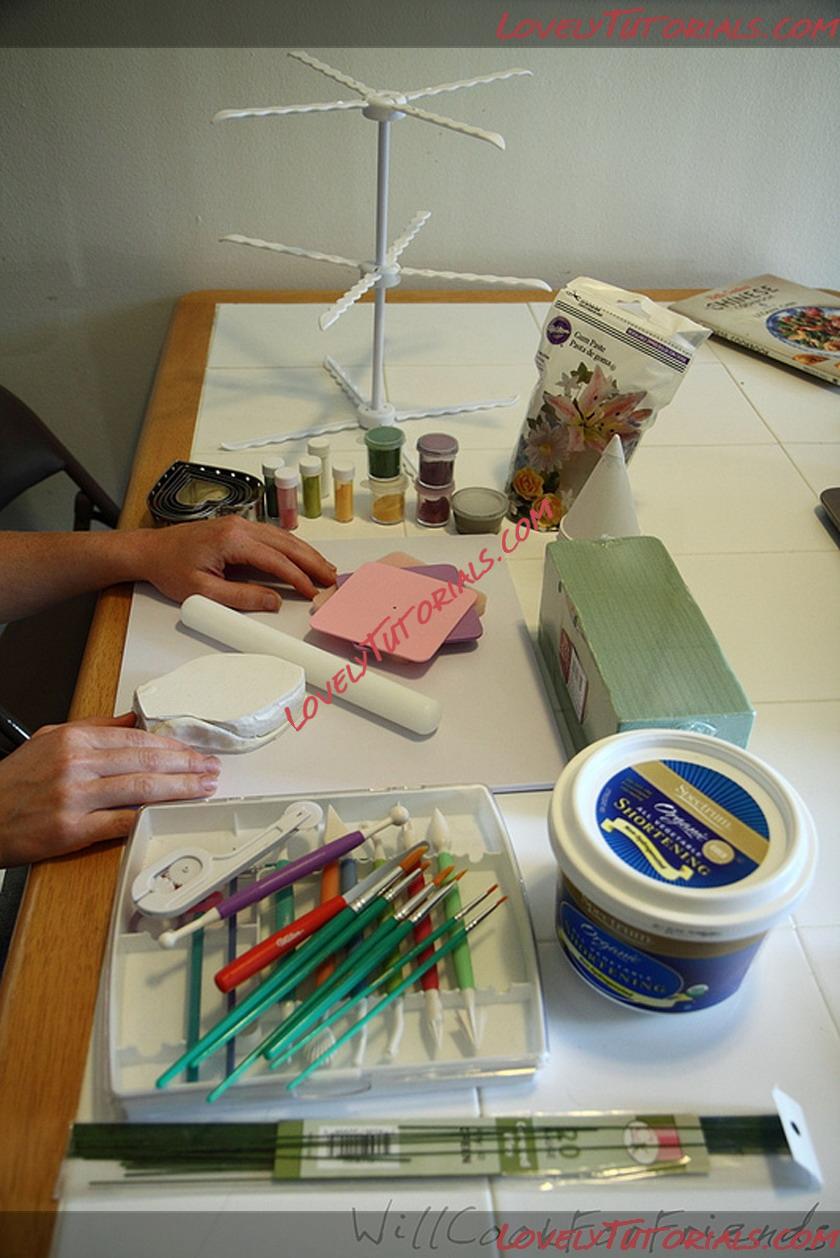
Размер: 313.7 Кб1.) Here’s what you’ll need

Название: 3.jpg
Просмотров: 0

Размер: 516.5 Кб
1. Gumpaste
2. A Celboard, matt, or other clean, flat surface to work on
3. Plastic fondant/gumpaste rolling pin
4. Heart-shaped cookie cutters (these are optional, but we’ll get to that later)
5. Fondant shaping foam
6. Petal veiner (this is a mold that presses realistic veins into the petals, and isn’t necessary if you don’t want it)
7. Paper cone cups – like the ones dispensed next to a water cooler
8. Gumpaste ball tool, & mini pallet knife (these tools can be bought individually, but are both available in Wilton’s basic gumpaste tools kit – you may find some of the other tools useful as well)
9.Floral wire/tape (I use 20 gauge wire)
10. Green floral wet-foam block
11. Food-safe Color Dust/Petal Dust, in whatever colors you want (note that Pearl dust/Luster dust is sparkly, while color/petal dust is a matt finish – feel free to use what you like)
12. Clean craft brushes, for painting
13. Vegetable shortening
14. “Sugar glue” (approx. 1 part gumpaste dissolved into 1 part hot water – adjust the ratio to create a thick syrup that can be used to ?glue’ pieces together)
15. Semolina flour or cornmeal (optional – mixed with yellow color dust, this creates the look of pollen along the stamen of the flower)
16. Flower drying rack (or clothes hangers, in a safe and out-of-the-way place)
It sounds like a lot, but don’t be too overwhelmed - the process is really quite simple!
First, we start by making the center stamen (the yellow pollen-holding part of the flower).
2.) How to make the stamen
Throughout this entire tutorial, I will repeat again and again that the most useful thing you can do is to look at real flowers, or photographs of real flowers. This helps to make them realistic in shape, and to know how to paint them when that time comes.
Calla lily stamen are usually quite long and narrow. The size you’ll want yours to be depends on the size of the heart-shaped cutter you plan to use. For now, let’s assume you’re using a 3″ heart cutter.
For your first lily, I’d recommend making the stamen approximately half the length of your cutter – so in this case, 1.5″ long, give or take. Once you get more accustomed to making the flowers, you can decide what size ratio you prefer.
Always begin with clean, dry hands, and a prepared work surface (everything you need within reach).
Название: 4.jpg
Просмотров: 0

Размер: 306.4 Кб
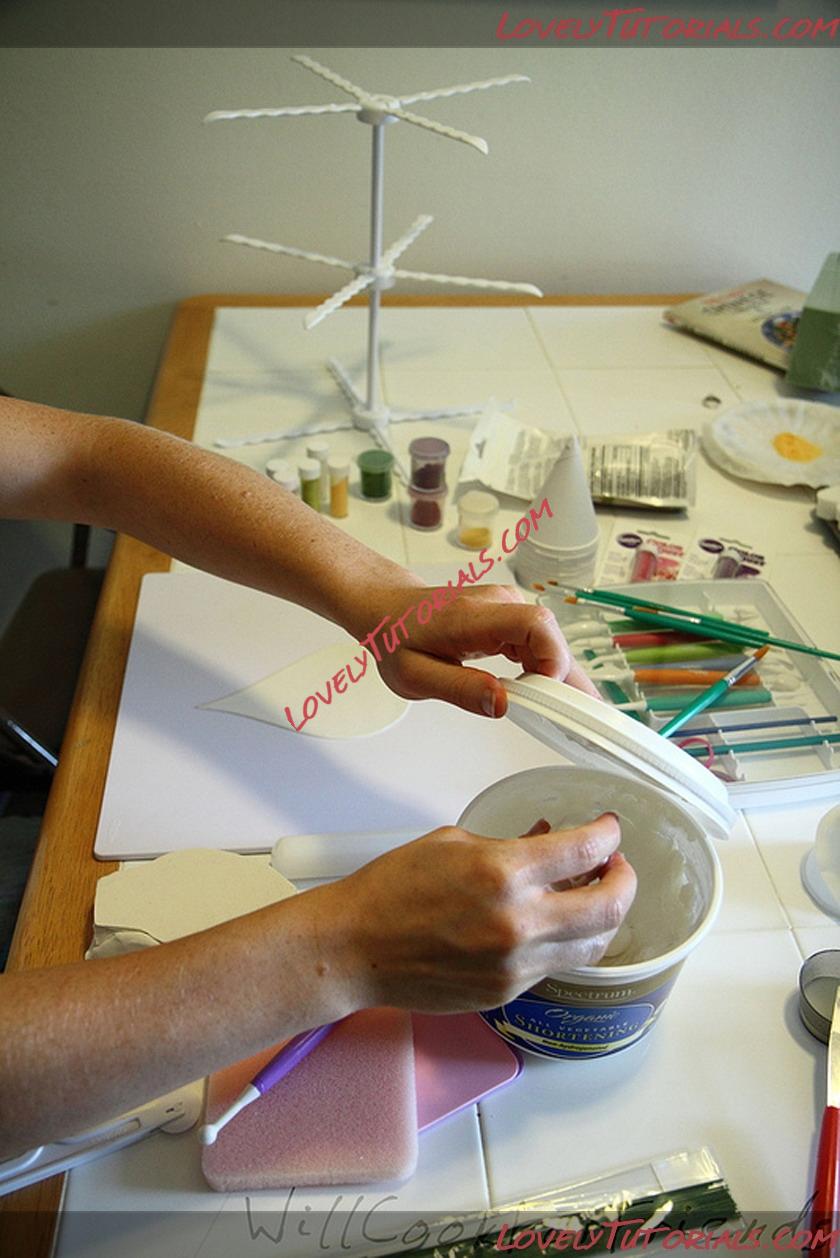
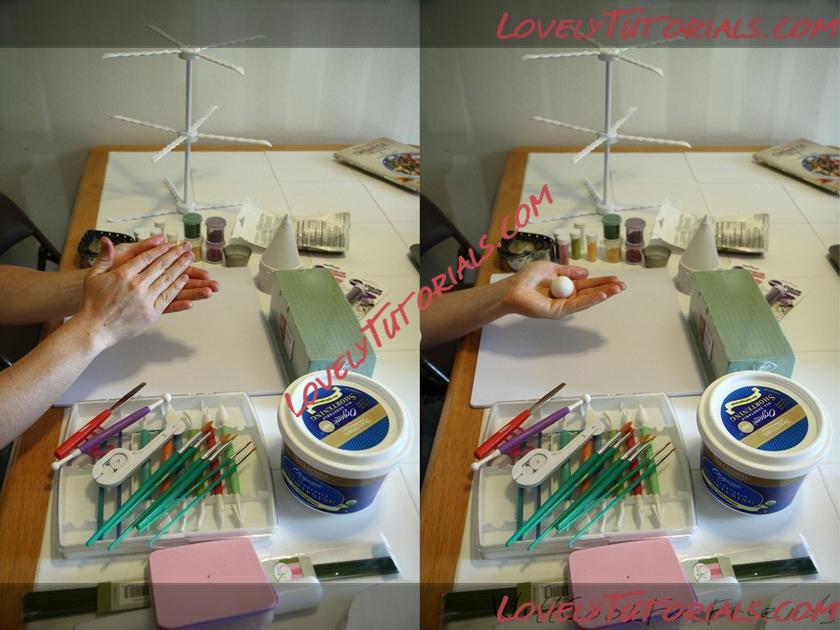
Start by taking a small ball of gumpaste (perhaps a little smaller than a ping-pong ball) in your hand. Rub a small amount of vegetable shortening between your hands, and begin massaging the gumpaste to soften it. Once it’s warmed up and easily pliable, roll it between your palms into a ball.
Название: 5.jpg
Просмотров: 0

Размер: 300.8 Кб
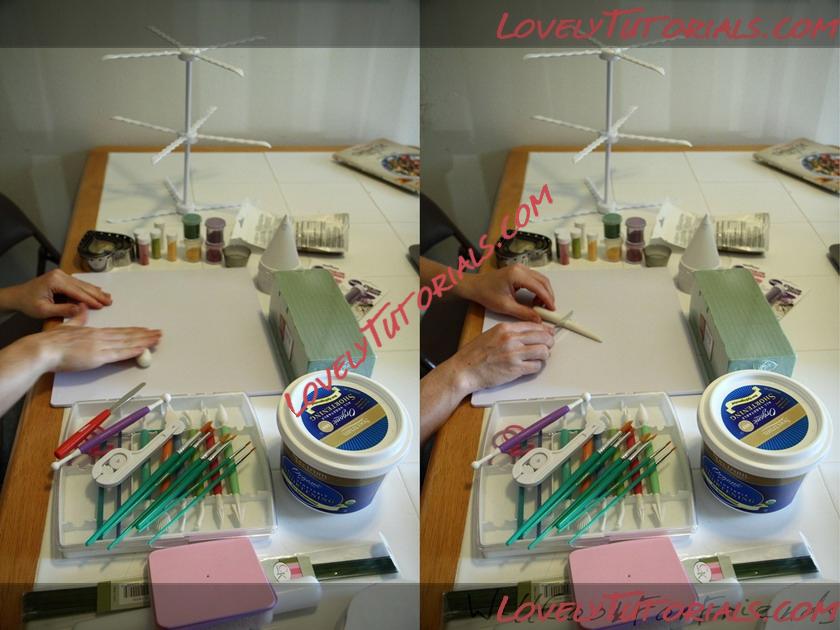
Lay the ball onto your matt or surface, and begin rolling it out like a snake. Taper one end of the snake, but don’t bring it to a point – just make it narrow. Cut the rope about 1″ – 1.5″ in, and pinch the cut end between your fingers to make another, more abrupt, taper – this end will fit into the bottom of the flower.
Старый 27.03.2014, 09:40
Arianchik Arianchik вне форума
Местный
Регистрация: 14.08.2013
Сообщений: 1,101
По умолчанию
Название: 6.jpg
Просмотров: 0

Размер: 501.4 Кб
Be sure to immediately place the excess gumpaste back into the sealed gumpaste bag, or as I do, putting it into the (closed) tub of shortening. Gumpaste will dry out quite quickly, and needs to be kept airtight when it isn’t being used.

Название: 7.jpg
Просмотров: 0

Размер: 307.1 Кб
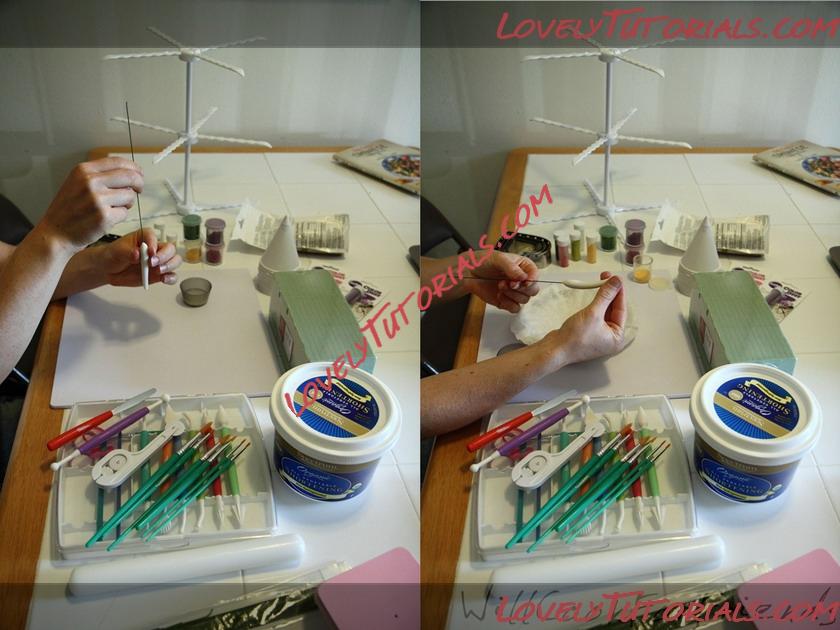
Dip one end of a floral wire into your sugar-glue mixture, and then carefully insert it into the bottom (pinched) end of the stamen. The wire only has to go in about 1/4-1/2 the length of the stamen – don’t thread it all the way through.
Once the stamen is on the wire, you can use your fingers to give it a very slight curve. I found this to be a much more natural look than keeping it as straight as possible.
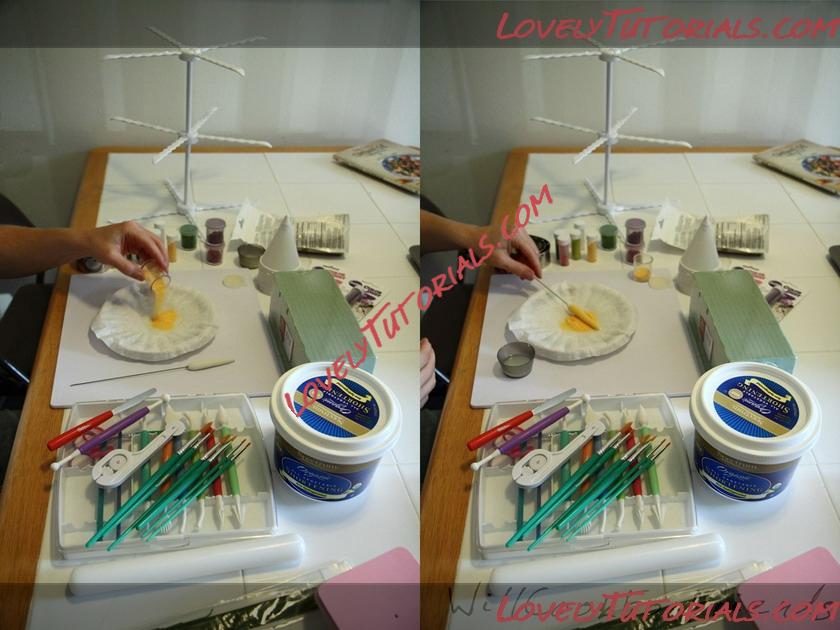
If you’d like your stamen to appear as though it has pollen on it, you can pour a mix of semolina flour (or cornmeal) and yellow color dust onto a paper plate (I combine the flour and color in a small container, shake, and then adjust the ratio to achieve the shade I want).
Название: 8.jpg
Просмотров: 0

Размер: 302.9 Кб
Using your fingers, rub a small amount of the sugar glue all along the stamen, being sure it’s thoroughly coated. Roll the stamen into the yellow mixture.
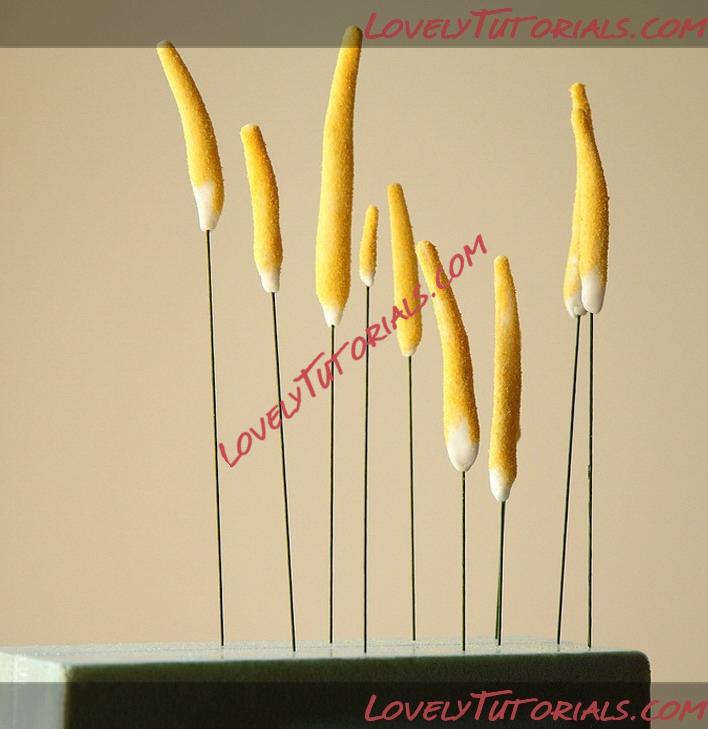
Once your stamen is finished, stick the wire into the foam block and set it aside to dry 8 hours or overnight. You want to be sure your stamen is completely dry before attaching your flower to it, or else it may slip off the wire.

Название: 9.jpg
Просмотров: 0

Размер: 217.5 Кб
Here I’ve made several varying sizes, as I will be making some larger and some smaller flowers for my cake.
3.) Making the calla lily petal
Once your stamen is completely dry, begin on the main petal of the flower.
Take about a ping-pong ball sized chunk of gumpaste into your hand. Rub a small amount of vegetable shortening between your hands/knead into the gumpaste to soften it.

Название: 10.jpg
Просмотров: 0

Размер: 289.8 Кб

продолжение на след. странице

Последний раз редактировалось Arianchik; 27.03.2014 в 10:23.
Старый 27.03.2014, 09:43
Arianchik Arianchik вне форума
Местный
Регистрация: 14.08.2013
Сообщений: 1,101
По умолчанию
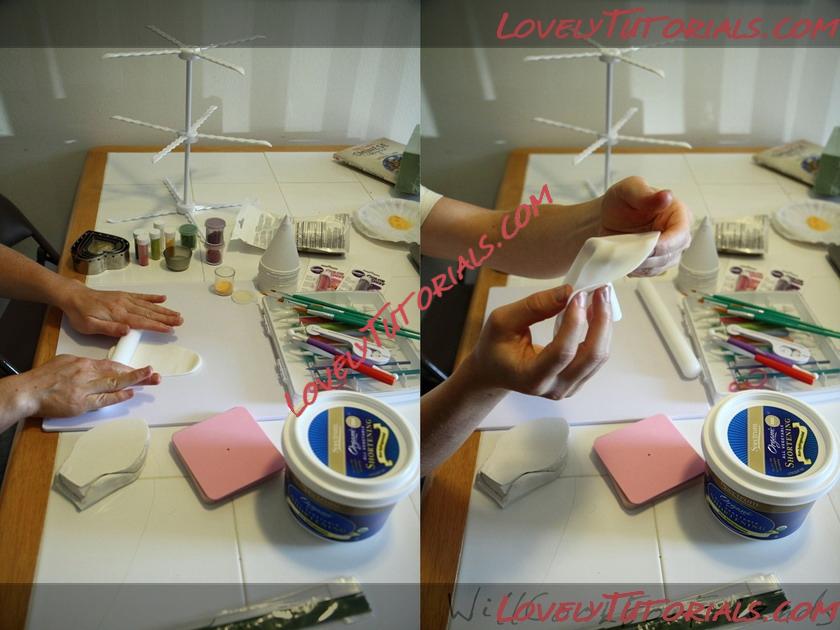
Place the gumpaste onto your matt or surface and begin rolling it out just like play-dough. You want to make it fairly thin, but not too thin or it will tear and be impossible to work with. Finding the right thickness will become easier and easier the more you do it – so for now, start with keeping it a little bit thicker than you think it should be, just to stay on the safe side.
After a few passes with the roller, lift and rotate the gumpaste to keep it rolling smoothly and to get a feel for how thin it is. Be careful of air-bubbles trapped underneath it when you lay it down, as these may cause it to wrinkle or tear when you roll it.
Название: 11.jpg
Просмотров: 5

Размер: 290.2 Кб
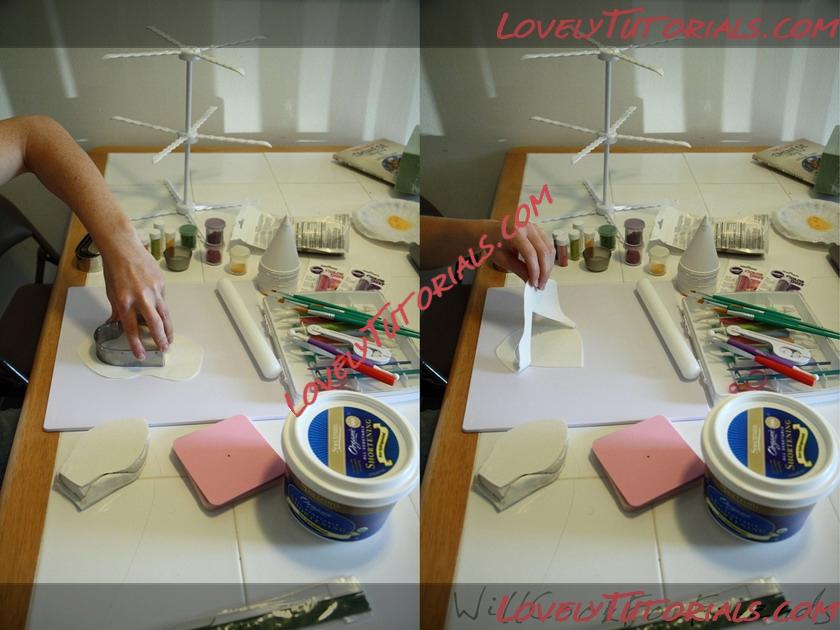
Once the gumpaste is thin enough, use a heart-shaped cookie cutter to cut out your petal shape. Alternatively, you could use a gumpaste/fondant cutter tool to freehand this. As I began creating more unique-looking, and larger sized, calla lilies, this became my preferred technique. For now, however, let’s stick to the heart-cutter.
Peel away the excess gumpaste, ball it up, and immediately return it to its bag or sealed container.
To shape the petal, there are a few different steps you can take to make it more elegant/realistic.

Название: 12.jpg
Просмотров: 0

Размер: 292.2 Кб
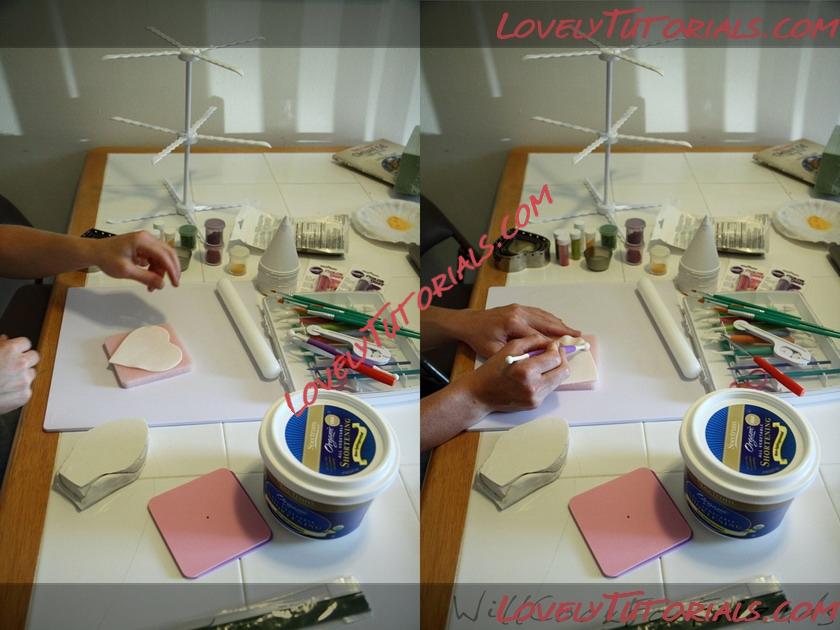
First, place the heart shape onto the thick pad of foam. Using the ball tool, press along the edges to thin them out even further. You may be surprised by how much pressure you can use here, but for now be gentle. Be sure to work quickly, as the thin gumpaste will begin to dry within a matter of minutes (depending on the temperature and humidity).
Название: 13.jpg
Просмотров: 0

Размер: 282.7 Кб
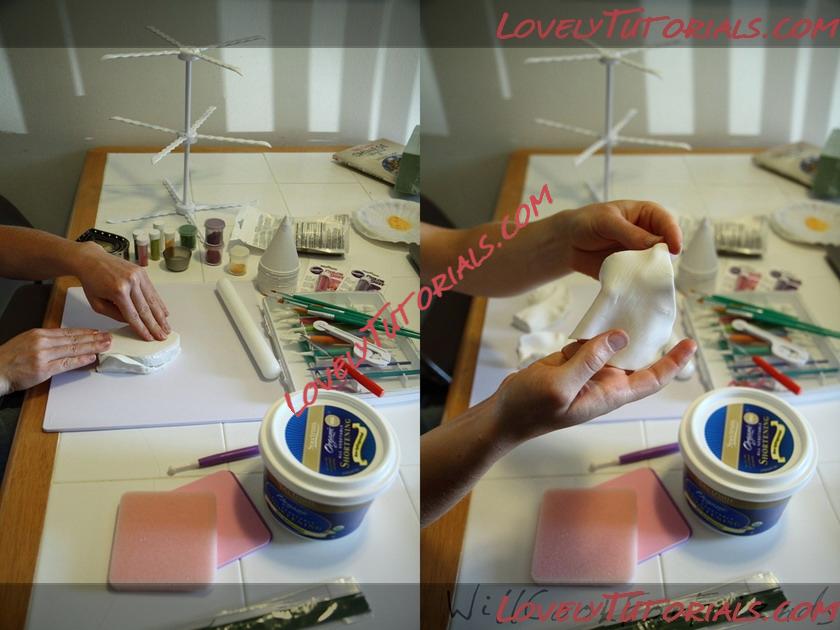
Next, you can use a petal veiner to imprint the veins that real flower petals have into our gumpaste. Simply lay the heart shape into one half of the mold, lay the second half on top, and apply gentle, even pressure. The amount of force you can use depends on how thin your gumpaste is, and also on the veiner you’re using – practice will tell, but for now use a gentle pressure and see what the results are like.
Название: 14.jpg
Просмотров: 0

Размер: 223.9 Кб
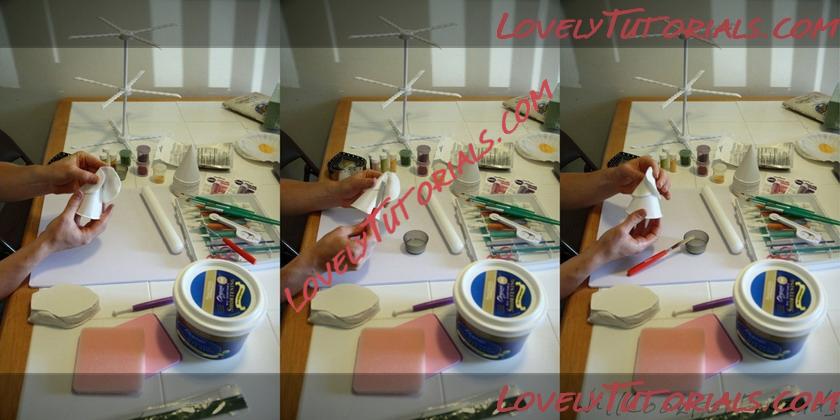
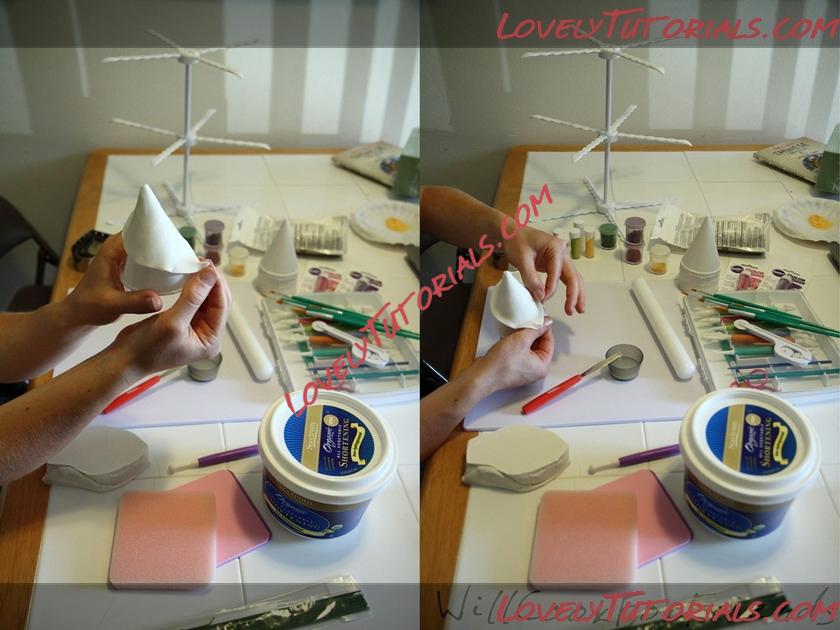
To shape the heart into a calla lily, hold it upright in the palm of your hand. Place the narrow end of the cone cup in the center of the heart. Fold one wing of the heart over the cone, and (using the mini pallet knife) apply a small smear of sugar glue. Fold the second wing of the heart over the first one, and press it gently into the glue to secure it. Be careful to keep a small hole open at the top, since this will be where the wire goes.
Название: 15.jpg
Просмотров: 0

Размер: 294.6 Кб
Once the heart is folded into the shape of a petal around the cup, you can manipulate the edges to give it realistic shape and bends. Looking at real calla lilies will help give you an idea of how this should go. I like to pinch the tip of my petal, and then curl the sides slightly – this is a very basic shape, and as I got better at making them I began to play with the edges more and more, creating waves and ripples and forming a less-perfect, more organic shape. But again, for now we’ll just stick to the basics.
Set your cone cup aside to dry for at least a couple of hours before moving on to the next step.
artesanatos passo a passo, baking, blomster, blüten, blütenpaste, cake decorating, cake decorating techniques, cerâmica plástica, chiodi di garofano, clavo de olor, clous de girofle, cloves, cold porcelain, cold porcelain figurines, cold porcelain flowers, confeitando bolos, copo-de-leite, curso de modelado, decoracion de pasteles, decoración de tortas, decorare le torte, decorazioni, deko fondant, dekorace na dort, dekoracija, dekoracije, dekorasyon, dekorácie, fimo, fimo flowers, fiori, fleurs, flogistica, floral inspirations, flores, flores azucar, floristics, floristik, floristikk, floristique, florística, flower, flower paste, flowers, fondan, fondant, fondente, fotopostup, gum pasta, gum paste, gum paste flowers, gumpaste, hand painting, handmodelliert, how to, how-to's, hřebíček, jak na, kage dekoration, kagedekoration, kakebaking, krok za krokem, kvety, la modélisation, making sugar flowers, marshmallow, masa flexible, modelado, modelagem, modelare, modeling, modeling paste, modeliranje, modellazione, modelleme, modellering, modellieren, modellierpaste, modelləşdirmə, modelovanie, modelování, modelowanie, motivtorten, nelken, pap, paso a paso, passo a passo, passo-a-passo, pasta flexible, pocelana fria, polymer clay, polymer clay flowers tutorial, postup klinček, postupak za ukrasavanje, schritt für schritt anleitung, schritt-für-schritt, sculpey flowers, sculpting, simple, steg for steg, step by step, step-by-step, styrofoam, sugar cane flowers, sugar cloves, sugar flower, sugar flowers, sugar flowers for cake decorating, sugarcraft, sugarpaste, sukker art, tecnicas de decoracion, tecniche, thai flowers, torte, torte decorate, torten dekorieren, torti, trin for trin, trin-for-trin, trinn for trinn, tutorial, tutorijal, ukrašavanje torti, uputstvo za dekoraciju, wedding cake, wedding cakes, zuckerblumen, ดอกไม้, सजा केक, मॉडलिंग, モデル, çiçek modelleme, 建模, 裝飾蛋糕, кветкі, квіти, как слепить каллу, гвоздика, полимерная глина, пошагово, мк, моделиране, майстер-класи, маршмеллоу, мастика, мастер-класс, букет, лепим цветы, лепка, ліплення, украшение тортов, украшение торта, свадебный торт, сахарная мастика, сахарный клей, уроки прикрашання, торт, фимо, флористика, холодный фарфор, цветочная паста, цветя, цветы, цветы из полимерной глины, цветы из холодного фарфора, цветы на торт, шаг за шагом


©2022 Lovely Tutorials
Content Relevant URLs by vBSEO