Cake Decorating Tutorials  (How To's) Tortas Paso a Paso
Cake Decorating Tutorials (How To's) Tortas Paso a Paso
Вернуться   Cake Decorating Tutorials (How To's) Tortas Paso a Paso > Figure making tutorials > Flowers Trees Tutorials
Перезагрузить страницу Анемоны, anemones, sasanky, anémones, anemoni, anêmonas, anémonas
Старый 26.05.2013, 12:42
Arianka Arianka вне форума
Администратор
Регистрация: 05.03.2013
Сообщений: 698
По умолчанию
Название: 21.jpg
Просмотров: 2

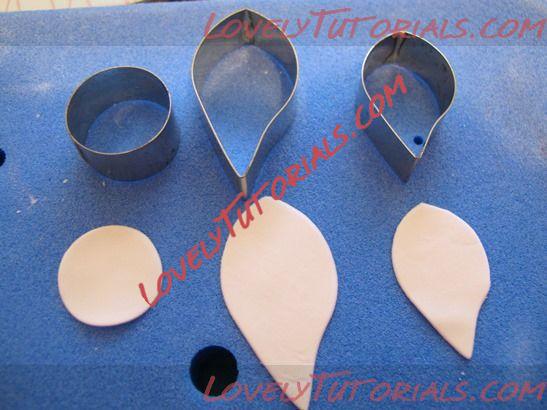
Размер: 37.2 Кб use cutters
Название: 22.jpg
Просмотров: 0

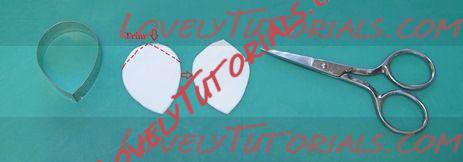
Размер: 7.7 Кб adapt existing cutter
Cutting tips (this what I do, if you do something that works, carry on to the next part)-
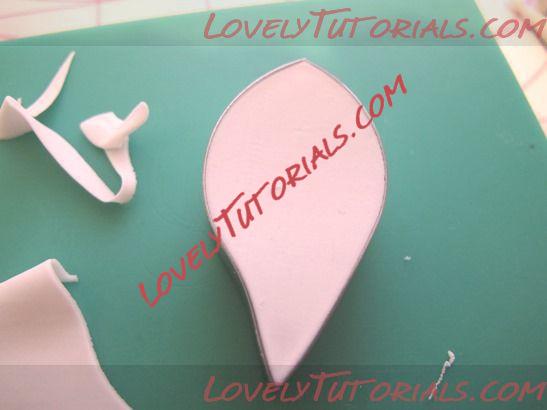
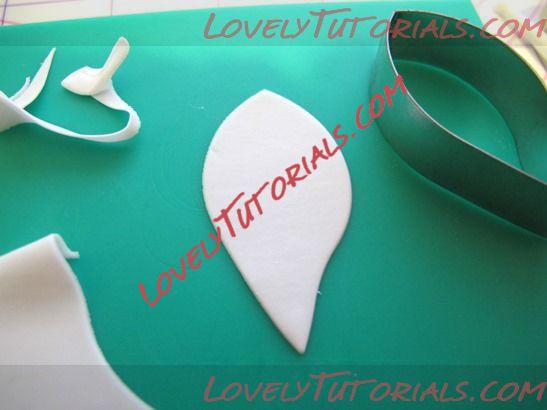
The ideal situation when using a cutter is that when you push down the cut-out gets stuck in the cutter as shown below. In this situation you can rub off the furry edges and push out a cleanly cut shape. If pushing the cutter onto the paste, it is better to pull the flower paste from around the cutter once you have cut through, than to wiggle the cutter about as this can distort the shape and make the cut-out come away from the sides of the cutter. The other thing that helps is to roll the paste out thinly and then turn it over so the slightly dryer side is now on the bottom, this helps get a clean cut. It also helps if the paste is fresh and not old and dried out. You can add a little water to the paste to bring it back to life. The other method which Lindy Smith likes, is to roll out the paste and then place it over the cutter and roll over the top of it, this way you should get a clean cut straight away. If you do get furry edges after cutting, you can rub them off once the petal has dried out or trim them off with a pair of nail scissors which is what I usually do. If you have greased part of your board for rolling, use a different part for cutting. A slight textured surface is also good for cutting as it can help remove the furry edges for you if you like to wiggle the cutter.

Название: 23.jpg
Просмотров: 0

Размер: 15.6 Кб
Название: 24.jpg
Просмотров: 0

Размер: 19.4 Кб
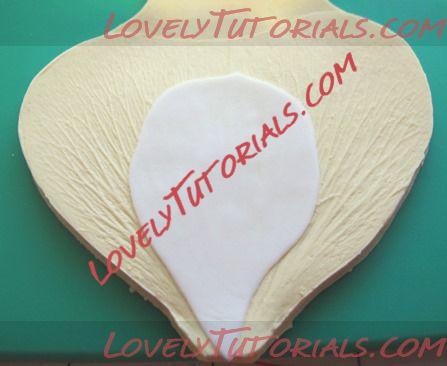
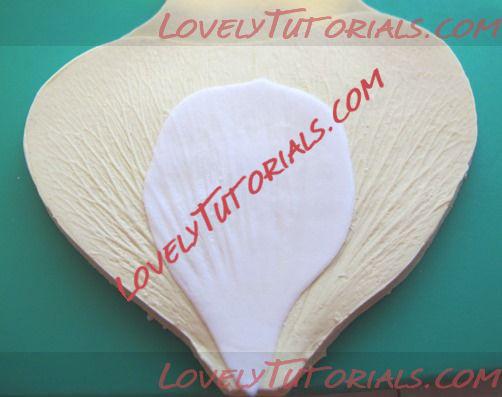
2. Take one of the large petals and vein it using a poppy petal or similar double sided veiner (the one here is made by Sugarcity). With these veiners, there is letters printed in the middle join of the mould indicating what it is e.g. PP=Poppy Petal, if you have this facing towards you then the back of the petal will be veined by the ?back’ part of the mould. Sometimes it is hard to tell which side is which with a heavily veined flower!. Anyway, position the bottom of the cut-out petal as shown , fold the other half of the mould over the top, line up then press down on it firmly all over with your hand or roll over it with a rolling pin
Название: 25.jpg
Просмотров: 0

Размер: 16.1 Кб
This is what it should look like after. These moulds are non-stick so it should be easy to peel the cut-out petal away. If your paste is very sticky you can apply a little white vegetable fat to the mould or cornflour to the petal (don’t put cornflour directly into moulds, the grains will get trapped in the grooves and you could lose detail on the impression
Название: 26.jpg
Просмотров: 0

Размер: 19.4 Кб
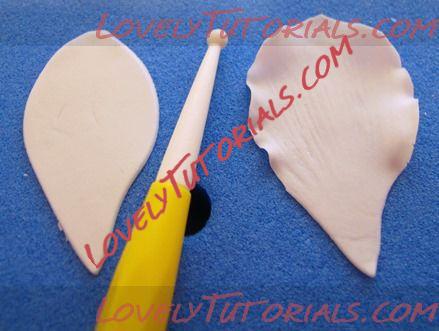
3. Next, put the petal on a foam pad and thin/frill the edges with a small ball tool. To do this run the ball tool around ½ on the petal edge and ½ on the foam pad from side to side on the top 2/3rds of the petal. The harder you press or the longer you go back and forth the thinner and frillier the petal edge will become (don’t press too hard or the paste will tear and the tool may snap!). I also stretch the petal by pulling out the sides and top while holding the other side static, which will thin the whole petal down a bit more and give it a more natural shape. You can see below a petal that had just been cut vs. one that has been veined, thinned and frilled. If the edges of your petals get a cracked appearance when thinning them then usually this means the paste has dried out on the edges and does not want to do what you want it to anymore! If this happens to me I usually trim it off and re-thin the freshly cut bit, petals are not always perfect and most of the time you cannot tell. This is another reason why it is important if you cut out several petals at once that you protect the ones you are not working on from drying out to quickly.
Название: 27.jpg
Просмотров: 1

Размер: 23.0 Кб
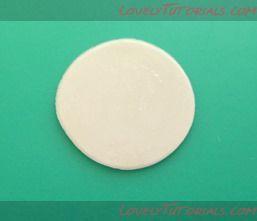
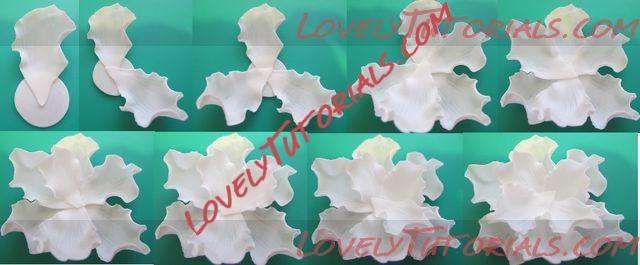
4.Take the circle of flower paste and lightly brush 1/3rd of it with edible glue. Stick the first petal on as shown in the combined picture below. Repeat steps 2 and 3 with the remaining petals (do the larger ones first, then the smaller ones) and stick them onto the circle as they are ready in the sequence below.
Название: 28.jpg
Просмотров: 0

Размер: 3.8 Кб
Название: 29.jpg
Просмотров: 0

Размер: 28.6 Кб
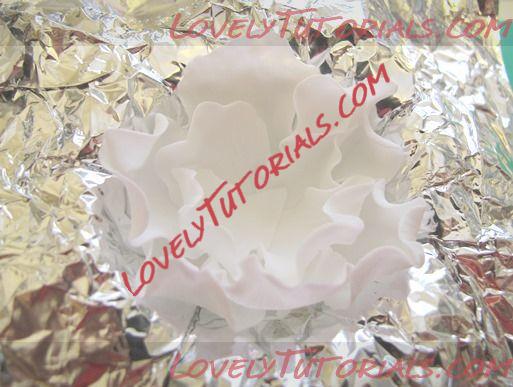
5.Make a curved former (a semi-circle shape, you can use a polystyrene or foam ball to help make the shape neat) out of tin foil for the flower to sit in while it dries (if you poke a few holes in it as well it will help the air get underneath)
Название: 30.jpg
Просмотров: 0

Размер: 37.6 Кб
Старый 26.05.2013, 12:44
Arianka Arianka вне форума
Администратор
Регистрация: 05.03.2013
Сообщений: 698
По умолчанию
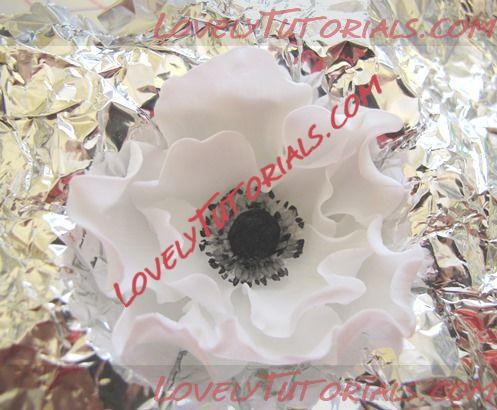
6. Stick the centre of the flower in with a little edible glue or royal icing. This can be done while the petals are drying
Название: 31.jpg
Просмотров: 0

Размер: 39.3 Кб
7. To give the flower more strength and stability the larger petals can be glued to one another where they overlap. Apply a little edible glue to one of the overlapping edges (flick it up with the end of the paintbrush first f you need to). Use the end of the paintbrush to seal together. Repeat all the way round.
Название: 32.jpg
Просмотров: 0

Размер: 43.1 Кб
Название: 33.jpg
Просмотров: 0

Размер: 42.7 Кб
If the flowers are going between two tiers of a cake then the former shape should sit neatly into the gap without risk of the petals breaking. On the stained glass cake the separator tier is only 1 inch smaller than the tier above and the height of the separator was 2 inches; so the outer diameter of the foil was about 2 inches. The flower shape was also very slightly oblong/fatter across the middle to help it sit better. Depending on where you are using the flower you can customise the former to suit. It will take a few hours to dry or just leave overnight in the former.
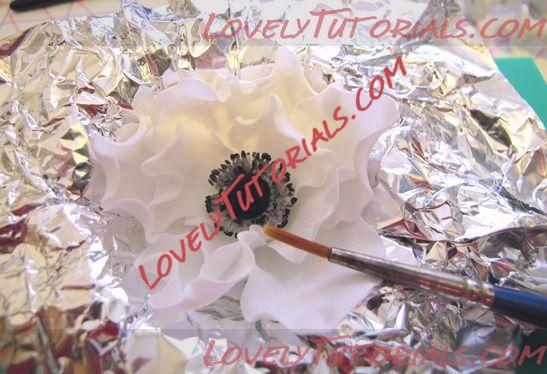
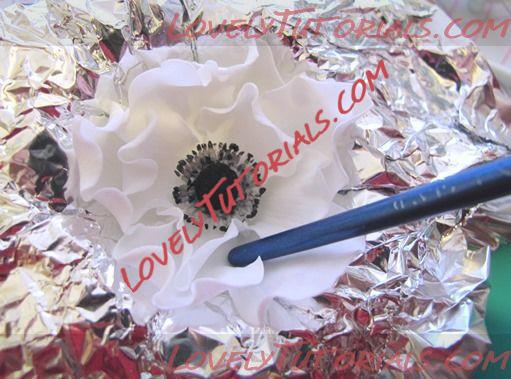
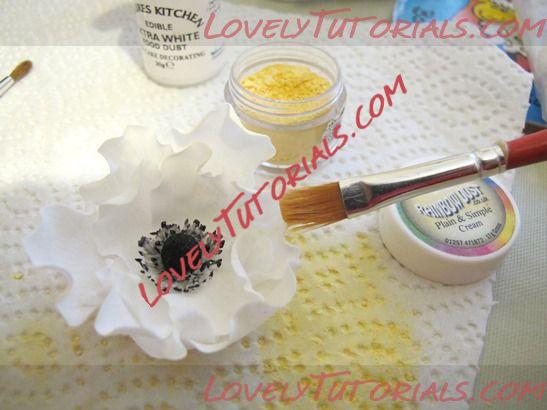
8. Once dry, the flower can be dusted with complimentary colours to give them more depth. For these flowers I used a little white at the petal base and cream on the edges. Attach to the cake with royal icing. On the Stained glass cake I filled the gaps between flowers with flowerpaste anemone leaves but this is not necessary.
Название: 34.jpg
Просмотров: 0

Размер: 31.4 Кб


Cake tutorial HERE
Старый 25.06.2014, 17:17
Anka Anka вне форума
Администратор
Регистрация: 23.04.2014
Сообщений: 513
По умолчанию


МК ЗДЕСЬ - TUTORIAL HERE
Старый 25.08.2014, 20:26
Arinka Arinka вне форума
Местный
Регистрация: 23.04.2014
Сообщений: 207
По умолчанию


МК ЗДЕСЬ - TUTORIAL HERE
Старый 15.09.2014, 16:08
Arinka Arinka вне форума
Местный
Регистрация: 23.04.2014
Сообщений: 207
По умолчанию
Огромная благодарность Metally за Мастер-класс
Название: 1.jpg
Просмотров: 0

Размер: 80.9 Кб
Лепка анемон из холодного фарфора

Понадобится:
  • самозастывающая полимерная глина синего, зеленого и черного цвета;
  • молд или вайнер с соответствующей текстурой;
  • каттер (вырубка) для анемоны (можно обойтись, вырезав лепестки ножницами);
  • стек для керамической флористики (можно заменить вязальной спицей);
  • клей секундный («Момент» и лучше всего в форме геля);
  • хорошее настроение .
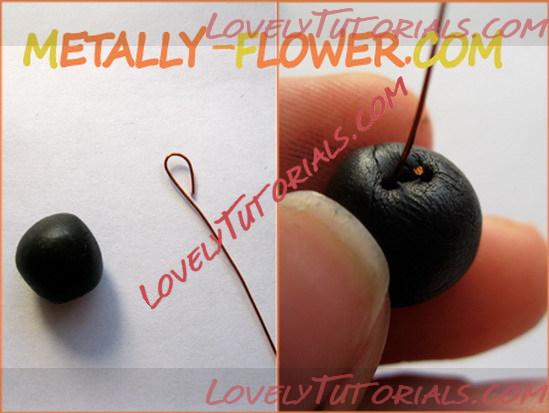
Шаг 1. Начинаем мастер класс по лепке анемон с создания круглой серединки цветка. Для этого отрезаем проволоку нужной длины (в зависимости от длины стебля), закручиваем на ее конце петлю.
Отщипываем кусочек черного холодного фарфора и катаем шарик. Продеваем внутрь него петельку и в образовавшееся углубление капаем чуть-чуть секундного клея, а затем аккуратно защипываем края, чтобы проволока спряталась внутри. Берегите пальчики, а то приклеятся!
Название: 2.jpg
Просмотров: 0

Размер: 49.3 КбШаг 1

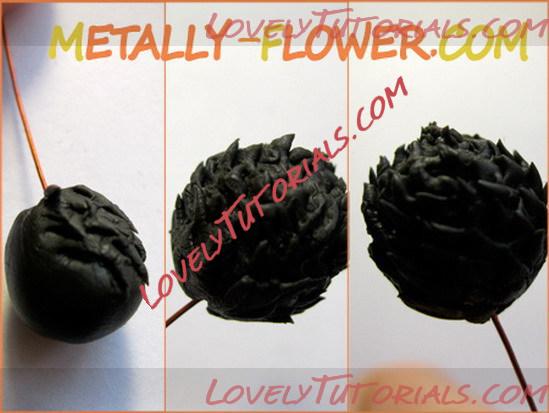
Шаг 2. При помощи маникюрных ножниц придаем шарику текстуру ёжика: аккуратно надрезаем его, создавая что-то вроде чешуек.
Делаем столько таких шариков, сколько планируем слепить анемон из ХФ и даем полученным серединкам немного высохнуть.
Название: 3.jpg
Просмотров: 0

Размер: 51.7 КбШаг 2

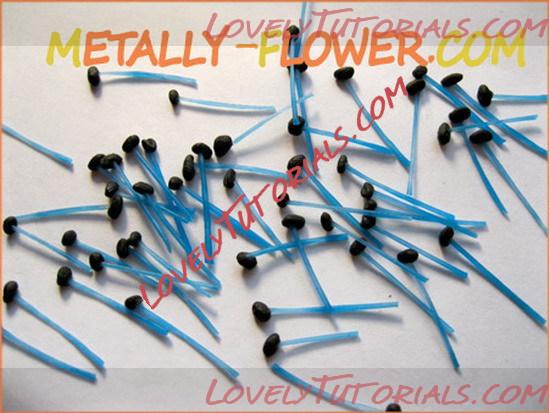
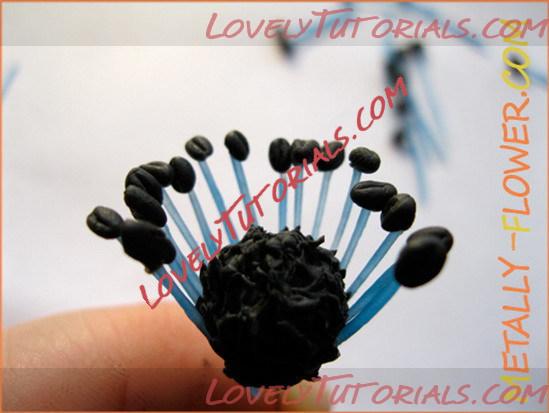
Шаг 3. У нас уже есть подготовленные самодельные тычинки из лески. Клеить их будем в два-три ряда, так что понадобится много таких малипусичек.
Название: 4.jpg
Просмотров: 0

Размер: 72.6 КбШаг 3

Шаг 4. Когда серединка подсохла, приступаем к приклеиванию тычинок. Смазываем их моментным клеем и располагаем близко друг к другу по кругу.
Название: 5.jpg
Просмотров: 0

Размер: 46.6 КбШаг 4

Шаг 5. Замыкаем круг.
Название: 6.jpg
Просмотров: 0

Размер: 63.3 КбШаг 5

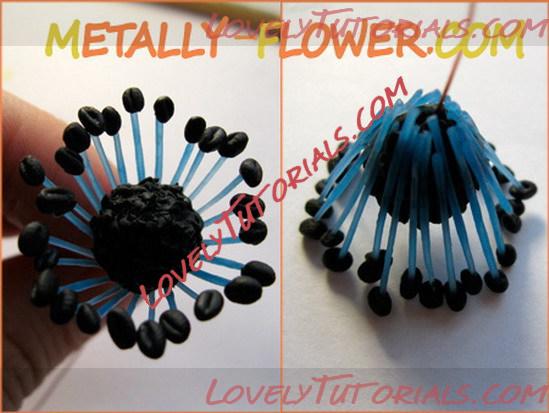
Шаг 6. Приступаем к приклеиванию второго ряда. Можно располагать тычинки в шахматном порядке.
Название: 7.jpg
Просмотров: 0

Размер: 69.4 КбШаг 6
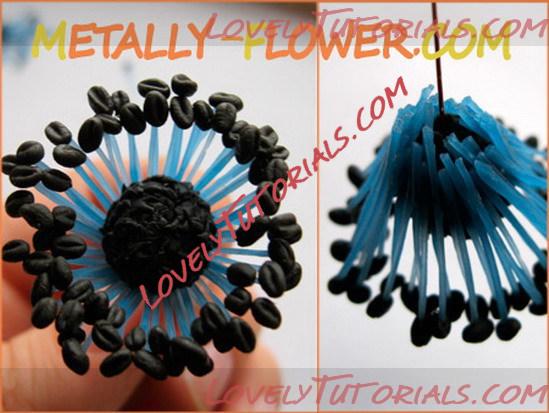
Главное следить за положением пыльников (черных кончиков на тычинках) – они должны смотреть примерно в одну строну, чтобы был аккуратный вид.
Если есть желание, можно добавить и третий ряд.
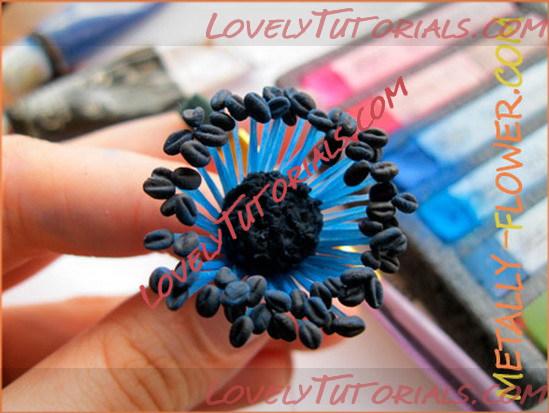
Шаг 7. А теперь припудрим серединку пастелью. Я использовала ультрамариновую и фиолетовую.
Название: 8.jpg
Просмотров: 0

Размер: 65.1 КбШаг 7

Лепка лепестков анемоны из ХФ

Свободную проволоку обкатываем зеленой глиной, создавая стебель. Подробно этот процесс уже описан в МК по лепке гербер.
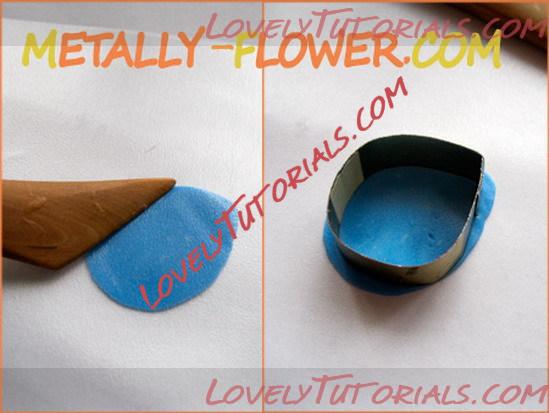
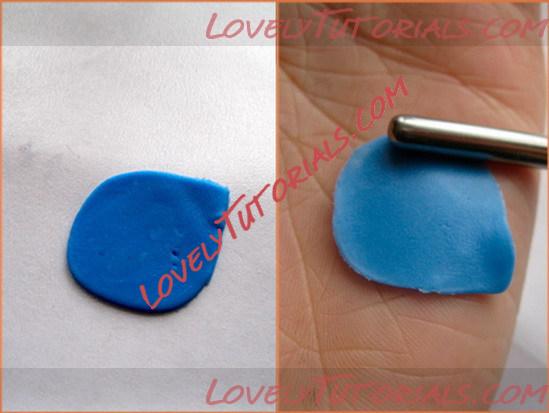
Шаг 8. После того, как все серединки готовы, а стебли подсохли, раскатываем в файлике голубую (синюю) полимерную глину и вырезаем каттером лепесток. Хотя бы примерные очертания, а окончательную форму можно придать ножницами.
Название: 9.jpg
Просмотров: 0

Размер: 52.4 КбШаг 8
Старый 15.09.2014, 16:09
Arinka Arinka вне форума
Местный
Регистрация: 23.04.2014
Сообщений: 207
По умолчанию
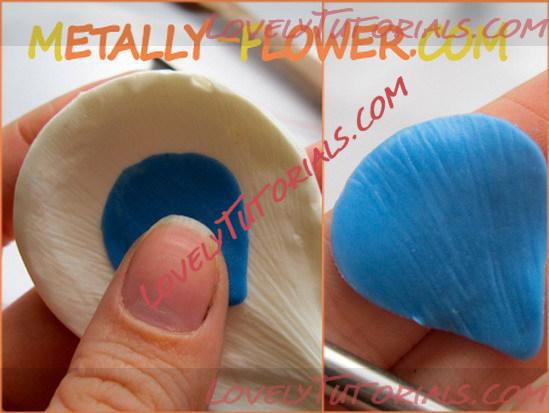
Шаг 9. Убираем каттер. Прокатываем стеком края лепестка, чтобы они получились тоненькими.
Название: 10.jpg
Просмотров: 0

Размер: 47.8 КбШаг 9

Шаг 10. Отпечатываем на молде текстуру. Он может быть любым универсальным, хотя если есть специальный для анемоны – это великолепно. Кстати, если вы хотите наделать дешевых и качественных текстур для разных листочков и цветов, загляните в МК по работе с силиконом для молдов.
Название: 11.jpg
Просмотров: 0

Размер: 55.0 КбШаг 10

Уместно использовать вайнер, чтобы на обратной стороне не осталось гладкого рисунка или отпечатков пальцев. Но я поспешила и пренебрегла этим
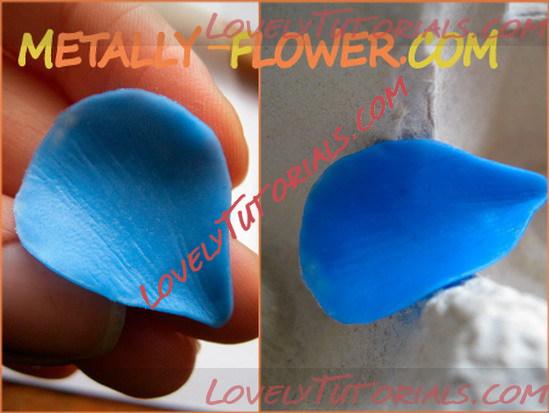
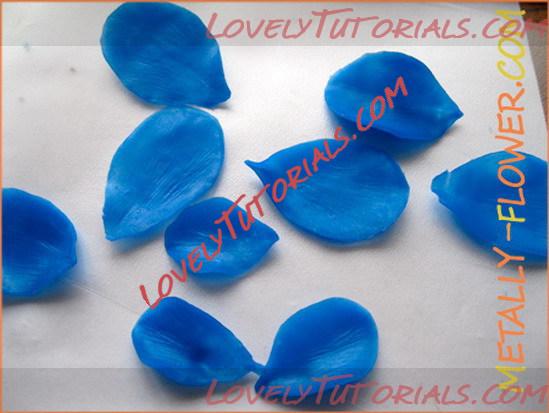
Шаг 11. Оставляем сушиться лепесток на картонной яичнице, придав ему изогнутую форму. И повторяем операции, пока не сделаем столько лепестков, сколько нужно.
Название: 12.jpg
Просмотров: 0

Размер: 54.5 КбШаг 11

Шаг 12. Для одного цветка я слепила 10 лепестков (на фото их меньше)
Название: 13.jpg
Просмотров: 0

Размер: 55.9 КбШаг 12

Сборка анемоны из холодного фарфора

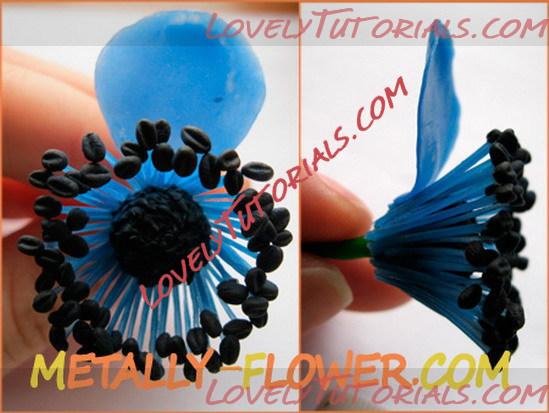
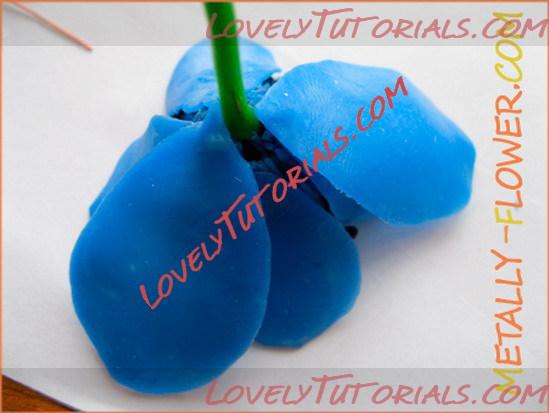
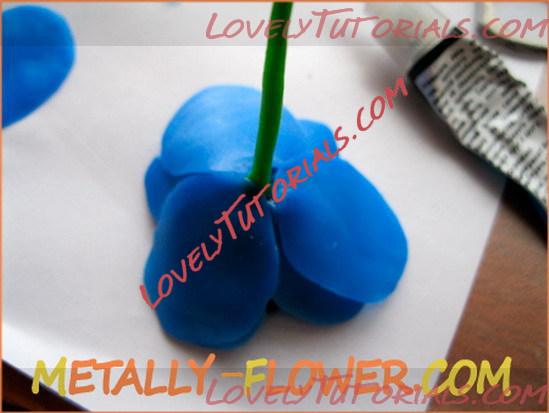
Шаг 13. А теперь приклеиваем лепестки (подсохшие снаружи, но внутри еще мягкие). В первом ряду четыре штуки. Вообще лучше посмотреть, как они расположены у живого цветка.
Итак, наносим на кончик лепестка секундный клей и прижимаем к серединке.
Название: 14.jpg
Просмотров: 0

Размер: 63.4 КбШаг 13

Шаг 14. Аналогично поступаем со вторым лепестком.
Название: 15.jpg
Просмотров: 0

Размер: 59.2 КбШаг 14

Шаг 15. Приклеиваем третий лепесток.
Название: 16.jpg
Просмотров: 0

Размер: 53.8 КбШаг 15

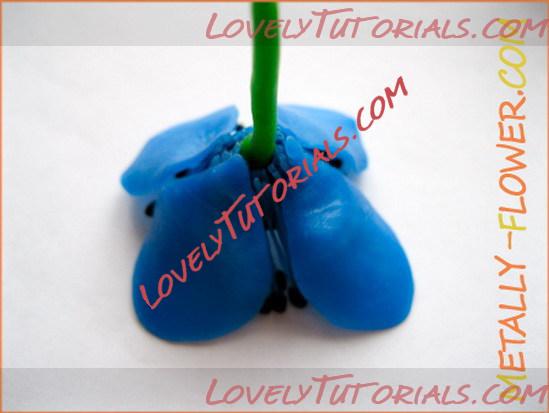
Шаг 16. Приклеиваем четвертый лепесток – вот вид с изнанки.
Название: 17.jpg
Просмотров: 0

Размер: 36.7 КбШаг 16

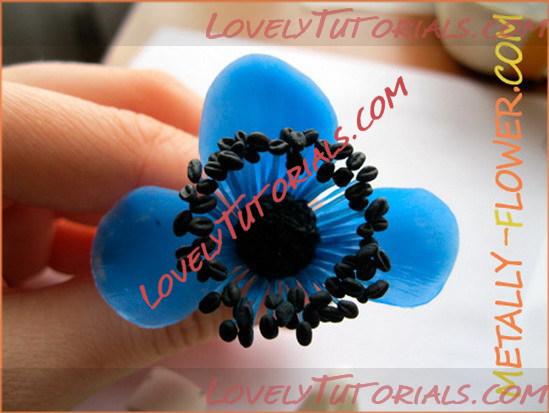
Шаг 17. А теперь второй ряд – три лепестка с равными углами между ними, как у лилии.
Название: 18.jpg
Просмотров: 0

Размер: 43.7 КбШаг 17
Старый 15.09.2014, 16:10
Arinka Arinka вне форума
Местный
Регистрация: 23.04.2014
Сообщений: 207
По умолчанию
Шаг 18. И третий ряд – три лепестка в шахматном порядке по отношению ко второму ряду.
Название: 19.jpg
Просмотров: 0

Размер: 46.7 КбШаг 18

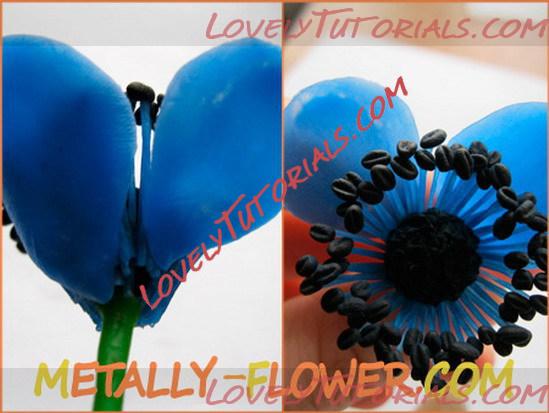
Всё! Уместно подвесить цветочек вверх ногами на полчаса, а потом наоборот поставить в стаканчик, чтобы опустившиеся лепестки распрямились. Так после полного высыхания у анемоны будет красивая форма. Если она чем-то не устраивает, это легко исправить под струей пара: как, читайте в статье Выравниваем лепестки цветов.
Вы можете приклеить лепестки иначе: у анемон они расположены очень интересно и в каждом цветке по-разному, так что строгих правил нет.
Тонировка анемон из ХФ

Высохшие лепестки нужно затонировать: я использовала сухую пастель сиреневого и синего оттенков. К сожалению, не удалось сфотографировать цветок так, чтобы это было видно.
Пастель дает матовость, особенно красиво это выглядит на тычинках: будто на них настоящая пыльца!
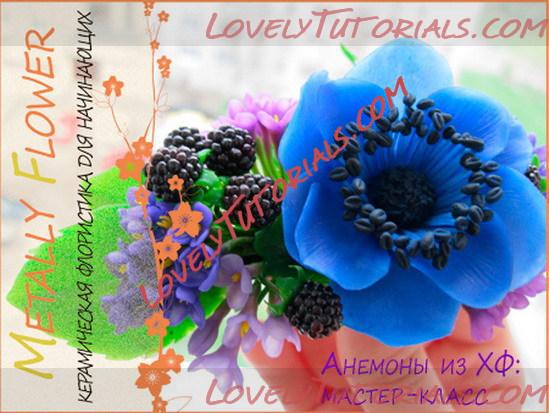
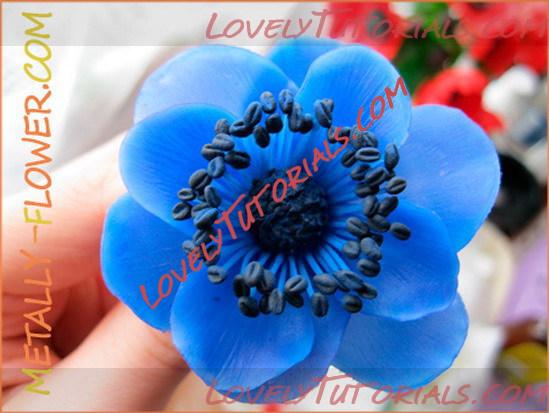
Вот, какой получился цветочек.
Название: 20.jpg
Просмотров: 0

Размер: 65.2 Кб
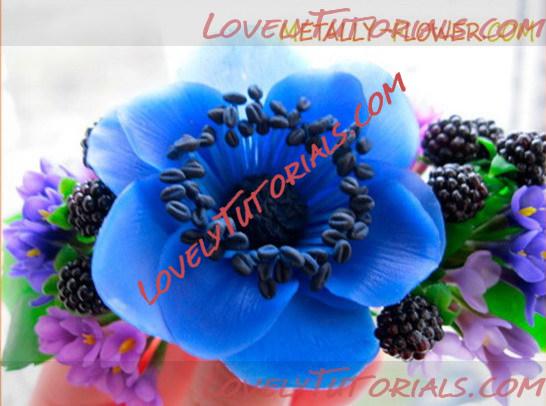
А это он в составе заколки с ежевикой и сиренью трех сортов.
Название: 21.jpg
Просмотров: 0

Размер: 62.5 Кб
anemone, anemono, anemoon, anlegget, anläggning, anémone, armado de los ramos, arranjo, artesanatos passo a passo, augalas, baking, biljka, bitki, bloem, bloemen, blomma, blommor, blomst, blomster, blume, blumen, blüten, blütenpaste, boeket, bouquet, buchet, buket, bukett, bukiet, buquê, cake decorating, cake decorating techniques, cerâmica plástica, chiodi di garofano, clavo de olor, clous de girofle, cloves, cold porcelain, cold porcelain figurines, cold porcelain flowers, confeitando bolos, csokor, cukrinių gėlių, curso completo de flores, curso de modelado, cvijet, cvijeće, decoracion de pasteles, decoración de tortas, decorare le torte, decorazioni, deko fondant, dekorace na dort, dekoracija, dekoracije, dekorasyon, dekorácie, el abc del armado de ramos, fimo, fimo flowers, fiore, fiori, fleurs, floare, flogistica, flor, floral inspirations, flores, flores azucar, flores e folhas, flori, floristics, floristik, floristikk, floristique, florística, flower, flower paste, flowering plants, flowers, flowers on a wire, folhas pintadas, fondan, fondant, fondente, fotopostup, gum pasta, gum paste, gum paste flowers, gumpaste, gumpaste flowers class, gėlė, gėlės, hand painting, handmade, handmodelliert, hideg porcelán, hladno porculan, how to, how tцветы на проволоке, impianto, kaldt porselen, kallt porslin, kalt porzellan, kasvi, kolde porcelæn, koud porselein, kukka, kukkakimppu, kukkia, kvetina, kvety, květina, květiny, kwiat, kwiaty, kylmä posliini, kytica, leaves, les anémones, making sugar flowers, mazzo, modellierpaste, modelləşdirmə, modelovanie, modelování, modelowanie, montando, motivtorten, nelken, növény, oasis o esponja de floristeria, pap, paso a paso, passo a passo, passo-a-passo, pasta flexible, pflanze, plant, planta, plante, plantes, plantă, plukė, pocelana fria, polymer clay, polymer clay flowers tutorial, porcelaine froide, porcelana fria, porcelana fría, porcellana fredda, postup klinček, postupak za ukrasavanje, puokštė, ramo, rastlina, rece porţelan, rododendron, rostlina, roślina, sasanka, schritt für schritt anleitung, schritt-für-schritt, sculpey flowers, sculpting, simple, soğuk porselen, stamens, steg for steg, step by step, step-by-step, strauß, studený porcelán, styrofoam, sugar cane flowers, sugar cloves, sugar flower, sugar flowers, sugar flowers for cake decorating, sugar paste flowers, sugarcraft, sugarpaste, sukker art, tecnicas de decoracion, tecniche, thai flowers, torte, torte decorate, torten dekorieren, torti, trin for trin, trin-for-trin, trinn for trinn, tutorial, tutorijal, ukrašavanje torti, uožkabarzdis, uputstvo za dekoraciju, virág, virágok, vrtna anemona, vuokot, wedding cake, wedding cakes, windröschen, wire, zawilec, zimno porcelany, zuckerblumen, ดอกไม้, सजा केक, मॉडलिंग, モデル, イチリンソウ属, çiçek, çiçek modelleme, šalto porceliano, 建模, 裝飾蛋糕, 银莲花属, əsmə, 진달?, κρύα πορσελάνη, μπουκέτο, ανεμώνη, αζαλέα, λουλούδι, λουλούδια, φυτό, кветка, кветкі, квіти, квітка, куст, гвоздика, ветреница, полимерная глина, полевые цветы, пошагово, природа, мк, моделиране, майстер-класи, маршмеллоу, мастика, мастер-класс, анемона, анемоны, азалия, азалія, букет, завод, листья, лепим цветы, лепка, ліплення, рослина, растение, растения, украшение тортов, украшение торта, свадебный торт, сахарная мастика, сахарный клей, уроки прикрашання, студен порцелан, торт, фимо, флористика, флора, холодного порцеляни, холодного фарфора, холодный фарфор, халоднага фарфору, цветок, цветочная паста, цвете, цветя, цветы, цветы из полимерной глины, цветы из холодного фарфора, цветы на торт, шаг за шагом


©2022 Lovely Tutorials
Content Relevant URLs by vBSEO