Method
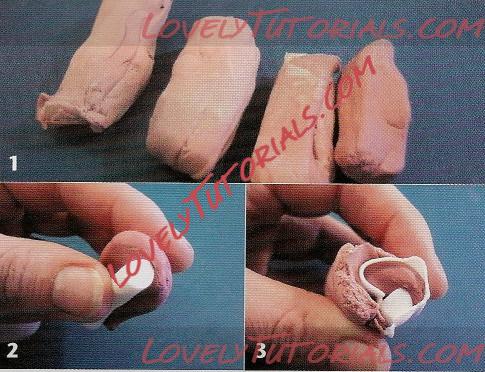
1 Using either the technique described for making cooked beef, or just by eye, prepare several shades of pink meat mix by adding gradually more of the foundation colour mix 2 L also add the tiniest bit of grey for authenticity, but this is optional.
2 To make a narrow cylinder of foundation colour mix 2, wrap a piece of darker pink clay, to represent the muscle, around the outside of the cylinder, approximately a third of the way round the cane.
3 Wrap this section with a very thin sheet of foundation colour mix 2. Carry on adding muscle, increasing the size as you go. By way of a guide -and it won't be the last time I mention it - do work from life. Look at a leg of ham. The muscles do not have to be absolutely accurate, just follow the basic idea that a leg has a few small muscles taking up one-third of the joint, and a couple of larger ones. The smaller muscles tend to be slightly darker in colour.
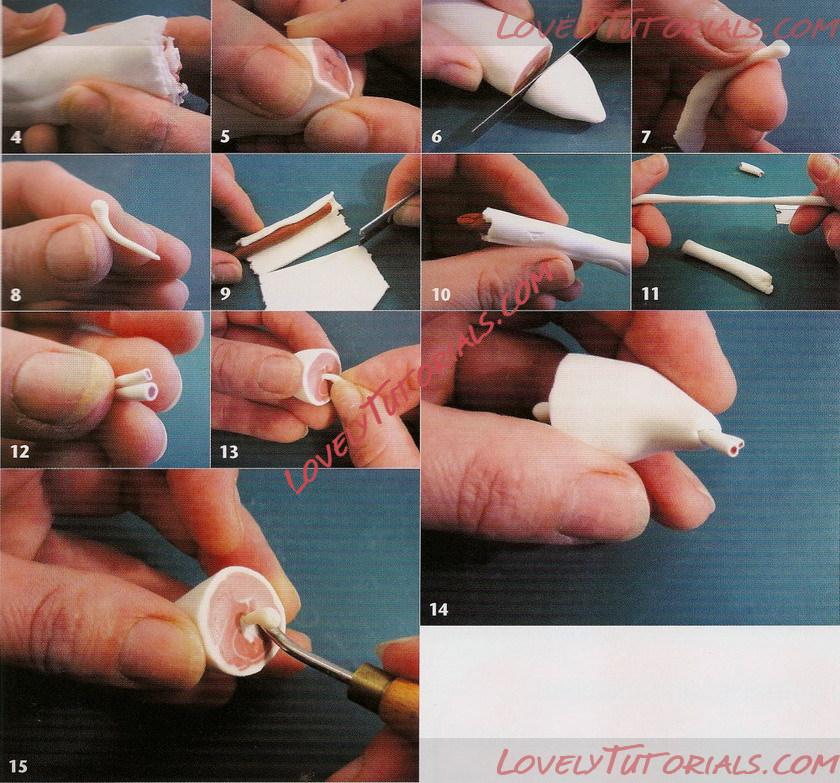
4 When you have added a couple of larger sections, fill in the other two-thirds. Wrap the whole cane with a slightly thicker skin of foundation colour mix 2. Lengthen your cane in the normal way. The finished cane should be approximately 2-2.5cm in diameter.
5 Narrow the end of the cane to a blunt point. You may need to trim the end off a few times to neatly enclose the meat part and the white.
6 Cut a thin cone of day from the cane 2.5-3cm long. Put this section of clay to one side.
7 and 8 Make up the bones and harden in the oven before inserting them into the ham. Make a tiny blob of white with a long, pointed tail by rolling the material between the thumb and the forefinger. The blob should measure approximately 3mm in diameter. The length of the point is less critical since most of it will be pushed into the ham joint.
9 and 10 Make the two
leg bones for the other end by wrapping a little basic meat mix with a sheet of foundation colour mix 1.
11 Lengthen this cane until it is only about 3cm in diameter. Cut off a piece and lengthen it a little more, so that it is only about 2mm in diameter.
12 Make a pair of bones, one from each of the canes. Squeeze them together into a point at one end and harden them in the oven with the ball joint bone.
13 Once hardened, push the ball-ended bone into the front of the ham.
14 Push the other bones into the opposite side of the ham joint.
15 If there is a big gap left by pushing the bone in, fill it with a little of the foundation colour mix 2.
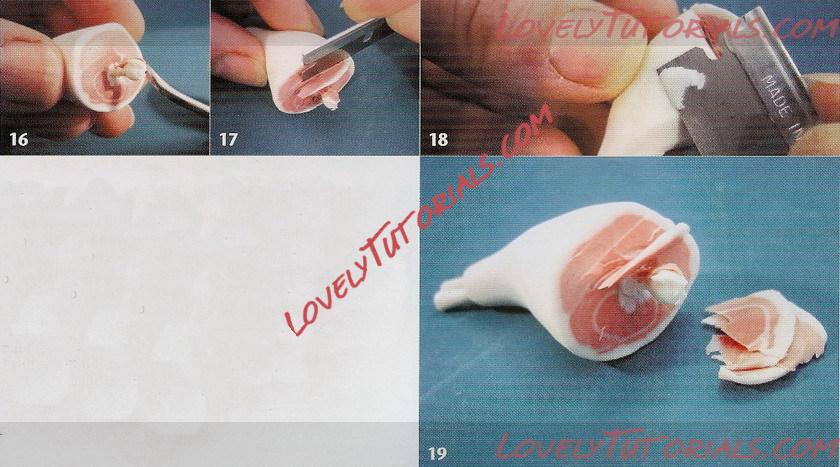
16 Carefully cut a tiny nick into the ball joint. Add a little of the ham mix or pink bits trimmed off from your work to the ball joint end. These should resemble ragged bits of ham and fat clinging to the severed bone.
17 Cut a slice of ham halfway down but leave it attached to the joint, slightly curled over as though it is being carved.
18 You can carefully trim
the fat a little to add to the tealism.
19 To display your ham, cut a few slices from your original cane to appear as if they have been cut from the joint, ready to serve.
