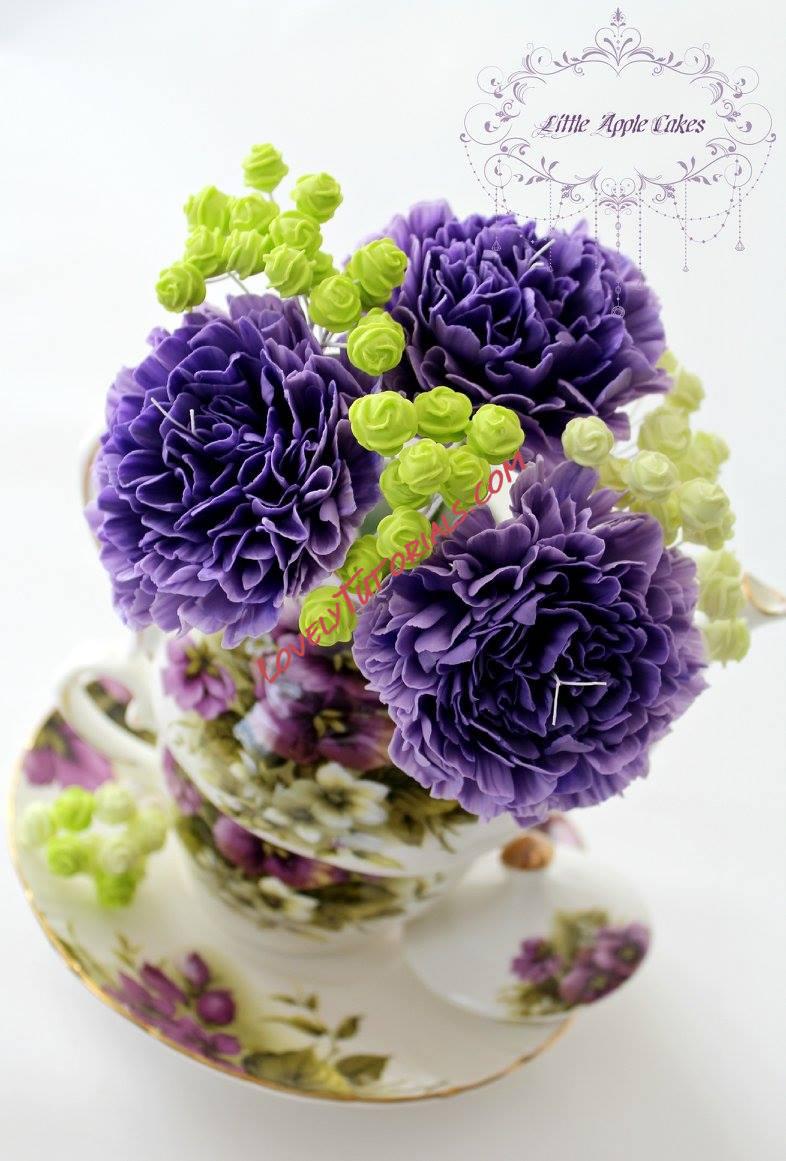
Огромная благодарность Little Apple Cakes за Мастер-класс
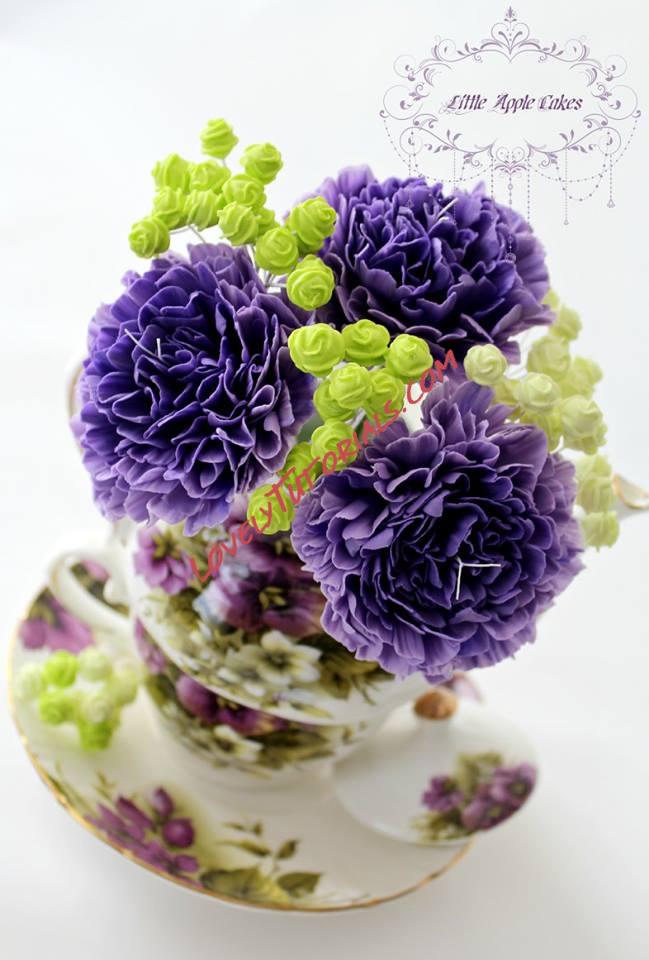
NOTE: If you are planning to make an ombre carnation (I think those are the prettiest) try adding everything from a pea size to a blueberry size piece of white gumpaste (to the original color) for each layer.
Also don't forget to steam the flowers, it will make the centers more dark and give the flowers that “wow” effect.
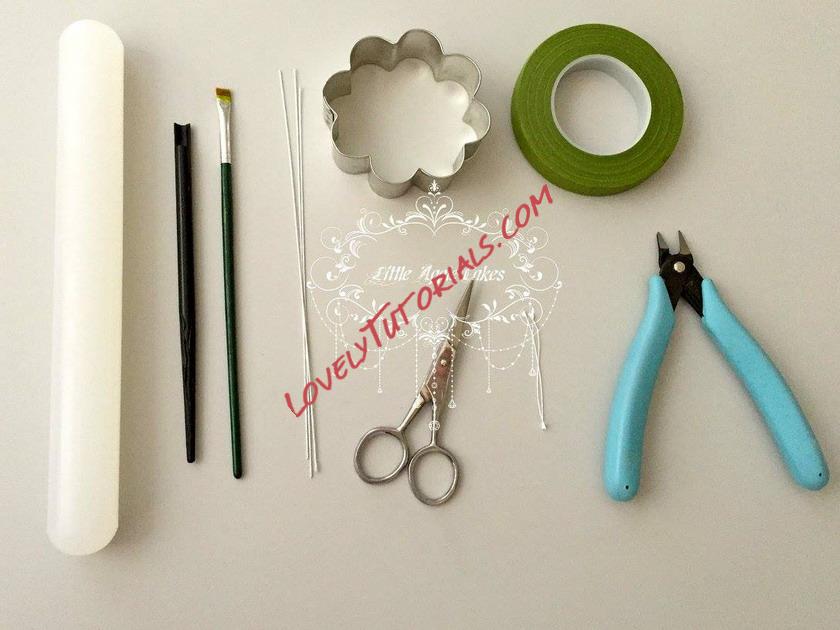
For this tutorial you will need:
~ Rolling pin,
~ Veining tool or a paint brush,
~ 20 gauge wire,
~ Flower cookie cutter,
~ Small scissors,
~ Floral tape,
~ Pliers,
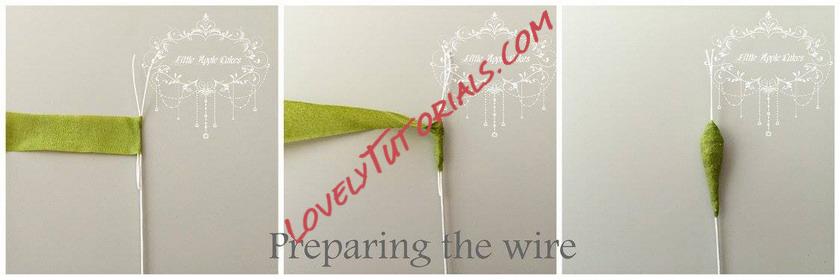
Preparing the wire:
Start by removing anthers on each side of the stamen and taping two “naked stamens” to the wire. Honestly I think adding stamens is optional, they look great both with and without them.
Make an upside-down cone by twisting the tape couple of times where you want it to be the thickest.
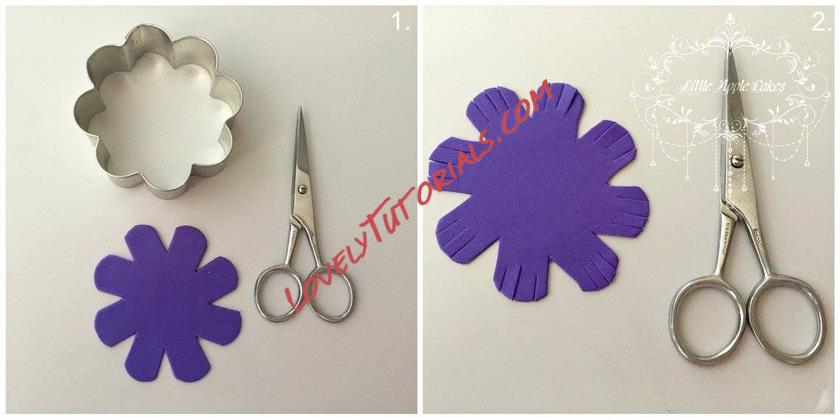
Photo 1:
Roll out gumpaste to 2 mm thickness and cut out a flower using the cookie cutter.
With the help of scissors cut a V shape in between each petal.
NOTE: You don't want the gumpaste to be too thin or thick, 2 mm is a perfect size. You will get great ruffles and it will not look too bulky.
Photo 2:
Make three cuts on each petals, dividing petals in four sections each.
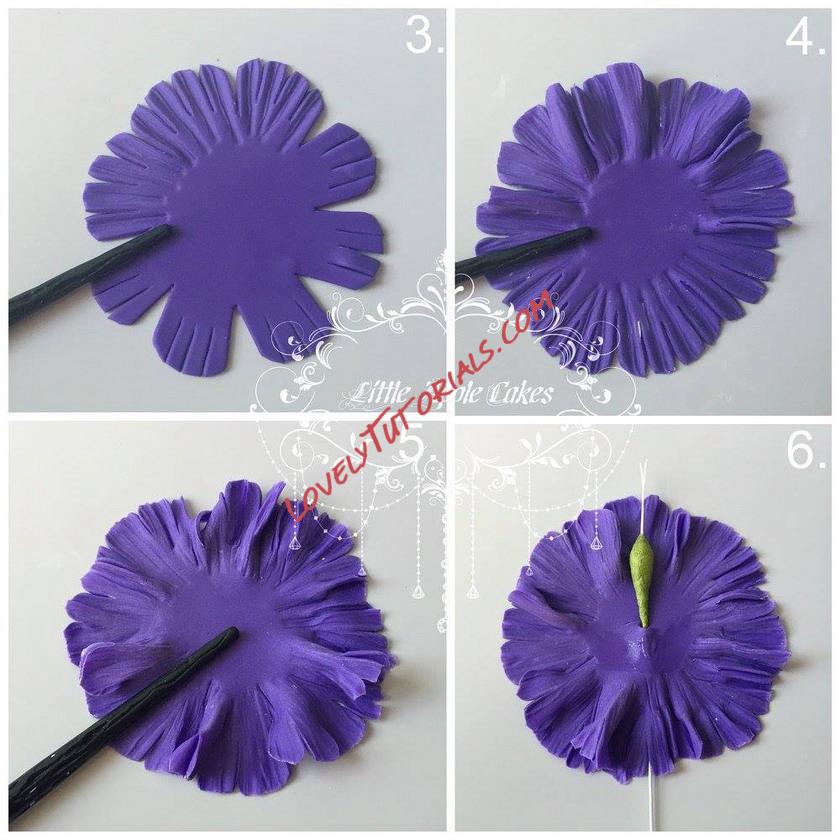
Photo 3:
Using vening tool or a back of a paint brush start thinning the petals, you will thin each layer three times.
First time press the veining tool in the middle of each petal section.
NOTE: I like the thickness of the veining tool or the back of the paint brush, toothpicks are too thin and will ruffle the petals too much.
Photo 4:
Second time press the veining tool in the middle and rock it back and forth to thin out each section and make it wider.
Photo 5:
Third time thin out the edges of each section of petals. Don't forget to move the petals around otherwise they will glue to each other.
Photo 6:
Thread the wire trough the middle of the layer all the way up to the thick taped center.
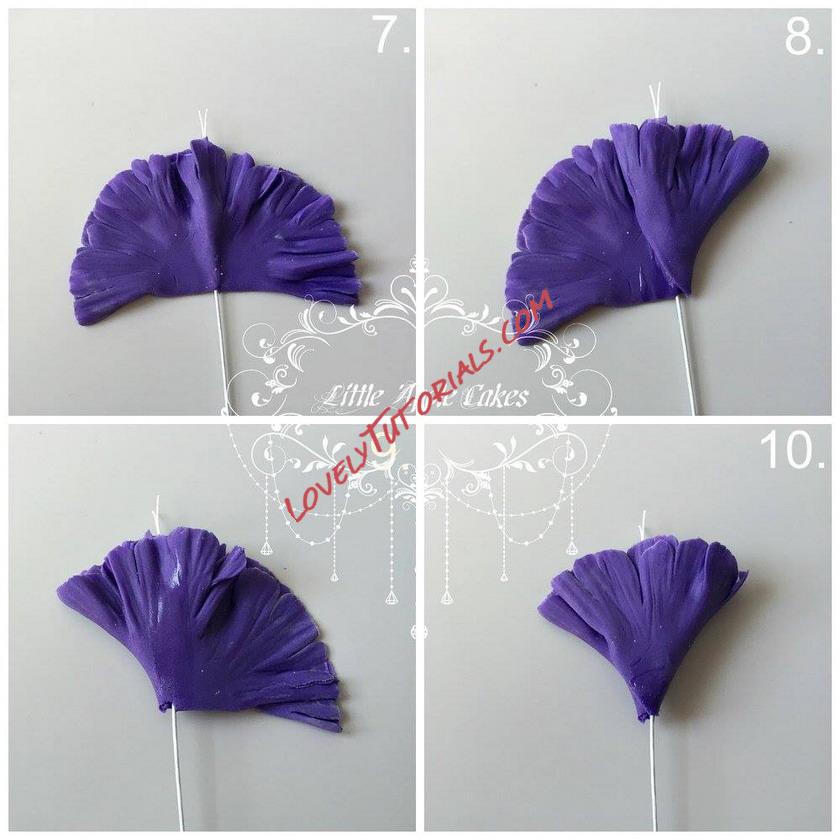
Photo 7:
Add just a little bit of gumglue/water and fold the layer in half, secure the layer by pressing it around the center. Try to keep the wire in the center.
Photo 8:
Add some gumglue in the middle of the layer and fold one side of the layer so that edge meets the middle.
Photo 9:
Turn the layer on the other side and repeat step 8, fold the layer so that edge meets the middle.
Photo 10:
As you can see it's pretty flat.
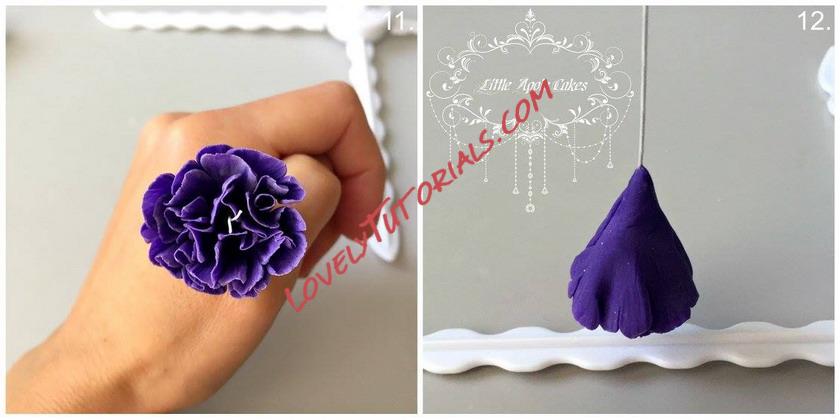
Photo 11:
Place the flower in your hand just like on the photo and cup it around, shaping it to more round instead of flat. Make sure you can't see the green middle, you can manipulate petals and move them around to close the center more.
Photo 12:
You will dry your carnation upside-down trough the whole process. Leave to dry 24 hours or at least over night. You want this first layer to be totally dry because it will be the support for all the other layers, and it needs to be able to take the weight.
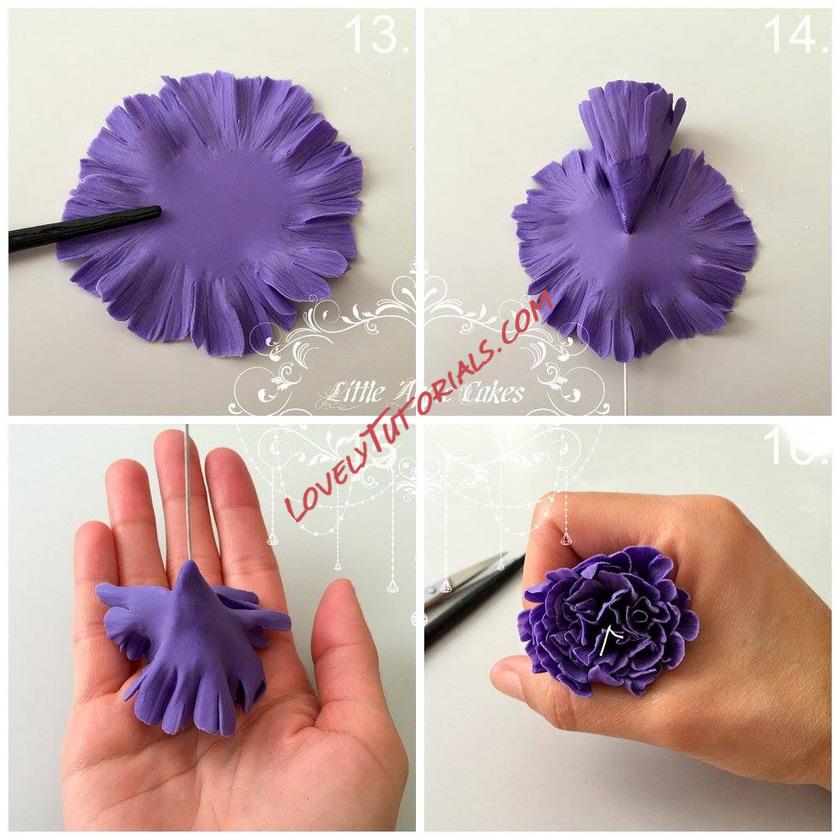
Photo 13:
All my carnations have 5 layers.
You will cut and thin all 4 remaining layers the same way you did the first one.
Photo 14:
The only difference between the remaining 4 layers and the first one is that you will drape the remaining layers on top of each other instead of folding them.
Photo 15:
This photo shows you how to drape the second layer on top of the first one. It's normal to get some small folds while draping second and third layer.
Photo 16:
Use the same method as you did with the first layer, cup the flower between your thumb and pointer finger and shape it if needed.
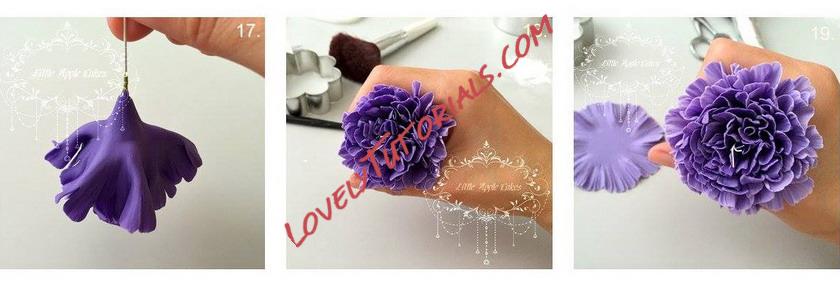
Photo 17:
Third layer. As you can see there are still some small folds here and there but the flower is getting bigger and by fourth layer you will not have any folds at all.
Photo 18:
Cupped third layer.
Photo 19:
Cupped fourth layer.
