Огромная благодарность Felicity and Krystle за Мастер-класс
 Materials needed:
- Soft pink gum paste
- Stacked, filled and iced cake
- Soft pink ribbon
- Covered cake board or a cake stand
- Edible glue
- Quilting / stitch tool
- Small sharp
- Parchment paper
- Pen
- Scissors
- Royal icing or melted white chocolate
- Food safe long nose pliers
- 2 x dowel rods, long cake pop sticks or wooden skewers (cut to around 1″ taller than your cake)
- Plastic wrap
- Paintbrush
 Step 1:
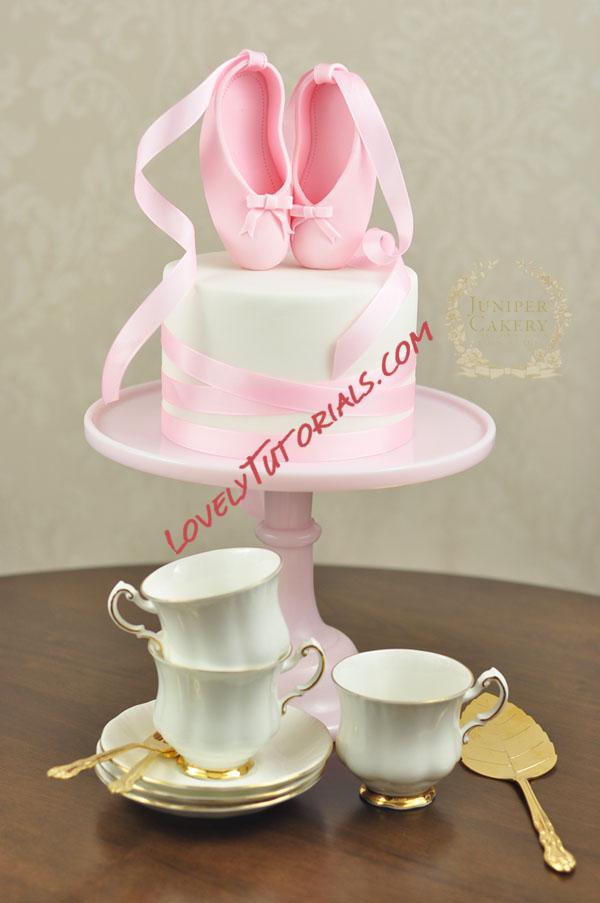
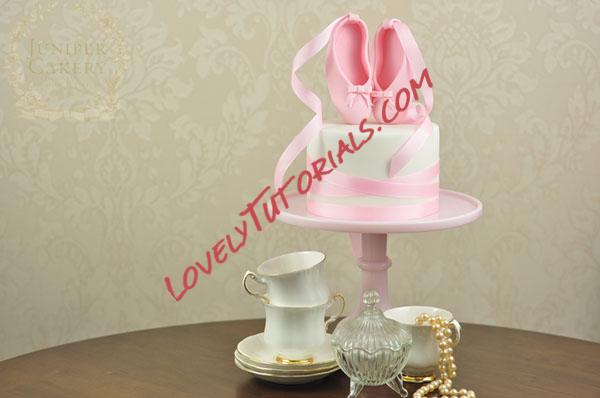
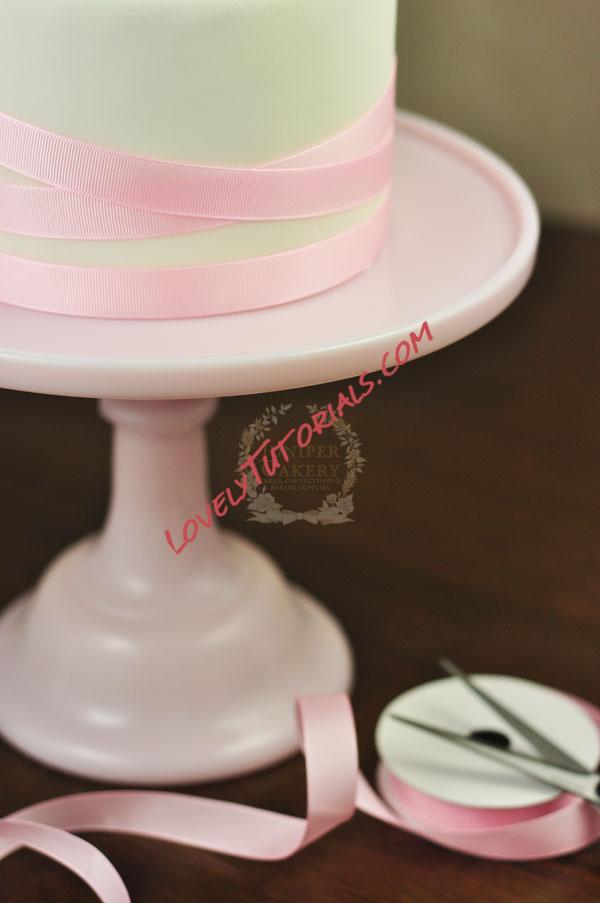
Take your covered cake and wrap some pink ribbon around to mimic the look of tied ballet slippers! We attach our ribbon down onto the cake’s surface with a little dab of royal icing or melted white chocolate to keep it firmly in place.
 Step 2:
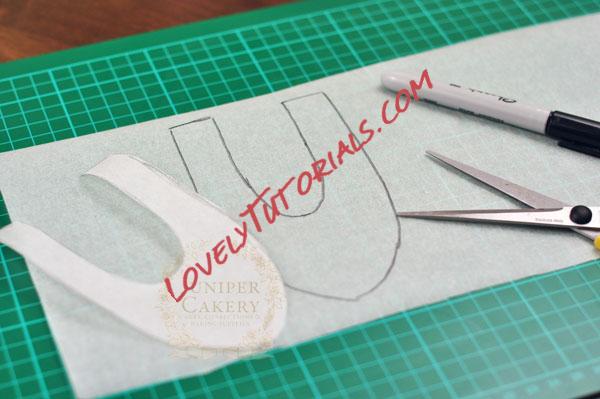
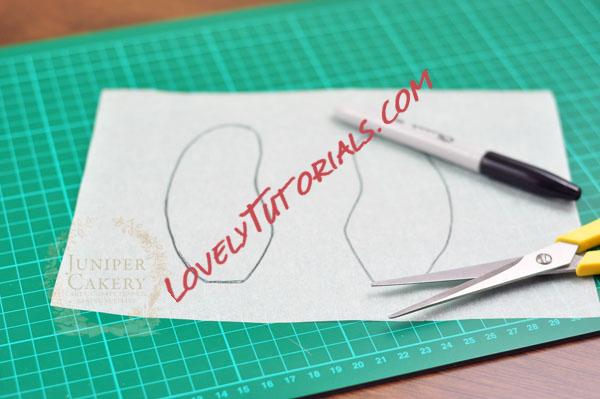
To make a pair of dainty ballet slippers begin with some parchment paper and a pen and work out a template. You can use a clean pair of children’s shoes to get a general shape of the soles, free hand sketch or use oval shapes to keep this step simple. For the outer pieces you will need a horseshoe shaped section longer and larger than the sole.
Note: This step does require a little trial and error but don’t be afraid to play around with the size and shape of the slippers until it works with the technique you’ve chosen.
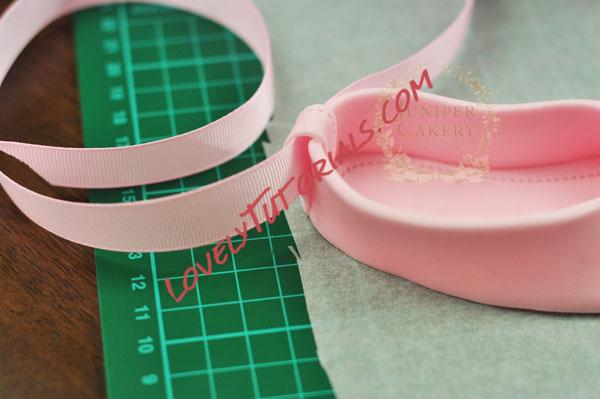
 Step 3:
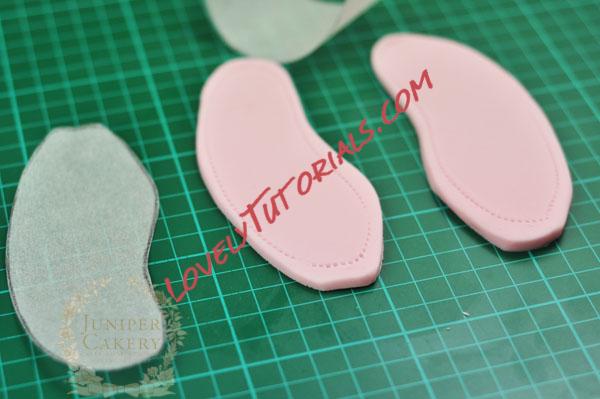
Roll out some soft pink gum paste to a thickness of around 4mm and carefully cut out your pieces.
Step 4:
Add some stitching detail to the inner section of the soles with a quilting tool.
 Step 5:
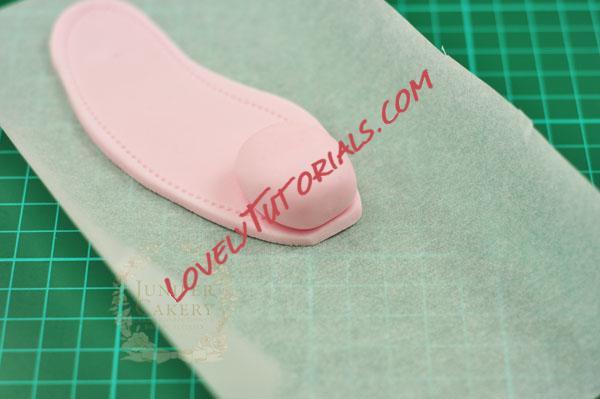
Roll two medium sized balls of soft pink gum paste and attach and mould these to the toe section of the slippers. These help add weight to the toes to help keep them en pointe once placed onto the cake.
The balls placed inside also help the slippers from caving in when being worked with as well as providing a good solid place for any dowel rods of skewers to be inserted into.
 Step 6:
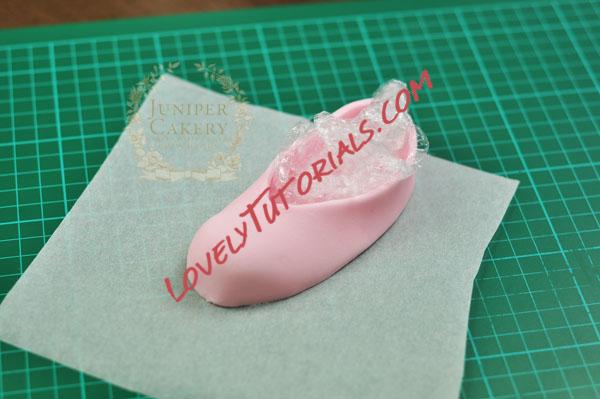
Paint edible glue around the outer edge of the soles and carefully drape and affix the upper section to the sole. Use some plastic wrap if desired to help pad out the slippers whilst they dry and set.
 Step 7:
Roll out a little more soft pink gum paste and cut out two slim rectangles for the heel. We utilised these pieces further by using them as small loops for actual ribbon to curl through; this was done to make the ribbon easier to remove when the cake is ready to cut. Placing the ribbon higher up on the ballet slipper also helps it to drape and tumble down the cake much better – a lovely aesthetic touch!
Step 8:
To finish the slippers create tiny gum paste bows or rosettes and attach with edible glue.
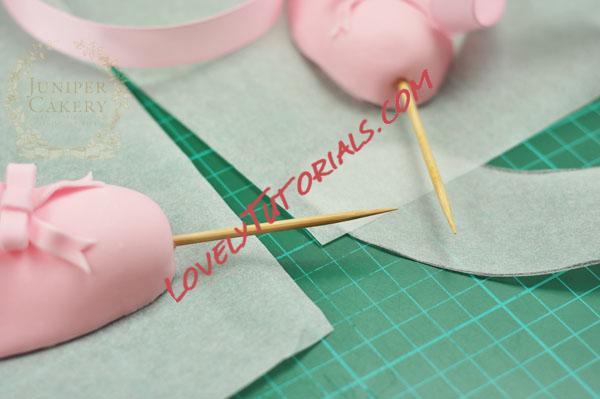
 Step 9:
To place and attach the slippers into the cake dip each stick in edible glue (you can also use royal icing or melted chocolate for a more firmer hold) and insert the ‘glue’ covered ends carefully into the tips of your slippers. Leave to set. Then carefully push into the top of your cake using the long nose pliers – don’t push down on the actual slippers or they’ll begin to break and cave in!
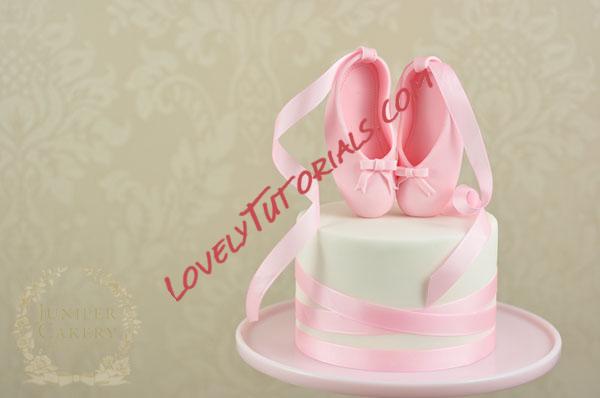
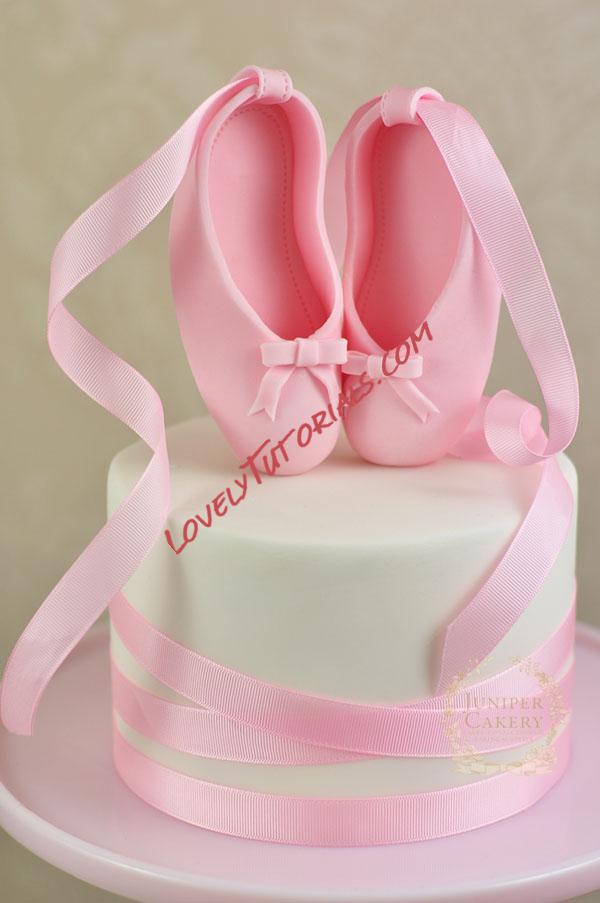 Step 10:
Finally, arrange and curl your ribbon around the slippers and cake for a pretty look. We generally wind ribbon around our fingers and hold for a few seconds to get a loose curl, but for more stubborn ribbon you can use a hair curling iron (be careful not to melt the cake or the gum paste ballet slippers though!).
