Огромная благодарность Автору Louise за Мастер-класс
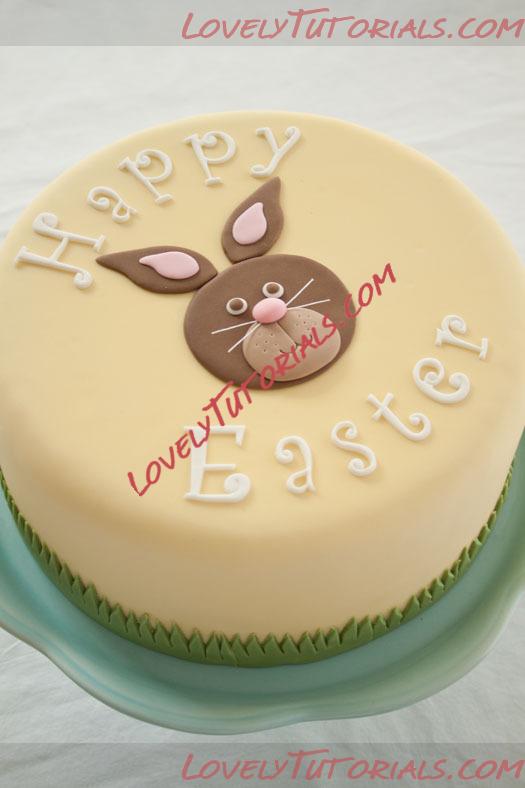
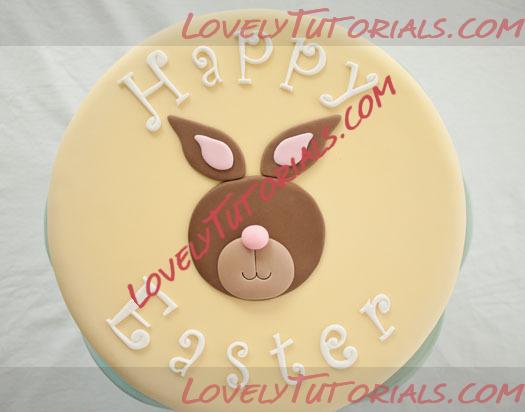
The last of my three Easter cake tutorials. A cute little Easter bunny cake! I have made a fondant grass border instead of a ribbon this time. This Easter bunny cake would be a fun project to make for kids, since the bunny is made using basic tools. If you like, you can add more decorations to the cake like small flowers and Easter eggs in the grass? Again, scale down the design to a smaller cake by leaving out the “Happy Easter” lettering on the cake.
This Easter bunny cake would be perfect together with my bunny cookie pop’s.
This is what I use:
10″ fondant covered cake (I have used Egg yellow from Americolor)
Rolled fondant icing
Food gel colors (brown, pink & green)
Fmm Funky Alphabet & Numbers + Funky Alphabet lower case set (Other types of lettering can be used instead)
Cutting wheels (PME) (Alternative, use a small pizza cutter)
Scallop and comb (PME) (Drinking straw can be used, if you don’t have such tool)
Small modeling tool knife (A table knife can also be used instead)
Modeling tool with a pointy end
Round cookie cutter 3″ (8 cm) (Alternative, use a drinking glass)
Small oval cookie cutter 1 1/2″ (4 cm)
Leaf cutters in two sizes
Edible glue + brush
Small rolling pin
Cornstarch for dusting
White flower stamens
Knife
Step 1:
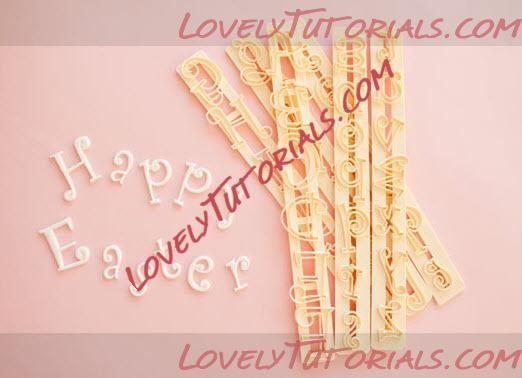
Dust your work board with cornstarch and roll out (in the size of a dinner plate) some of the white gum paste very thinly. Set a side and let it dry for 15 minutes. Dust the gum paste with cornstarch and cut out strips of fondant wide enough to cut out the Funky letters. Take one strip at a time. Press down the tappits and remove any excess gum paste. The letters should release easy if you tap the cutter on to your work board. A needle can be helpful, if it won’t release. Cut out 2 letters of each, in case of breakage. Set a side to dry.
 Step 3:
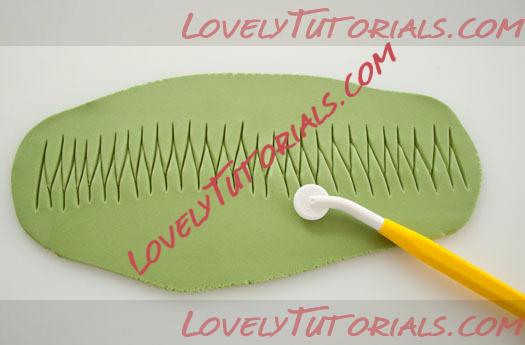
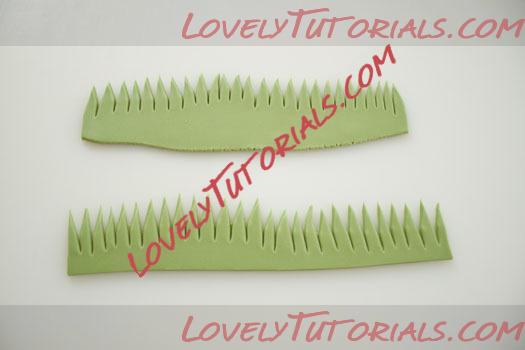
Color some fondant green. Roll it out, to a long strip. Next take your cutting wheel and start cutting up and down all the way down the middle of the fondant strip. It looks kinda like a zipper.
 Step 4:
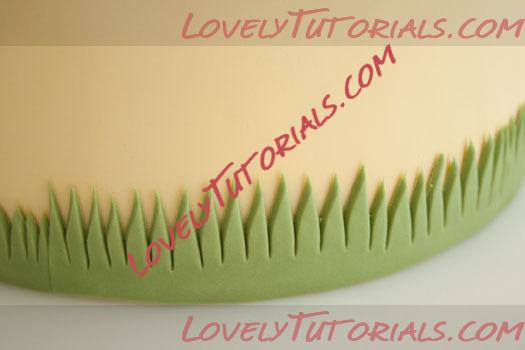
Trim the grass border with a knife and glue it on the cake in sections with edible glue.
 Step 5:
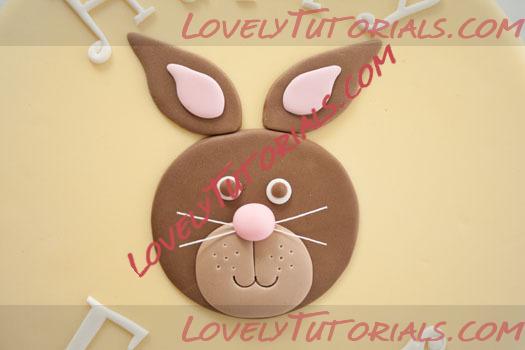
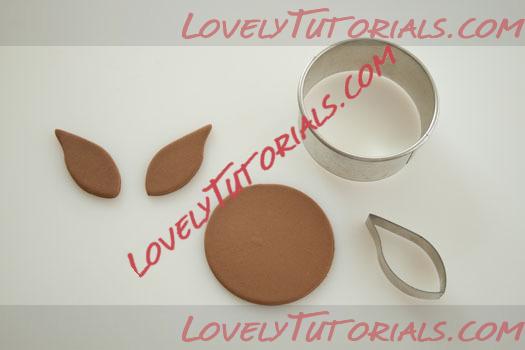
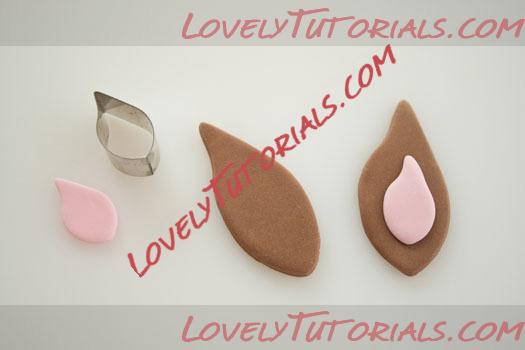
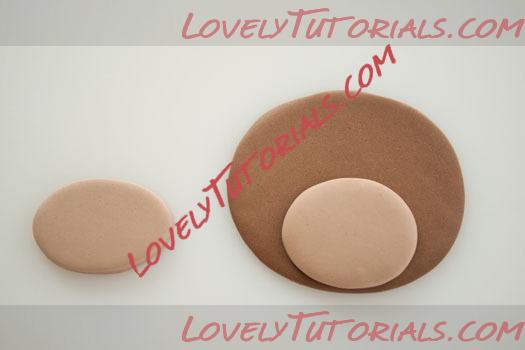
Color some fondant brown. Roll it out and cut 1 circle with the cookie cutter + 2 brown leafs (use the largest leaf cutter) for bunny ears. Shape the circle into oval shape. Smooth the edges with your finger. Color some fondant pink and cut out 2 small leafs. Glue the pink leafs on top of the brown leafs and smooth the edges with your finger.
 Step 6:
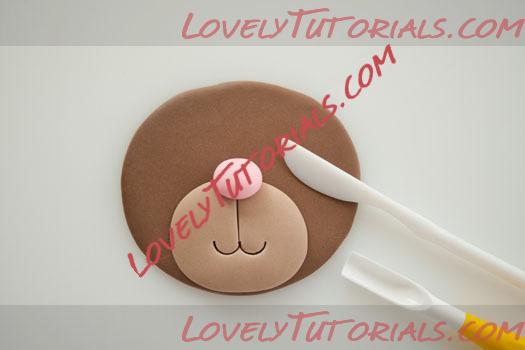
Next knead a little white fondant with a bit of brown fondant. Roll out and cut out using the oval cutter. Glue it on the “bunny head” and smooth the edge. Roll a small ball of pink fondant for the nose and glue it on. With a knife and a scallop tool make the mouth indentation.
 Step 7:
Place the bunny on the cake but do not glue it in place at this stage. Place the lettering on the cake and when it sits OK glue on the bunny (Do not place the bunny too close to the top letters like I did) Turn over one letter at a time and brush a little glue on the back and attach to the cake.
 Step 8:
Give the bunny a couple of whiskers (flower stamens) Use a pointy tool on the cheeks and make eyes out of white fondant with a tiny brown fondant ball on top.