Огромная благодарность Автору Beth за Мастер-класс
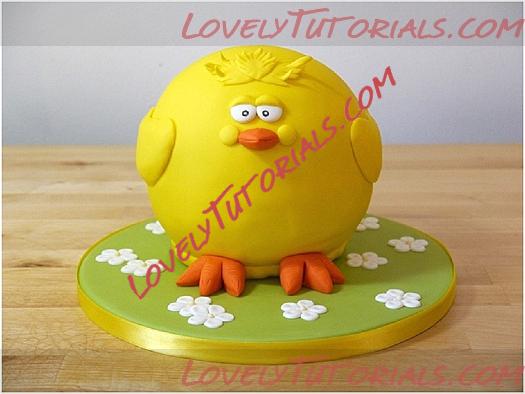
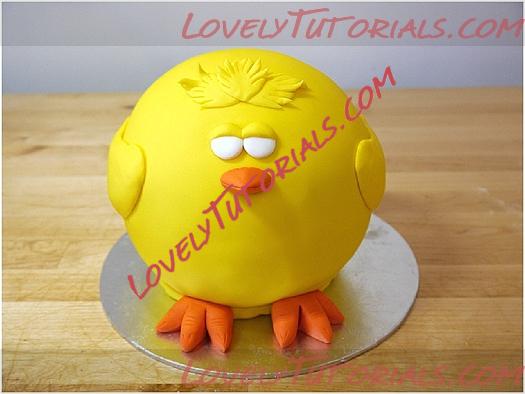
Spring is finally on its way and Easter is just around the corner, so this leads me to think about all the cute baby animals that we will soon be seeing. To celebrate, I have created a round Easter chick, which is a lot of fun to make and look at. You can also make it as simple or as detailed as you like, depending on how much time you have.
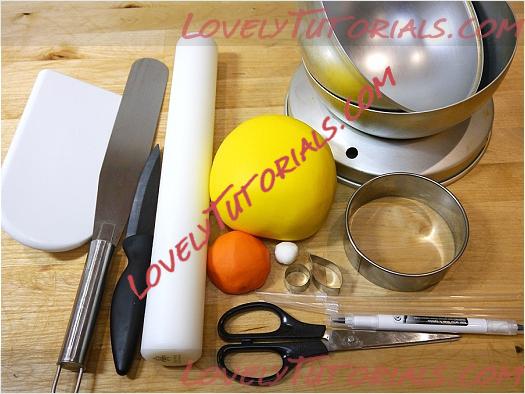 This is what I used:
Cake batter, enough for a 7″ round sponge cake
Jam, buttercream and white chocolate ganache
Ball tin (I used a 6″ diameter ball tin)
Baking sheet
Baking parchment and trex/butter to line the tins
3 x drinking straws plus scissors to trim
Thin cake board, 1″ narrower than diameter of your cake
Knives for cutting cake and icing, plus a palette knife
Rolling pin and cornflour to dust work surface
Orange and yellow fondant icing, plus a small amount of white for the eyes
Small circle cutter and black edible pen for eyes
Optional extras: large circle cutter for wings, leaf cutters for details
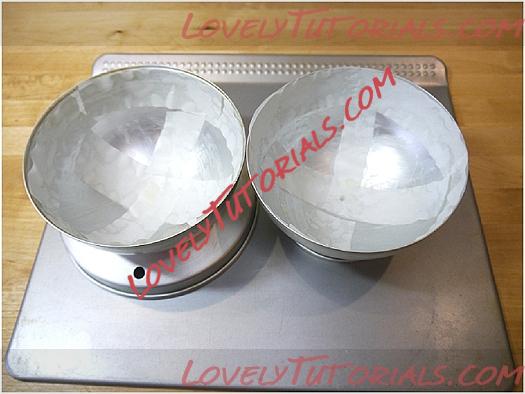
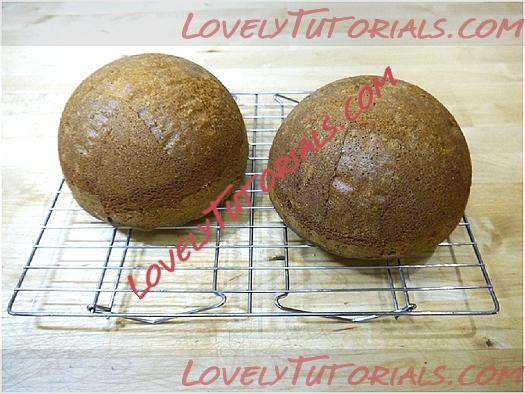
Step 1:
Grease and line the two halves of the ball tin. I find that a strip around the edge and a cross through the centre is enough to release the edges and prevent the middle from sticking, but you may wish to add more strips, depending on the nature of your cake mix. Place the two tins in oven-proof supports (I used the large ring from the 6″ ball tin plus a small ring from a 4″ ball tin) and place on a baking sheet.
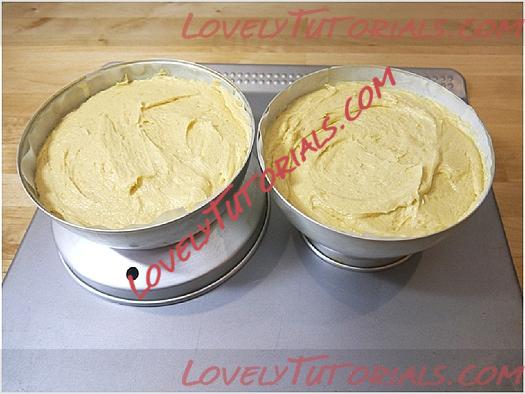
 Step 2:
Fill the tins with cake batter, leaving at least several centimetres/an inch gap at the top. You want the cake to rise to the top of the tins but not overflow. Cook the two cakes as per your normal recipe, ensuring they are fully cooked throughout. Turn them out onto a cooling rack.
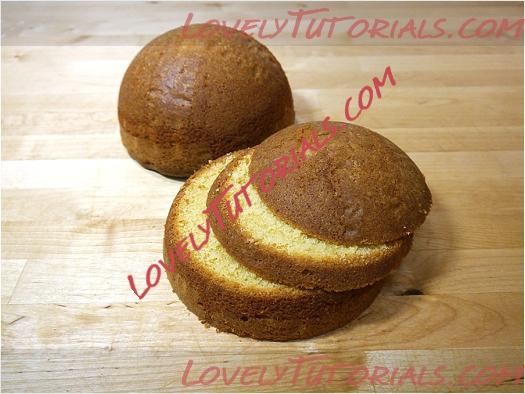
 Step 3:
Once the two halves are cooled, remove the strips of baking parchment. Faint lines will have been created in the sponge but this won’t affect the overall round shape of your cake.
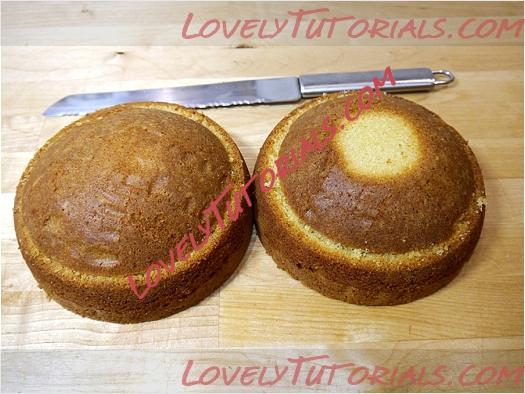
 Step 4:
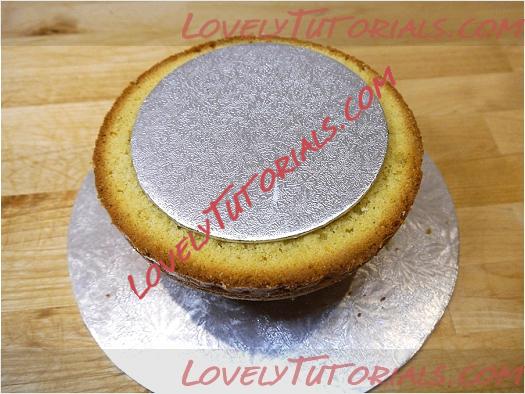
Using a bread knife or cake leveller, cut the flat surfaces of the two halves so that, when put together, they form a slightly squashed ball (this leaves room for filling in the middle). You may want to leave the cake like this but I prefer more filling so I also removed a thin section from the middle of each half. Using your bread knife, trim the curved top off one half so that it will sit flat on the cake board (you don’t want your cake to roll away!). You should now have four pieces of cake that do not quite fit together.
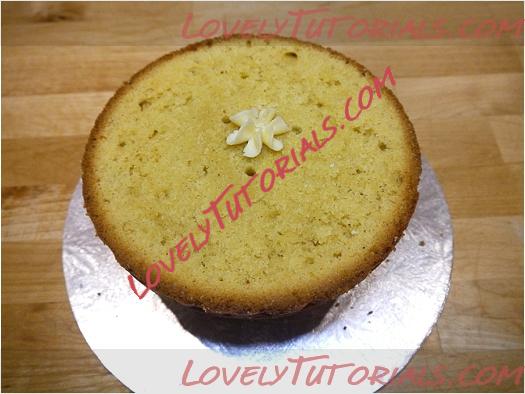
 Step 5:
Taking the lower half of the ball (the one with the flat bottom), add jam and buttercream between the two pieces and sandwich together. To increase stability and prevent the weight of the top half from squashing the bottom half and distorting the ball, push three drinking straws into the cake, near the centre, and trim level with the cake. Add a small amount of buttercream and stick the thin cake board in place on top.
 Step 6:
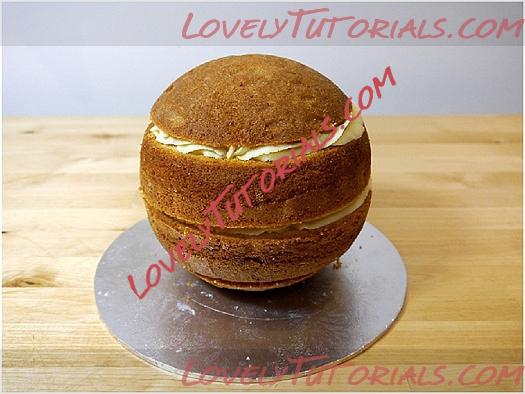
Add jam and buttercream to the second half of the cake and place on top of the first half, securing with a layer of buttercream. You now have a ball of cake. Place in the fridge for 30 minutes or so to firm up.
 Step 7:
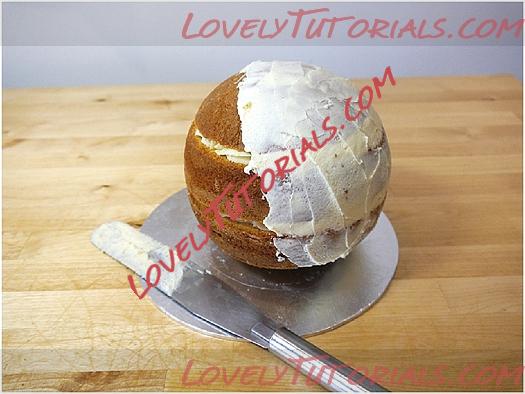
Crumb coat your ball. I started with a thin layer of buttercream to ensure that any gaps between layers were completely filled, then I covered the whole cake in ganache to hold everything in place. Place in the fridge again to set the ganache.
 Step 8:
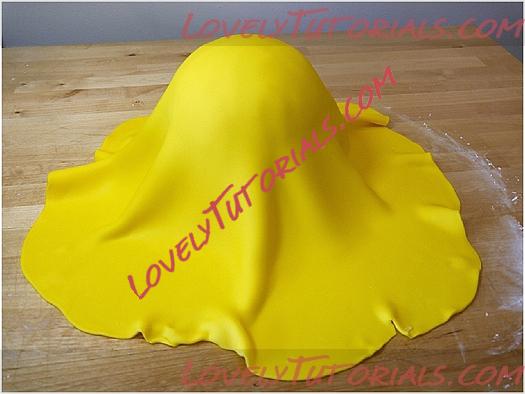
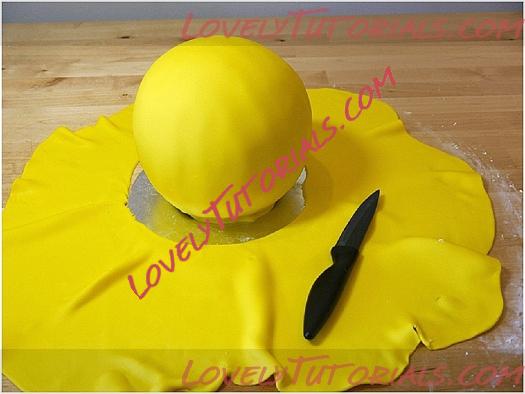
Wet your ganached ball cake using your preferred method (water/sugar syrup/thin buttercream). Roll out a large sheet of yellow fondant to a thin layer (2-3 mm). If your fondant is too thick, the weight will cause it to split at the top of the ball. Cover the ball with the fondant, straightening out the excess to prevent tears and creases.
 Step 9:
Gently smooth the fondant with your hands, working it over the curved shape. Start at the top and work your way downwards, being careful not to over stretch the fondant as you cover the lower half. When the ball is completely covered and your hands reach the table, trim the excess fondant with a sharp knife. Leave a little extra fondant at the very bottom so that you can create a neat edge.
 Step 10:
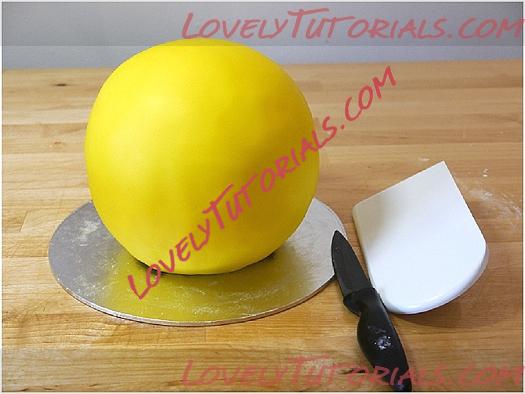
Using an icing smoother, gently smooth the surface, again working from top to bottom until you are happy with the result. Use your sharp knife to tuck in and trim any excess at the bottom to leave a clean edge.
 Step 11:
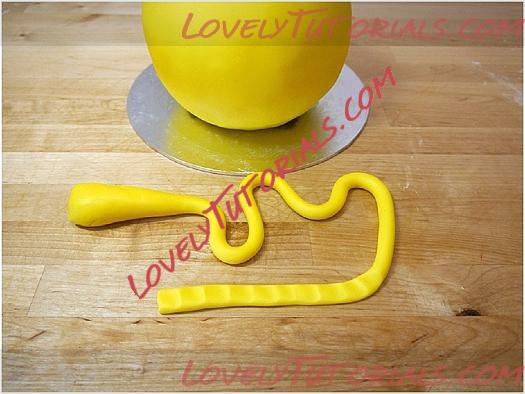
If you are not happy with the finish at the bottom of the ball, don’t worry, I have a solution! Chicks are feathery so you can create a feathery edge to the bottom of the cake by rolling a thin sausage of yellow fondant. Using your little finger, make impressions in the suasage to resemble feathers and then wrap the strip around the base of your cake. This will hide any mistakes and help to stabilize the ball.
 Step 12:
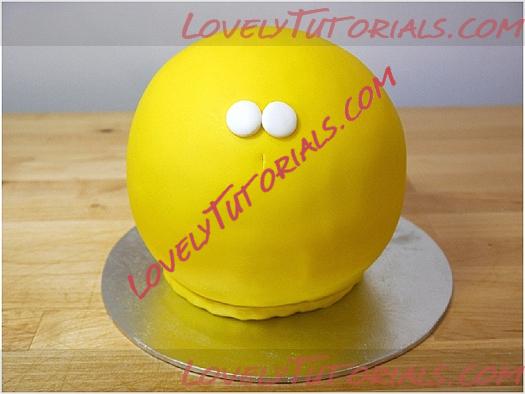
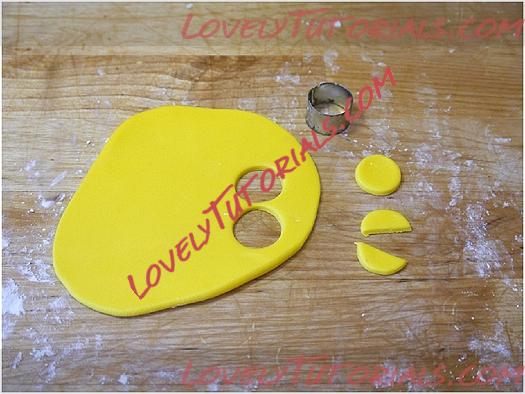
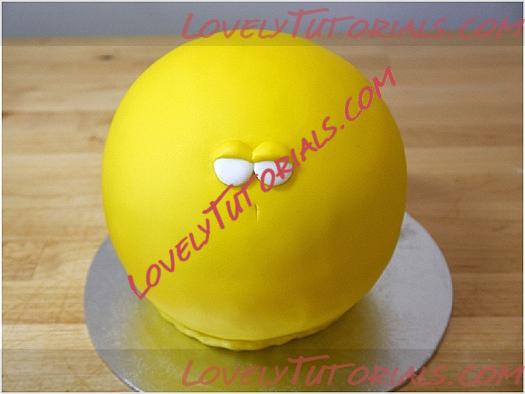
Using your knife, mark where you would like to place the face of the chick (I chose just above the half way mark). Roll out a thin sheet of white fondant and cut out two small circles for eyes. Stick these in place using a little water or sugar glue.
 Step 13:
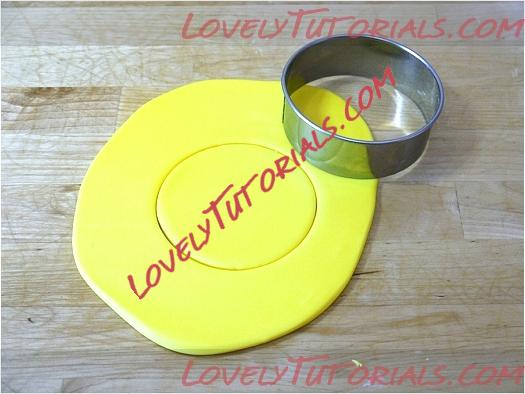
Using the same circle cutter, cut out a circle of yellow fondant and cut it in half. This will form the two eyelids. Soften and curve the edges with your fingers.
 Step 14:
Using water or sugar glue, place the two yellow semi circles onto the eyes, moulding the edges to completely cover the edge of the white circle underneath.
 Step 15:
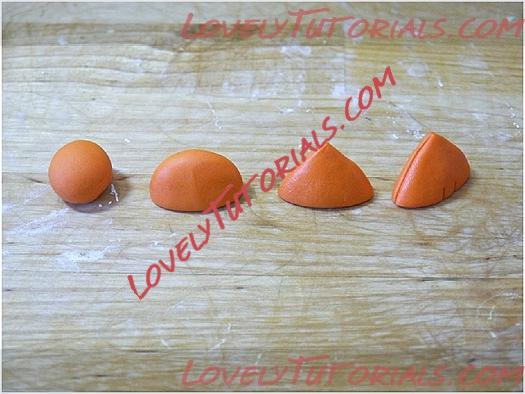
Mould the beak. Start with a small ball of orange fondant (approximately 15 mm in diameter) and pinch it into an oval with a flat side. Then mould the curved side into a point. Use your sharp knife to mark the mouth and nostrils.
 Step 16:
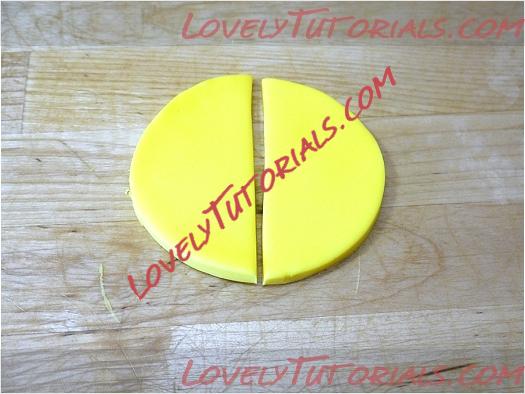
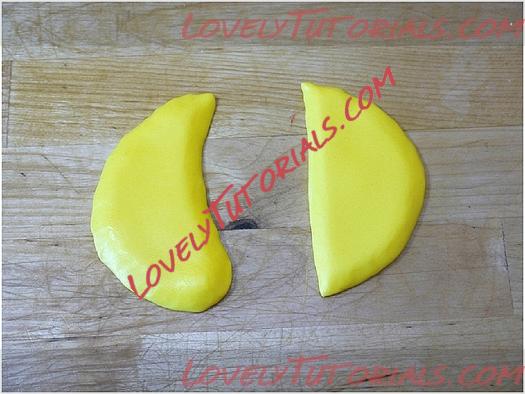
Make the wings. You can draw these free hand if you wish. Alternatively, use a large circle cutter to cut a circle of yellow fondant, then cut this in half with a sharp knife. Mould the edges with your fingers to create soft curves and press one corner inwards to create a curved end. Bend each semi circle slightly to create a curved wing shape, making sure that the two halves are mirror images of each other.
 Step 17:
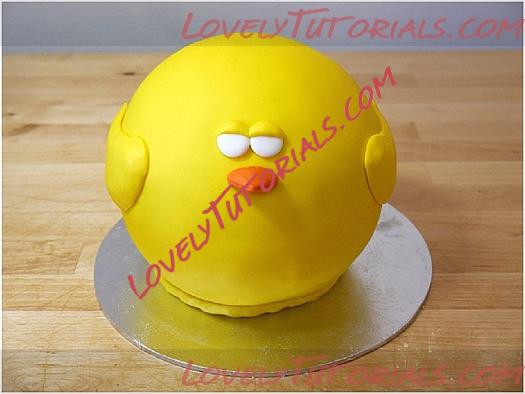
As before, secure the wings and beak in place, making sure that the wings are level and visible when the cake is viewed from the front.
 Step 18:
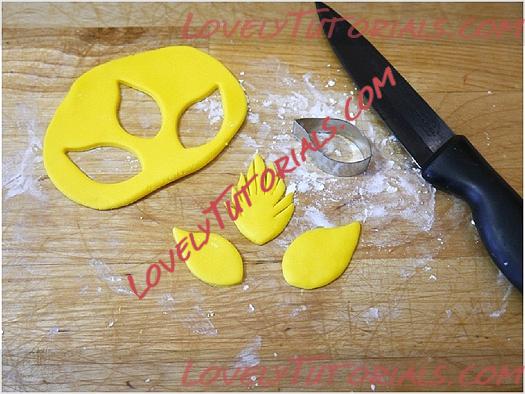
To add extra interest to the chick’s face and to create the look of feathers, make a fringe using a simple leaf cutter. Soften the edges of the leaf shape with your fingers, then cut slits with your sharp knife. Repeat three times to create three feathers. You can also use this method to create tail feathers.
 Step 19:
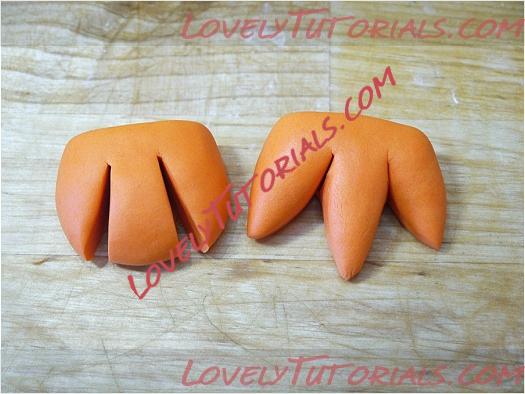
For the feet, roll two balls of orange fondant (approximately three times the size of the beak). Flatten the ball and cut off the curve from one side. Make two cuts into the curved side to create three toes. You can make all three toes the same size or, for a more realistic look, make the toe nearest the centre of the chick slightly larger than the other two.
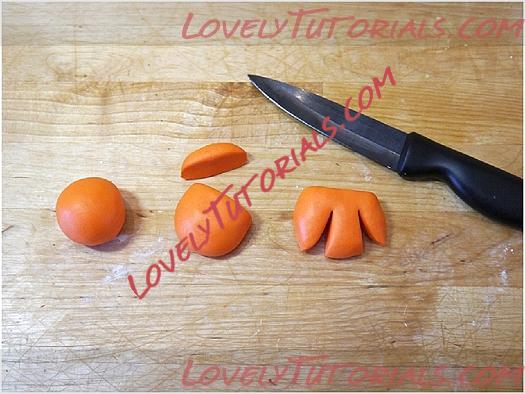 Step 20:
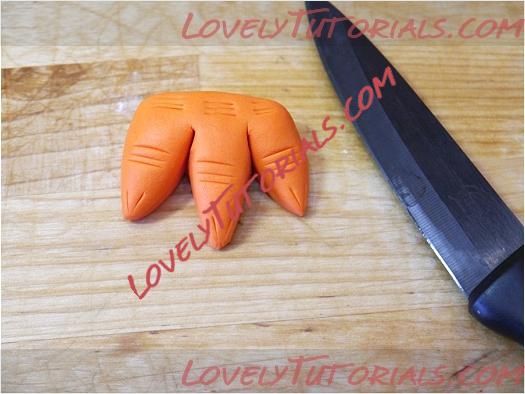
Smooth the edges of the toes so that they are curved and pinch them into points so that they resemble small carrots. Use your knife to score creases for knuckles, and make small triangular indentations at the ends for nails.
 Step 21:
Secure the fringe, feet and tail feathers in place using water or sugar glue. Bend some of the feathered edges of the fringe upwards to create texture and movement in the feathers.
 Step 22:
Using the black edible pen, draw rings onto the eyes for pupils. I have also added two small flattened balls of yellow fondant for cheeks, and I have placed the chick on a board covered with green fondant and simple white blossoms with yellow sugar pearl centres.

Happy Easter and Happy Caking!
