Огромная благодарность
Angie Scarr за Мастер-класс


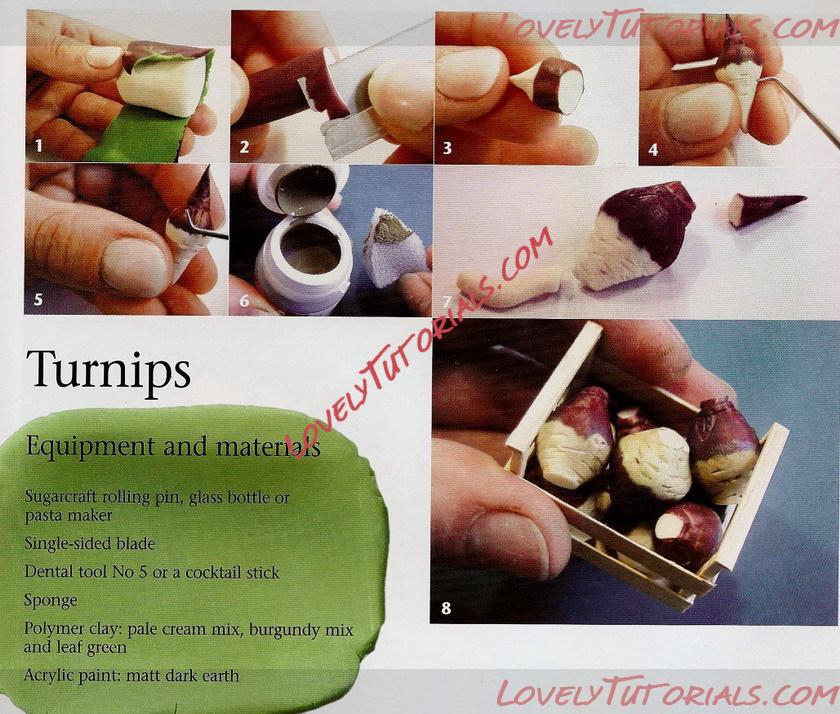
Method
1 Make a thin sheet of burgundy and leaf green clay by positioning the two sheets together and rolling until they are very thin. Wrap this skin around a cylinder of pale cream day.
2 Lengthen the roll to about 1.5 cm in diameter. Make a clean cut at one end, then, taking a blade, shave some of the outer skin from the first 5mm. To do this, roll the cane against the blade at a shallow angle. Do not cut towards any part of your hand. You should aim to just see a little green beyond the edge of the burgundy.
5 Nip together this cream-coloured end into a point, cut it off and work the other end into a burgundy-coloured turnip point.
4 Mark the lines in the root part of the turnip by scratching with your dental tool or cocktail stick.
5 Press the scars on the top of the turnip, including the leaf scars.
6 Dip a piece of sponge in earth brown acrylic paint. Working quickly, wipe the paint on and then straight off again so some of it collects in the grooves in the root.
7 Harden the finished turnips and then remove the top and bottom with a sharp blade. Be careful; you are more likely to cut yourself when cutting hardened clay than soft. Always cut downwards and away from yourself on a cutting board. If the turnip shape rolls about on your surface, steady it with a piece of Blu-tack before cutting.
8 Your completed turnips on display in their box.


