Огромная благодарность
Angie Scarr за Мастер-класс


Method
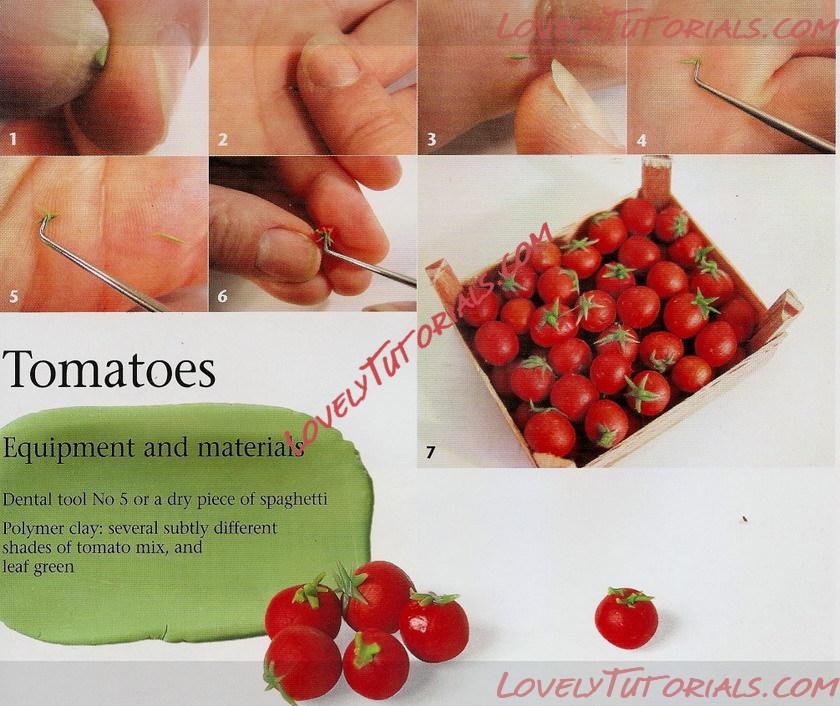
1 Condition your clay until it is really warm and soft. Nip off a minute piece of green clay for the stalk part.
2 and 3 Roll the clay gently over the palm of one hand with the index finger of your other. Another effective technique is to roll the clay downwards towards and, if possible, off the edge of your palm onto a ceramic plate or tile (avoiding any item that you might want to reuse for other purposes). If your hands are warm and soften the clay too much, try using the side of your hand instead of your index finger.
4 If your rolled piece of clay is too long, subdivide it with your dental tool and, employing a light hand, roll each piece again. You can make a lot of these little rolls of clay before you begin adding them to the tomato balls, or you can work one at a time, depending on your preferred approach.
5 Using your dental tool or the licked end of a piece of uncooked spaghetti) to pick up each piece of green clay, gently press against the centre of each strip. Using three strips, lay each piece across the next one to form a star shape.
6 Press star on to the top of each tomato.
7 When you come to pack your tomatoes into their vegetable box for an effective display, make sure you have a variety of differing sizes and shades of colour for added realism.


