Огромная благодарность Автору hanielas за Мастер-класс
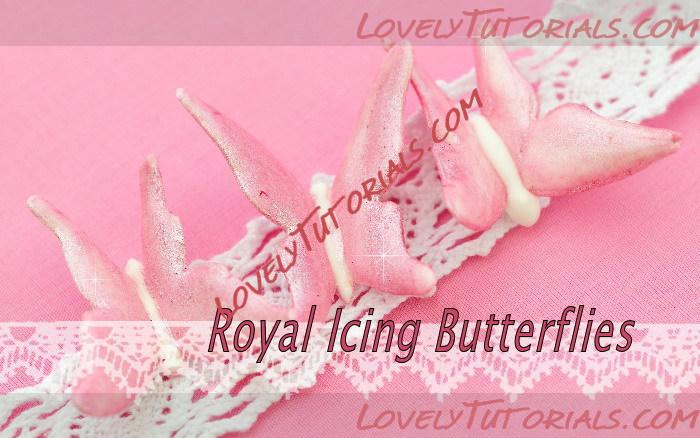 Royal Icing Butterflies
these "royal" butterflies won't fly away
they'll get eaten in less than a day
piped to make them look real and three D
delicate work required so obvious to me
© Iris Zuares
Creative works of Iris can be also
viewed on her flickr page eyewrisz
Butterflies are little magic of nature...I love them, few years back we visited
White River Gardens at Indianapolis Zoo. Each year from March to September the Hilbert Conservatory is filled with hundreds of free flying butterflies. Butterfly population increases during summer months, and there can be as many as thousands of these incredible creatures. We were lucky as we visited in August and there were about thousand of them, as we were told by a butterfly guard who carried a butterfly net with him and when somebody open the door and butterfly wanted to escape he would catch it and very gently release the butterfly into the Conservatory. Conservatory is filled with flowers and other plants, there are fruit stations to attract butterflies. Truly an amazing experience.
I decided to make a step by step tutorial on Royal Icing Butterflies. They can be used as edible decoration for your cupcakes, cakes, desserts.
Royal Icing Butterflies
- royal icing (
recipe): outline consistency and flooding consistency
- wax paper
- paper clip
-food coloring (optional)
-
luster dust (optional)
-small painter's brush (optional)
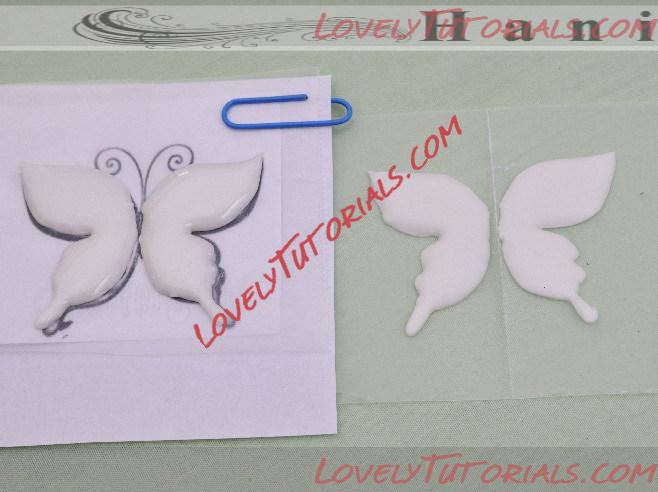
1.STEP- you need to make a template you will be using to make your butterflies.
Here I used an image of butterfly that I saved from the Birthday Card and the other one was printed from my computer.
2. STEP - using paper clip attach pieces of wax paper on the top of you butterfly designs.
3. STEP - prepare the royal icing, I used a simple sandwich bags to pipe, but you can as well use a piping bag with a tip or parchment cone. Remember to make an outline consistency and flooding consistency icings.Outline is always thicker than flooding. For flooding consistency follow a 10 second rule. Read more about
here. Fill two piping bags. I recommend using tip 1 or 2 for outlining and tip 3 for flooding.
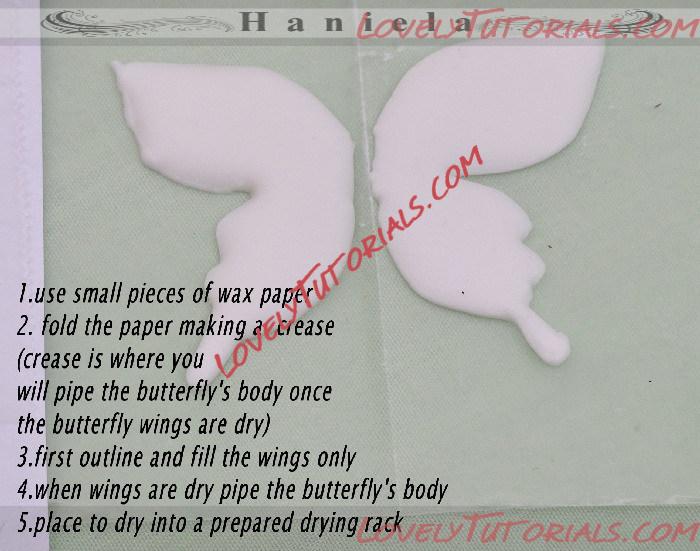
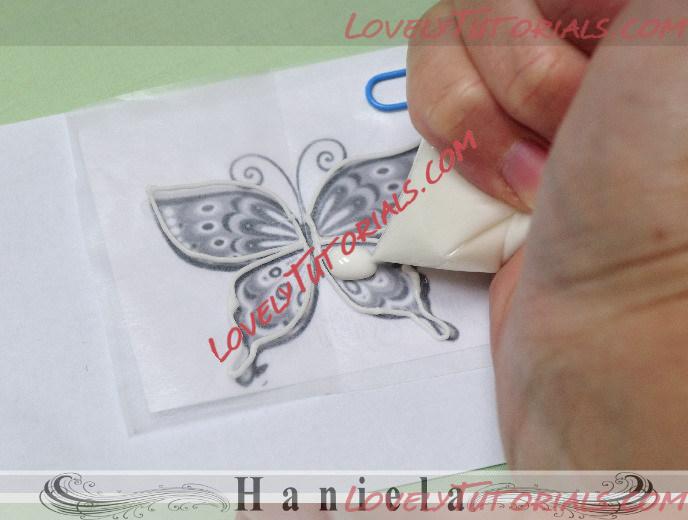
4.STEP - make outlines following your template
excluding body of the butterfly, you only want to make outlines for wings at this point, take care not to move the wax paper. When piping try to keep your elbow off the table. Be patient if you can't get it at first try, it is easy to wipe the icing off the wax paper and try again. :-)
5. STEP - using the piping bag with tip 3/again I used a sandwich bag for this step/ fill the outlined butterfly wings. Slowly move your piping bag over the butterfly and fill it with icing, if needed push the icing around with the tip.
 6.STEP
 - let it dry. When wings are dry, you can now pipe the body of the butterfly
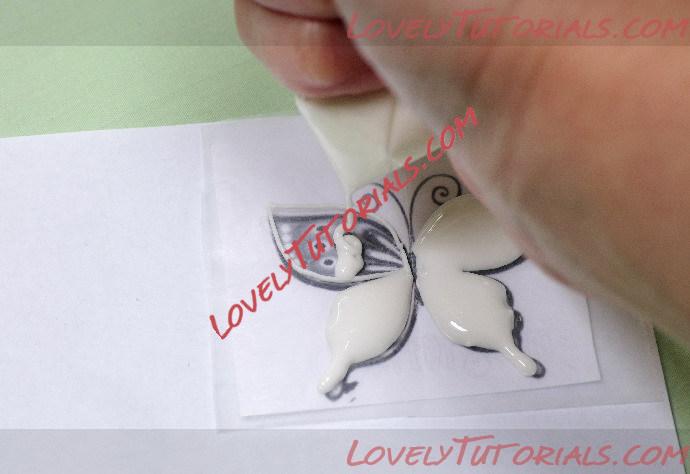
 7.STEP -
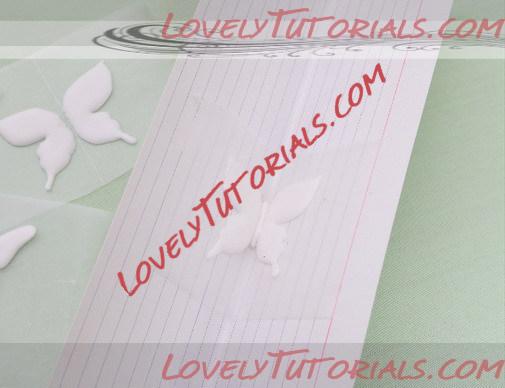
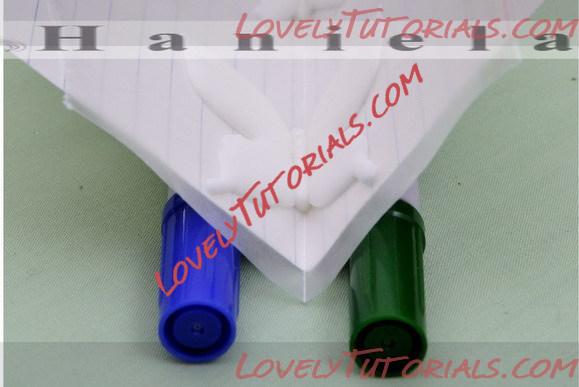
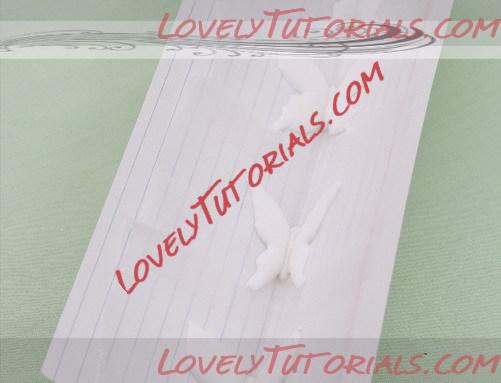
 once you have the butterfly's body piped, you want to immediatelyplace the butterfly to dry in the prepared drying rack. You want to dry the butterfly in such way so that the wings with the body are creating a V shape
.
I used a piece of thicker paper for this. Simple fold the paper to make a crease in the middle. I used two pens to balance the butterfly drying rack. Carefully place your butterfly so that the body is in the crease and let dry for several hours.
 8. STEP -
 little magic happens as you carefully peel off the wax paper...royal icing butterfly is born.;-))
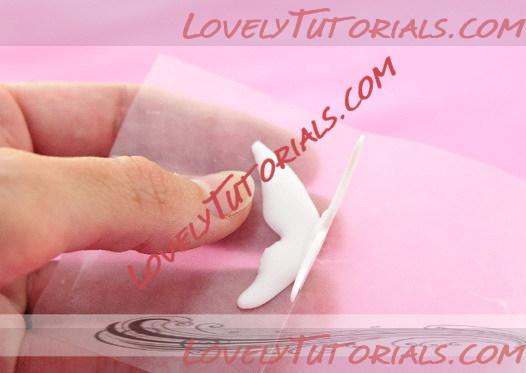
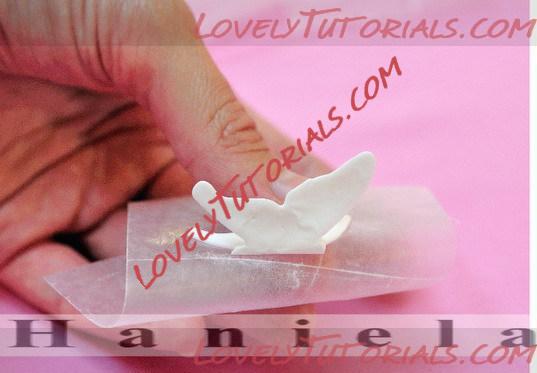
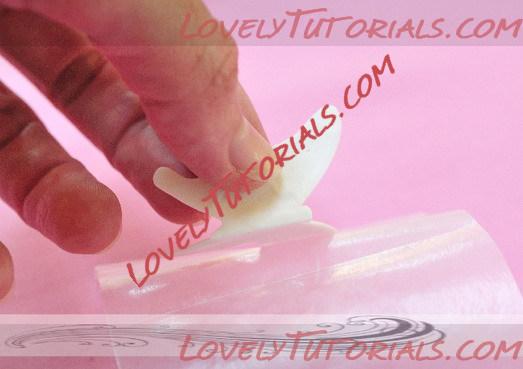
Be careful butterflies are fragile.
Royal Icing Butterflies can be stored for quite a long time, I had one stored in airtight container for a year, it was doing just fine.
Royal Icing Butterflies are extremely easy to tame...
There are endless variations for royal icing butterflies.They can be made using different colors, designs, sizes.
Royal Icing Butterflies make for a beautiful display when used as cupcake and dessert decorations.
I also like to add a little sparkle to butterflies by painting them with luster dust
.
What is Luster Dust?


