Огромная благодарность
Lisa Slatter за Мастер-класс
This two-tier wedding cake creation is one for fun loving couples who seek an alternative to the traditional bride and groom cake. If you like to tweet, then perhaps this one is for you!
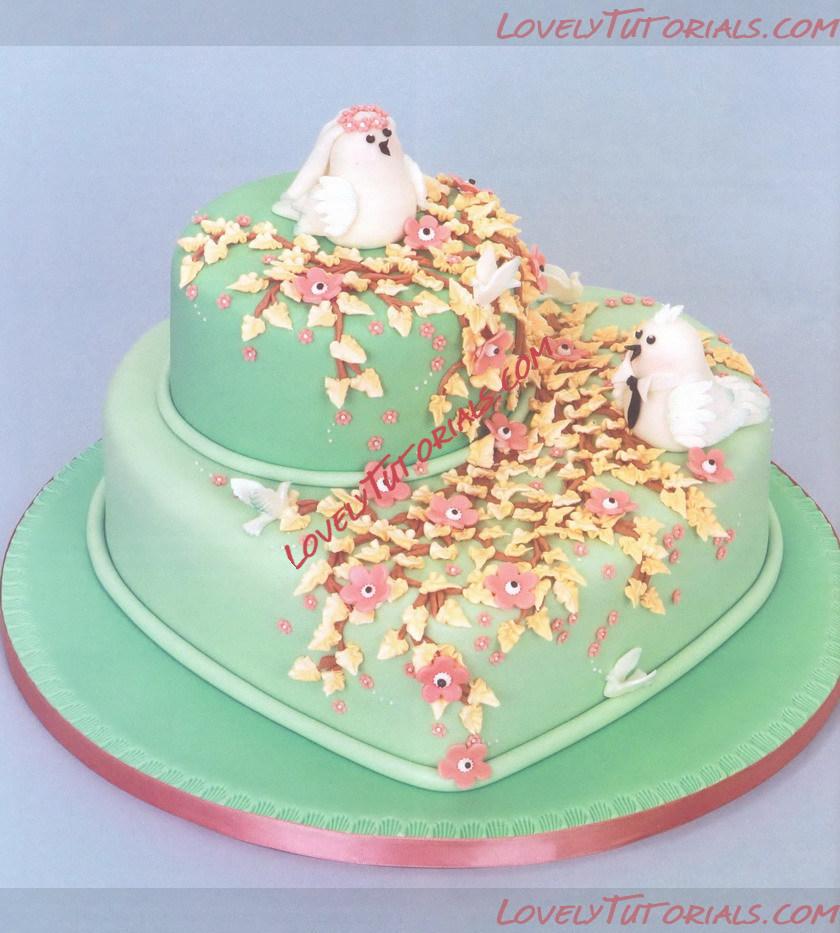
YOU WILL NEED
sugarpaste pale green 1.25kg
sugarpaste mid green 1.25kg
modelling paste 500g (Wilton Sugarpaste)
gumpaste 250g
round cake drum 406mm (16in)
cake box 406mm (16in)
large rolling pin
small rolling pin
smoother polisher
mini modelling tools shell tool
mini basket weave rolling pin
round and wavy edged cutters XXXL, XXL
mini cutting wheel
plunger blossom cutter set of 4
dove plunger cutter large
metal rose petal cutters set of 3
decorative plaque cutter large
round and wavy edged cutters set of 4
edible lustre spray pearl
spray gun attachment
round cake 152mm (6in)
heart shaped cake 278mm (11 in)
paste food colour cream, brown, pink, creamy peach,
black
dusting powder pink, blue
selection of paintbrushes
piping tubes 1, 2, 52, 43
royal icing
piping bags
Bake a 6in round cake and an 11in heart shaped cake. Pre-colour the 2.5kg white sugarpaste to a pale pastel green with a green paste food colour. Divide the coloured paste in half and add a little more green paste food colour to one half only to deepen it slightly.
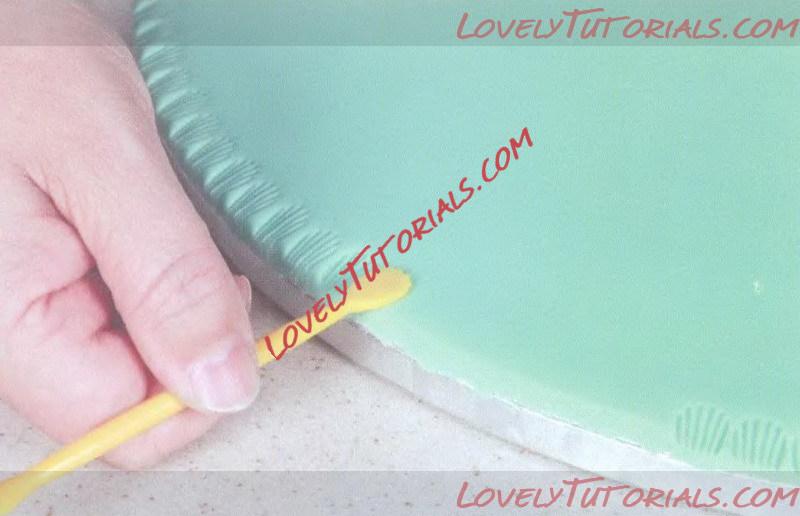
1 Cover a 16in round cake board with mid green sugarpaste. Whilst the icing is still soft, press the end of a shell mini modelling tool onto the icing at the edge of the cake drum to emboss a design all the way around.
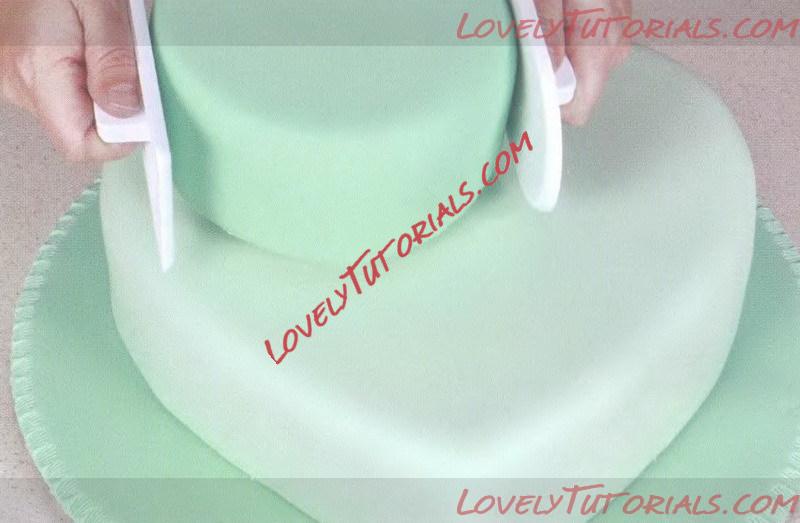
2Ice the 6in round cake with mid-green sugarpaste and the 12in heart shaped cake with light green sugarpaste. Place the heart cake centrally on the prepared cake drum. Dowel the heart cake and place the 6in round cake over the dowelled area.
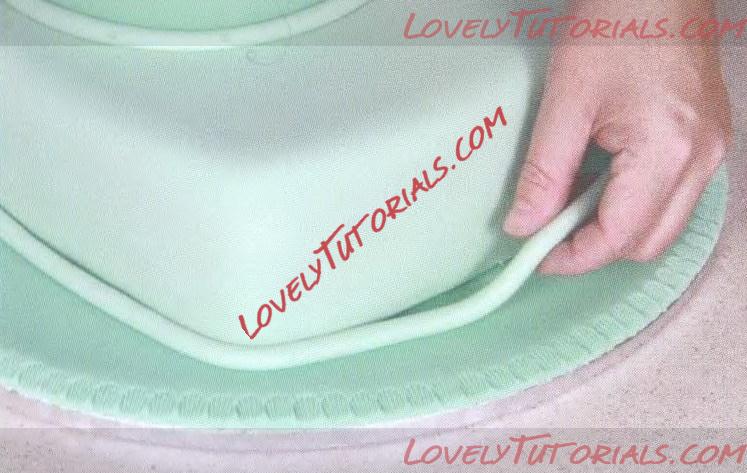
3Roll two long sausages of light green sugarpaste, ensure each one is long enough to go around the base of each cake. Stick in place at the base of each cake with a little water.
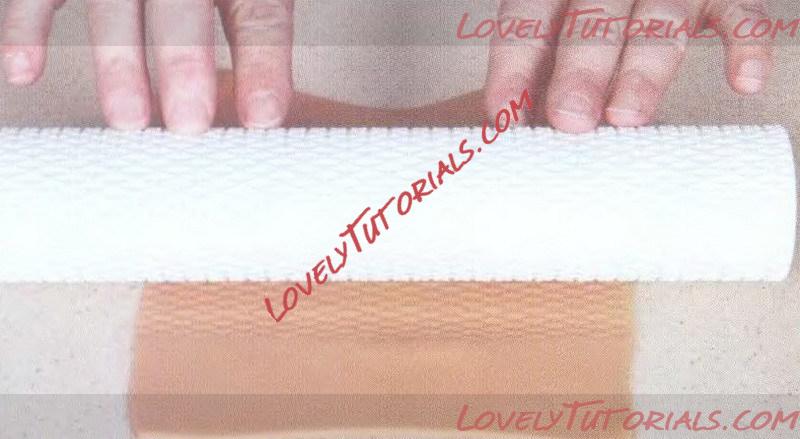
4Roll out brown modelling paste. Roll over the paste with a mini basket weave rolling pin to texture the paste.
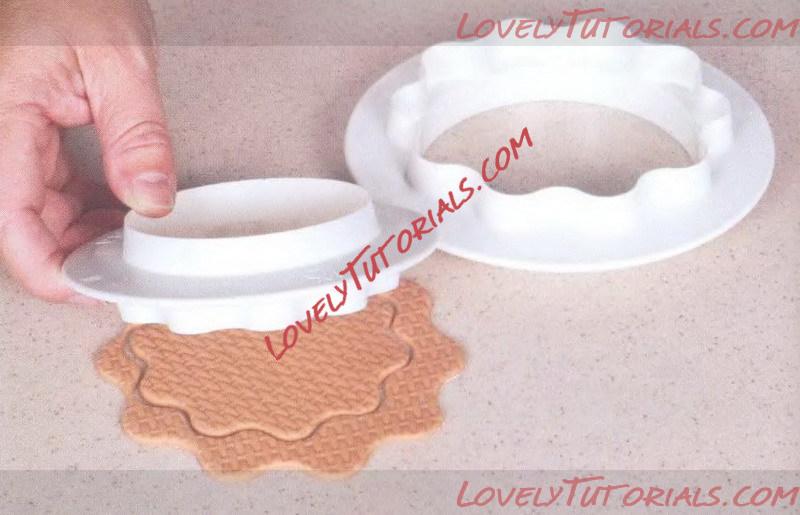
5Use a XXXL round and wavy edged cutter to cut out a circle from the textured paste. Place the XXL round and wavy edged cutter on top of this so that it is positioned in an offset position inside the first shape and cut again.
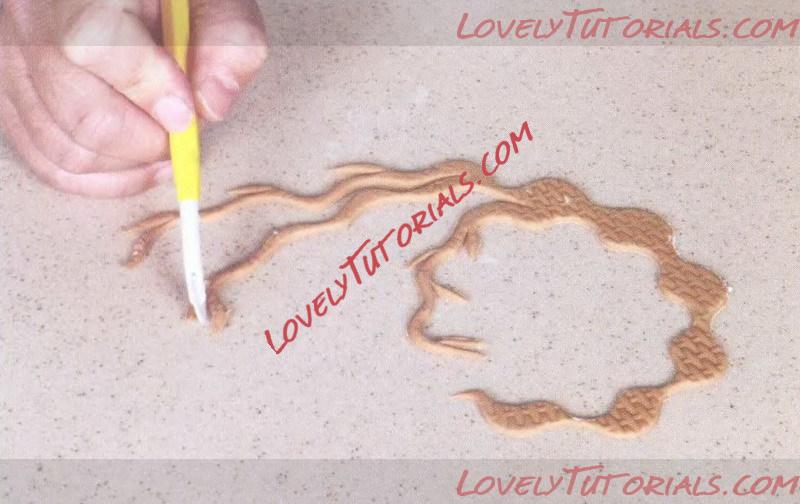
6Remove the centre wavy edged circle of paste and cut through the edge of the circle at the narrowest point. Use a mini cutting wheel to cut into the paste, following the contours of the wavy line to make branches. Make smaller cuts at the outer edges to make twigs.
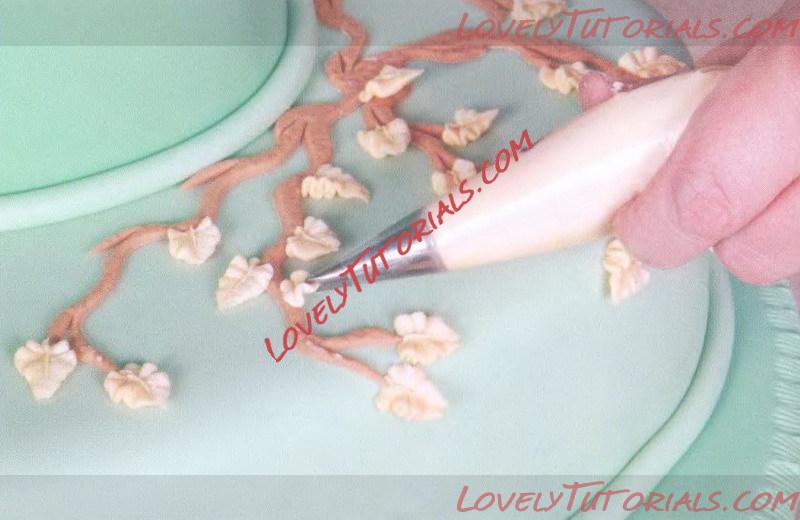
7Position the branches on top of the cakes, stick in place with water. Fill a piping bag with a No. 52 leaf tube and light cream royal icing to one side of the bag and dark cream royal icing in the other side. Pipe leaves in place all around the branches and twigs.
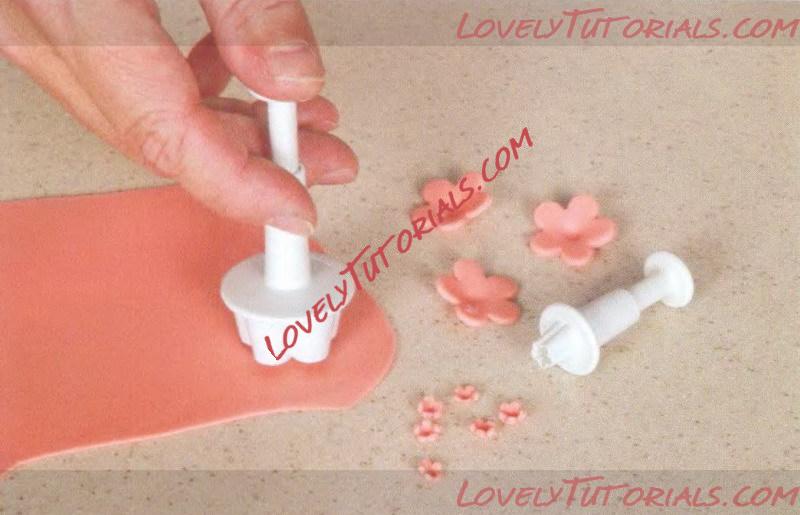
8 Roll out peach coloured flower paste. Cut out lots of large and tiny plunger blossom shapes, cup each one in turn on some foam. Leave to dry.
When using petal dust to dust the cheeks on the lovebirds, start with a little colour and build up gradually. You can soften the colour of the petal dust by adding a little white petal dust or cornflour to it. Remember it is easy to add colour, but not so easy to take it away.
Change the colour of the birds by painting them with food colours mixed with white alcohol to change them into different varieties.
For best results when using a textured rolling pin, ensure the rolled out paste is of an even, uniform depth all over. Roll the pin across the icing with firm pressure in one forward action. Do not be tempted to roll back and forth as this will ruin the design.
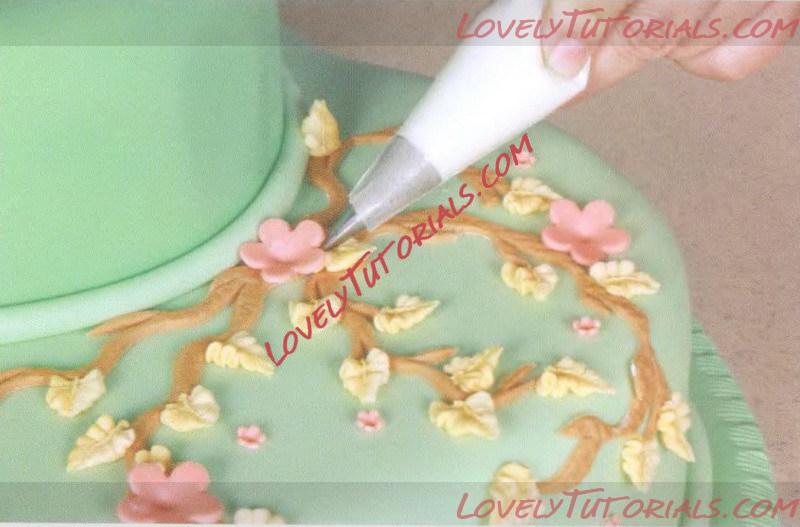
9 With a little royal icing, stick lots of large and tiny blossoms around the branches on the cake.
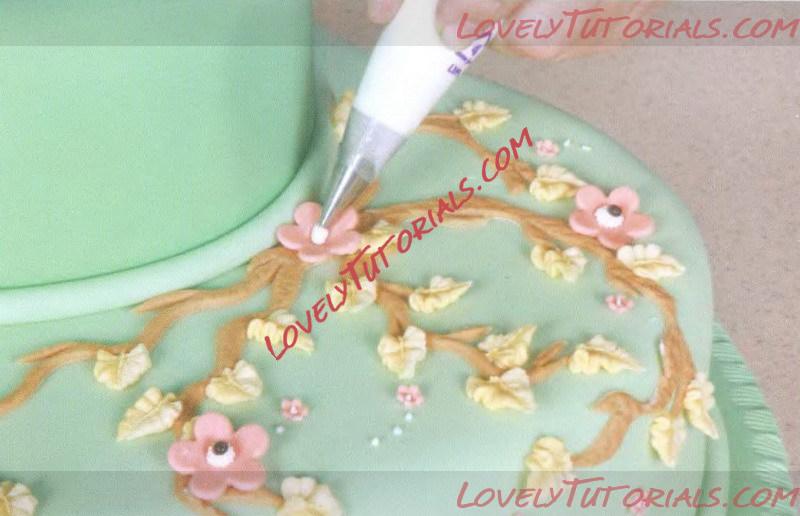
10 Pipe white royal icing centres in each of the large flowers with a No. 43 piping tube and in the centres of the small flowers with a No. 1 piping tube. With a No. 2 piping tube, pipe a black dot in the centre of the large flowers on top of the No. 43 piped centre.
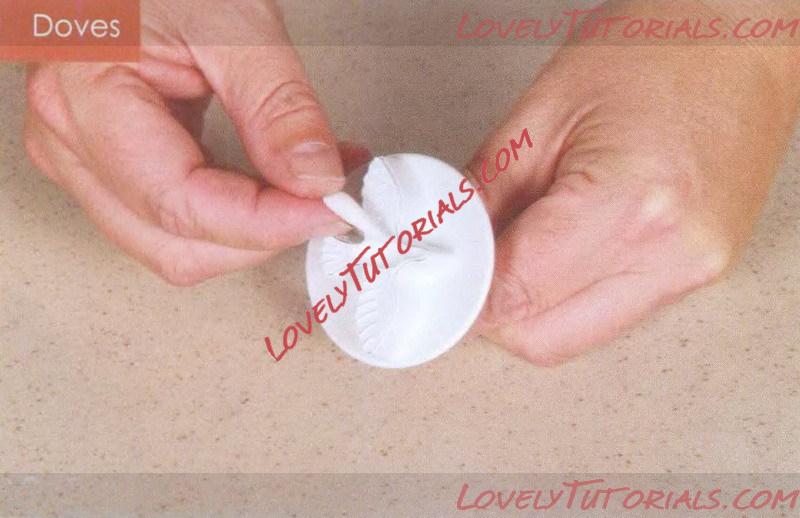
11 To make the body for the dove, take a tiny ball of modelling paste and roll into a small tapered sausage shape. Place the tapered end into the beak area of the cutter and push the rest of the paste down to fill the body.
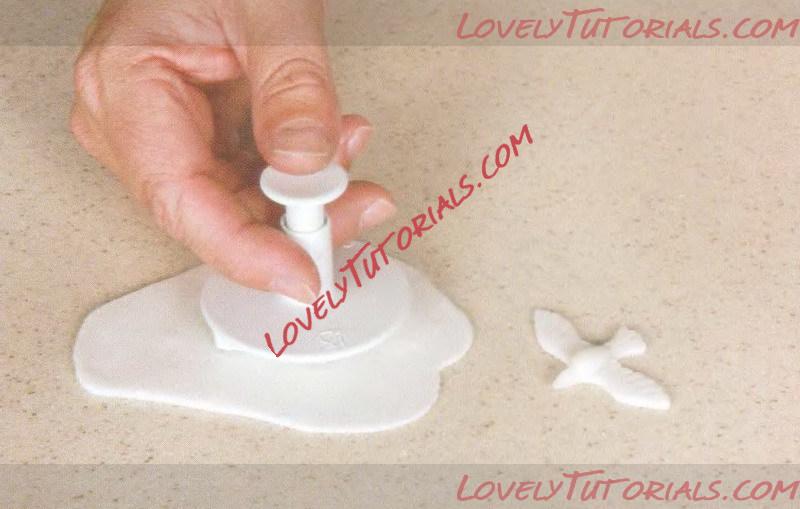
12 Roll out white modelling paste and place the dove cutter on top. Push the cutter down onto the paste to cut out the
wings. Leave in place then push down the plunger to emboss the
wings and join the body to them.
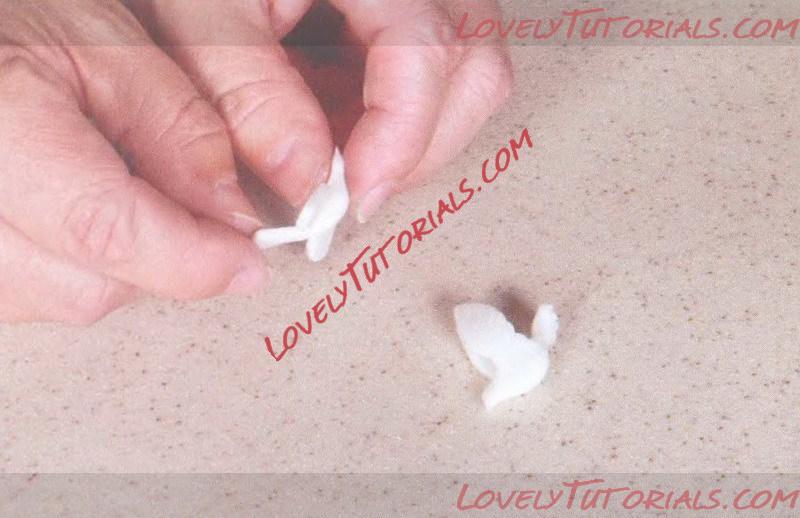
13 Bend the tail and wings to shape. Leave to dry with the wings and tail supported with foam or by placing the dove over a concertina of card.
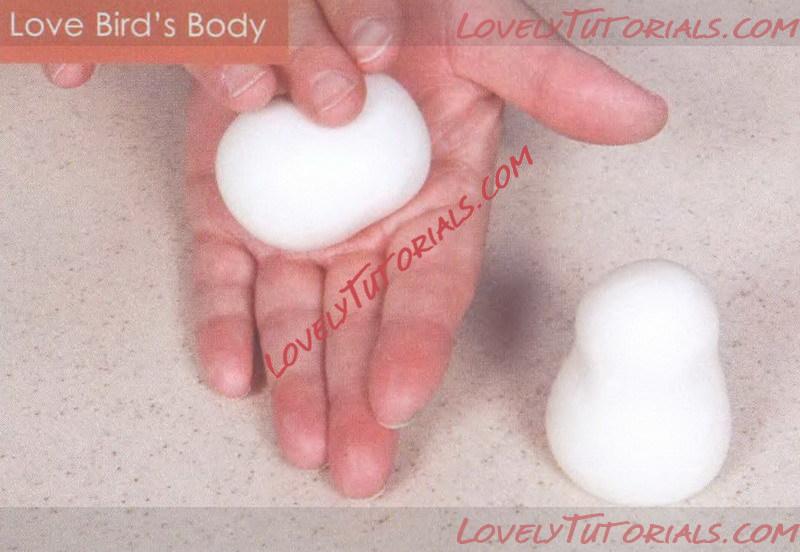
14 Take a large ball of modelling paste (a little larger than a ball) and roll in your hands to form a bell shape.
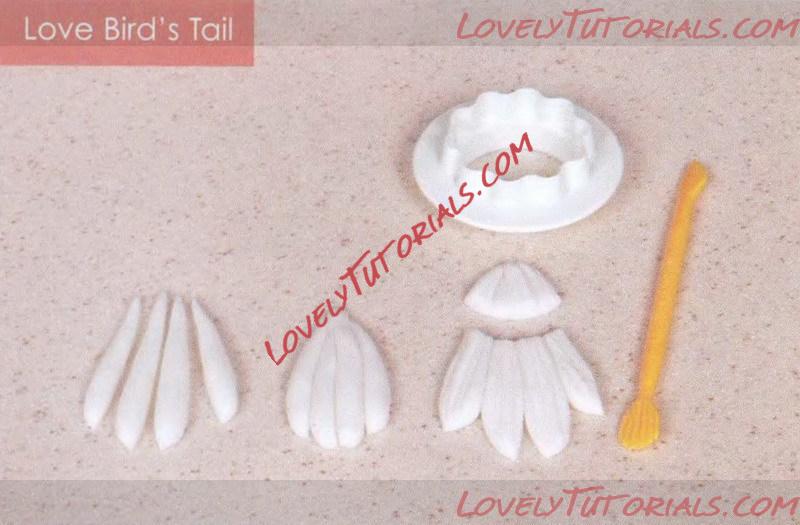
15 Take a small ball of paste (about the size of a large pea) and roll it info a long teardrop shape. Cut in half lengthways. With a smaller ball of paste repeat the process. Stick the teardrops together and place the two longer ones in the middle and the two shorter ones on the outside. Texture with a mini shell tool. Make a curved top with a circle cutter.
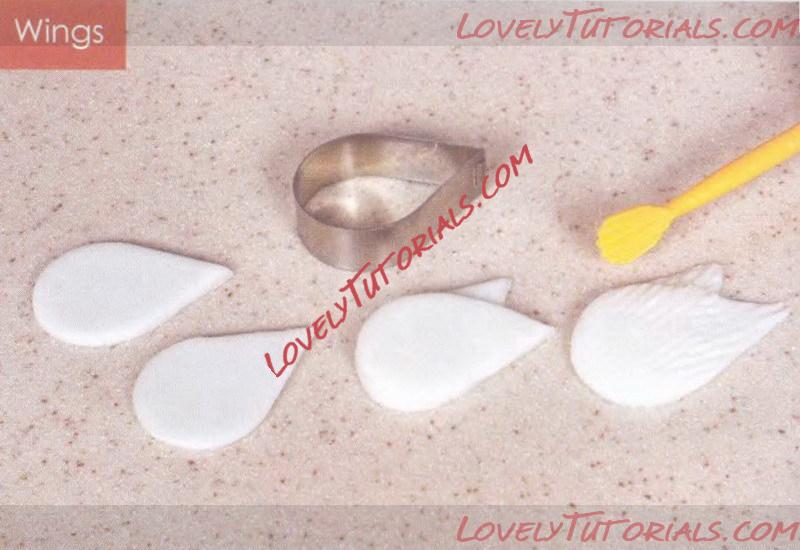
16 Cut 4 single rose petals with the largest rose petal cutter. Stic two petals together at the widest point, ensure the point of the back petal just shows. Draw a mini shell modelling tool over the surface of the wings towards the outer edge, to give them some texture and make them look feathery.
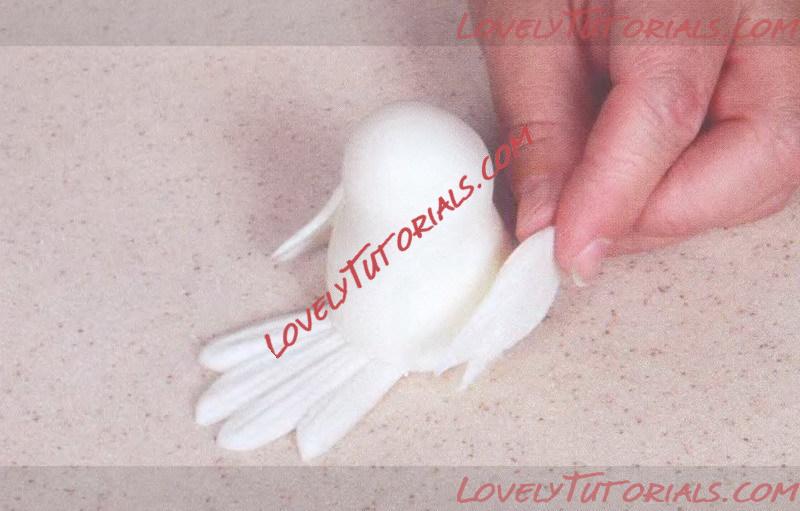
17 white royal icing and a No. 1 piping tube to attach the tail to the back of the body and the one wing on either side of the body.
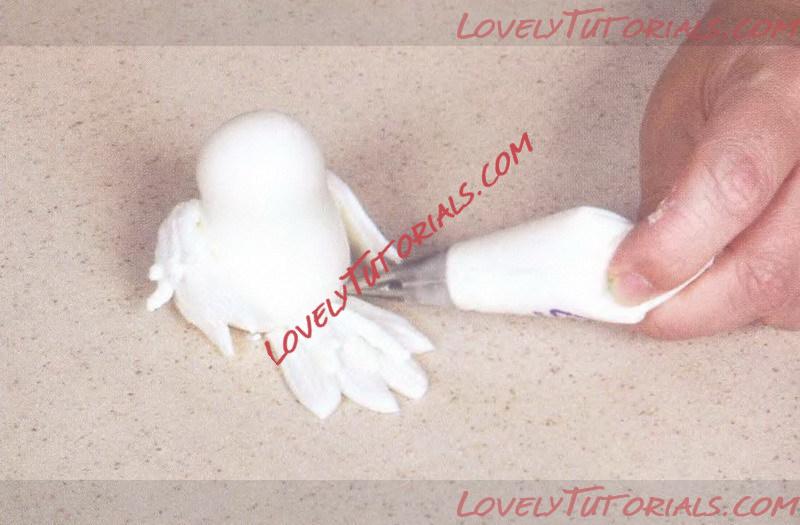
18 With white royal icing and a No. 43 piping tube, pipe additional feathers over the tail and wings. For the groom pipe a few feathers on top of his head with the same tube and leave to dry. Once dry, highlight the edges of the wings and tail with a little pale blue dusting powder.
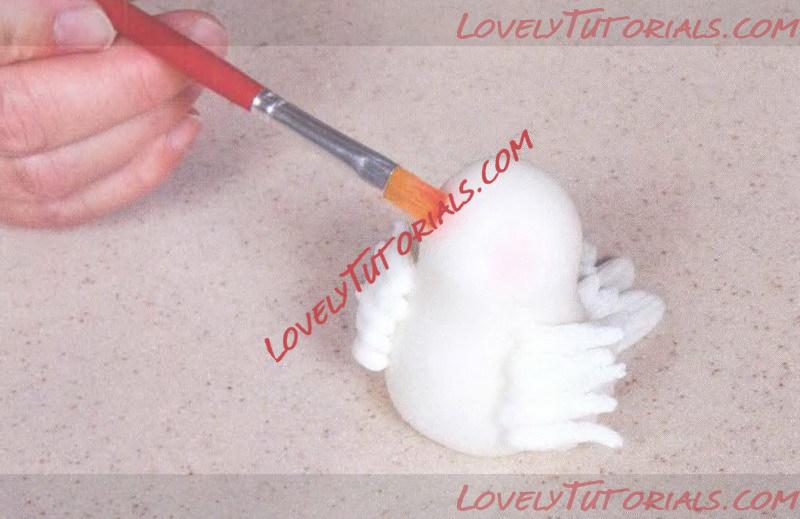
19 Dust rosy cheeks with a paintbrush and pink petal dust. Rub the round on the cheek area in a circular motion to achieve the required colour.
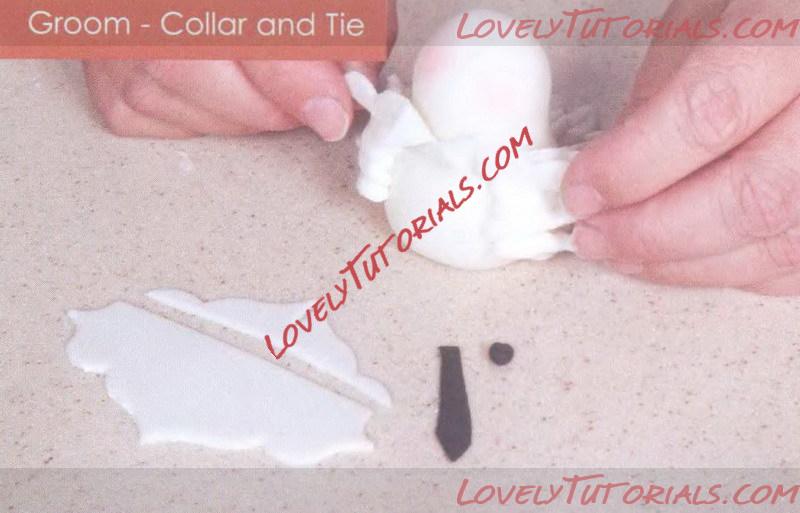
20 Cut out a plaque with the creative plaque cutter. Cut off a along one side with a mini cutting wheel then make a small cut in the centre. Turn back the edges in the centre to make a wing collar. Stick the collar around the neck. Cut a strip of black paste, trim to a point at one end. Stick to the front of the bird, add a ball for the knot.
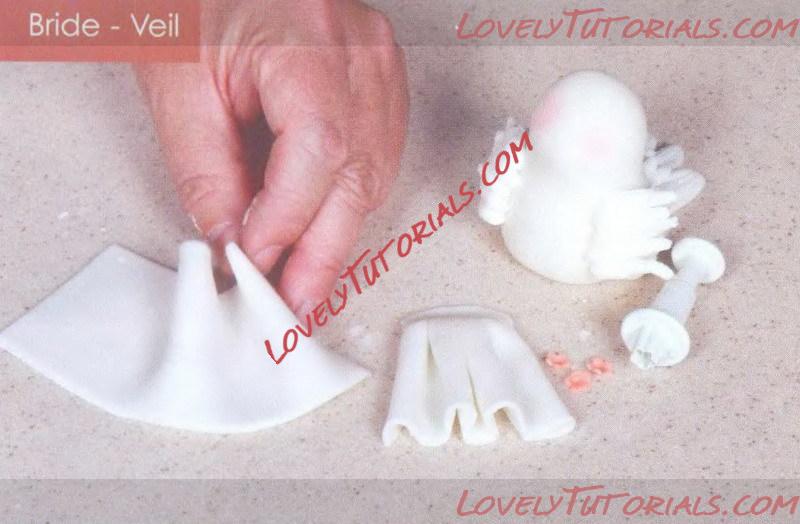
21 Roll out a piece of modelling paste. Cut to an oblong shape and concertina fold to look like fabric. Roll the top edge with a rolling pin to secure the folds in place and trim away the excess. Stick the veil to the top of the bird's head and add a few pink plunger blossom flowers as a headdress. Pipe a centre in each flower with royal icing.
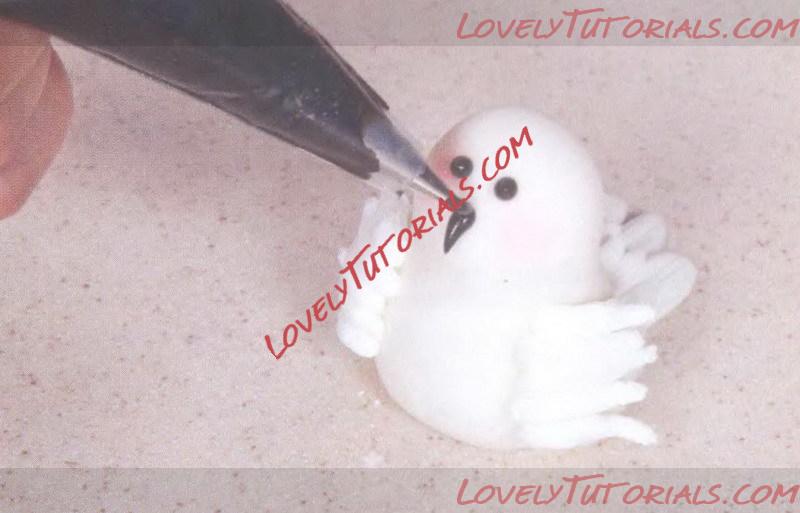
22 Fill a piping bag with a No. 2 piping tube and black royal icing.
Pipe two bulbs of icing in place for the eyes. Then pipe the beak, by piping two teardrop shapes. The first is the bottom part of the beak and is piped against the surface of the face downwards. The top is piped away from the face in an upward movement.
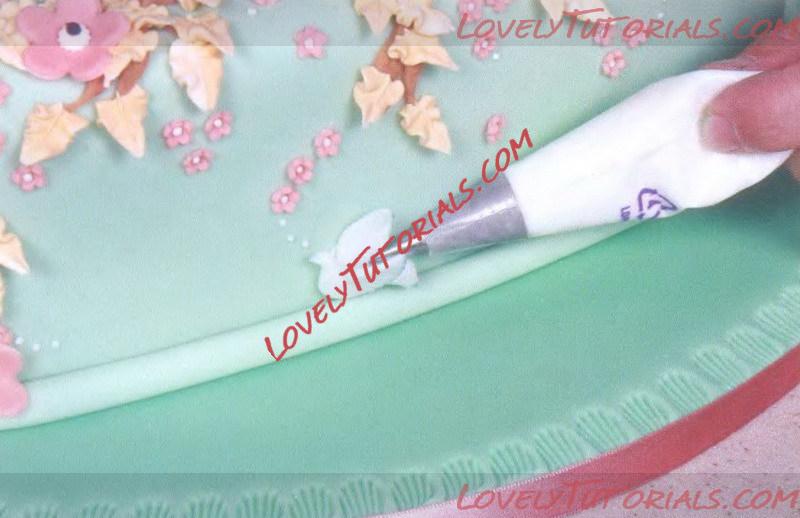
23 Take the previously prepared cut-out doves and highlight the
edge of the wings with pale blue dusting powder. Stick in position on the side and top surface of the cakes with royal icing.
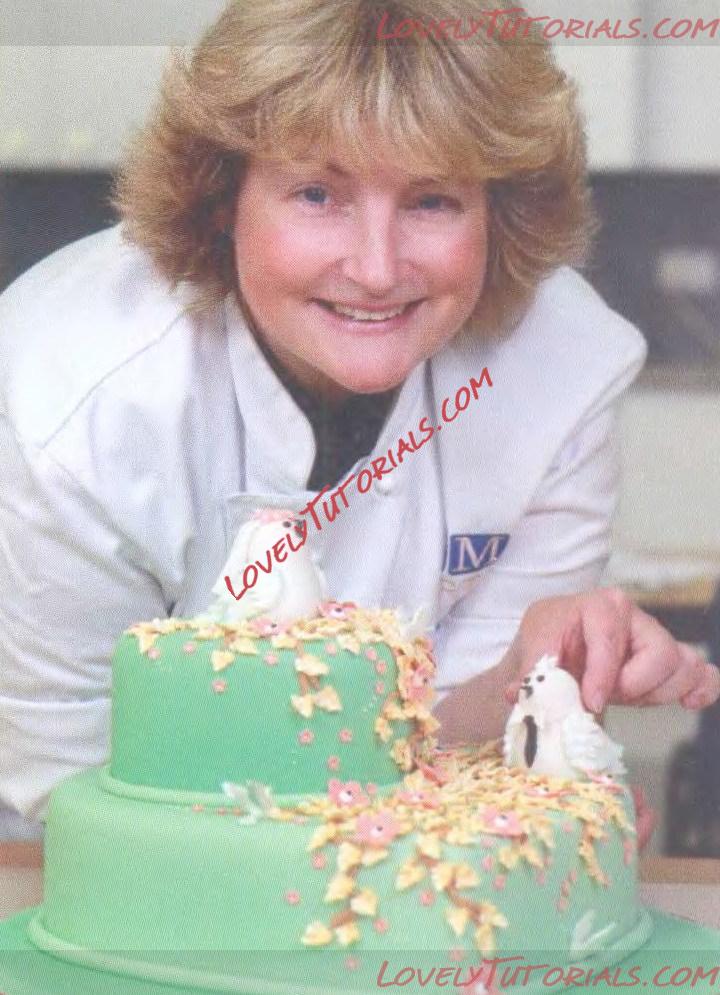
24 Place the bride
on the top cake and the groom on the bottom cake. Secure in place with royal icing. Spray pearl lustre colour over the top of the cake. Edge the board with creamy peach ribbon.


