Cake Decorating Tutorials  (How To's) Tortas Paso a Paso
Cake Decorating Tutorials (How To's) Tortas Paso a Paso
Вернуться   Cake Decorating Tutorials (How To's) Tortas Paso a Paso > Figure making tutorials > Flowers Trees Tutorials
Перезагрузить страницу самодельные тычинки для цветов-How to Make Your Own Flower Stamens
Старый 27.07.2011, 17:38
Ariana Ariana вне форума
Администратор
Регистрация: 07.09.2010
Сообщений: 7,940
По умолчанию самодельные тычинки для цветов-How to Make Your Own Flower Stamens
Название: Flower Stamens.jpg
Просмотров: 577

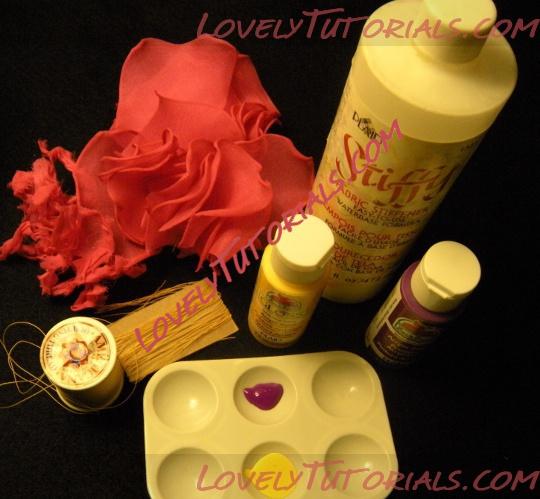
Размер: 109.2 КбAfter experimenting with a number of things, I found that the things shown in the image to your left gave me the best results. These included glazed hand quilting thread, acrylic paint, and fabric stiffener. First, I rolled my flower petals and set them aside. I cut the thread into strands approximately 24 inches long, dipped them into the fabric stiffener, and then I hung them across a clothing rack to dry (do not let strands touch). The drying only takes a few minutes. After drying, I rapped the thread around a 2 1/2- inch piece of cardboard that I used as a cutting gauge. Next, I cut each end of the thread. Finally, I dipped each end into the acrylic paint.


Название: Flower Stamens 2.jpg
Просмотров: 82

Размер: 96.8 Кб
After I dipped the stamen tips, I set them aside to dry. I used a gridded aluminum pan, but just about anything that would allow the stamen tips to hang over without touching each other would do.

Finally, the stamens are finished. One group of stamens on the tray below is commercially prepared; can you tell which one? They are the stamens on the extreme left. To the right of these are stamens that I double dipped, first in yellow paint and then in purple paint to obtain the same effect as the first group of stamens (click on the image to enlarge it.). I used the non-gloss paint for the second dip because it is not as thick as the glossy paint.
Название: Flower Stamens 3.jpg
Просмотров: 89

Размер: 91.7 Кб


Tips: For a larger stamen tip, dip stamen ends several times. The glossy paint yields a larger stamen tip because it is thicker. Also, setting the paint aside for approximately 15 minutes before dipping will also yield a larger tip because the paint thickens the longer it is exposed to the air.

I know this is not for everyone, but for those of us that just like to make things, this will work. Enjoy!

Огромная благодарность Lee Duncan за Мастер-класс
Старый 27.07.2011, 17:47
Ariana Ariana вне форума
Администратор
Регистрация: 07.09.2010
Сообщений: 7,940
По умолчанию Cotton stamens Tutorial
Огромная благодарность duskyroseveiners за Мастер-класс
Making your own stamens


Although commercially bought stamens can be used for a lot of flowers, they can be expensive, and aren't always suitable for the job.
Making your own, although time consuming can add realism to a lot of flowers, and with a little thought the following tutorial could be adapted for many flowers. The cotton thread I have used here is white, but can be dusted with petal dusts or painted afterwards if required.
A point to note: Cotton thread will absorb egg white and polyester threads will not. If you are using polyester threads, use watered down PVA glue to stiffen the threads. At the time of writing, using egg white is acceptable practice for flowers placed in Sugarcraft competitions, but PVA glue is not.

If you have problems obtaining 100% cotton thread, or object to the cost of many of the well known brands (which I do), the products sold here are excellent value for money at £2.00 for 1000m :
http://www.empressmills.co.uk/acatal...ft_Finish.html

Название: 269946.jpg
Просмотров: 70

Размер: 19.9 КбНазвание: 269948.jpg
Просмотров: 74

Размер: 23.5 КбНазвание: 269950.jpg
Просмотров: 63

Размер: 14.6 Кб


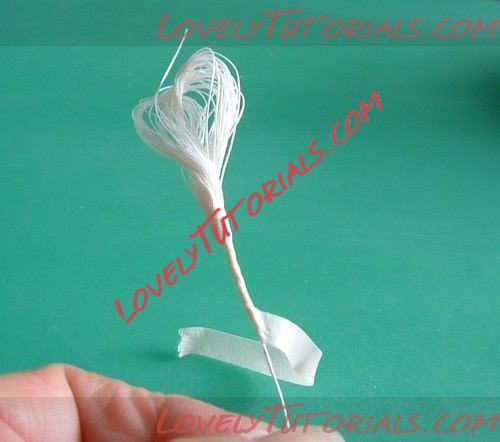
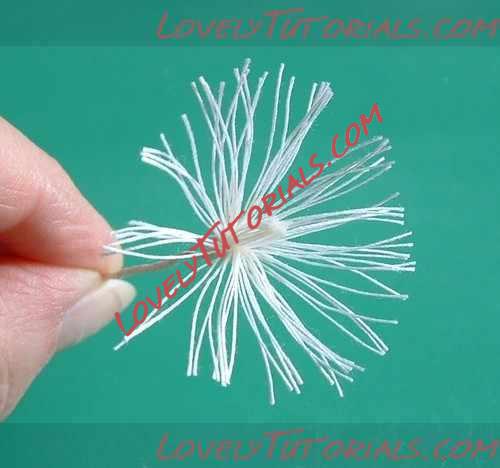
Wrap thread around two fingers 50 times (more if you want a fuller effect). Take a 1/4 length piece of white 28g wire and slip the wire between cotton and finger and give a twist before removing the cotton from your fingers. Twist the loose end down the wire as tightly as possible.


Название: 269951.jpg
Просмотров: 62

Размер: 17.2 КбНазвание: 269953.jpg
Просмотров: 60

Размер: 18.0 КбНазвание: 269954.jpg
Просмотров: 66

Размер: 21.3 Кб
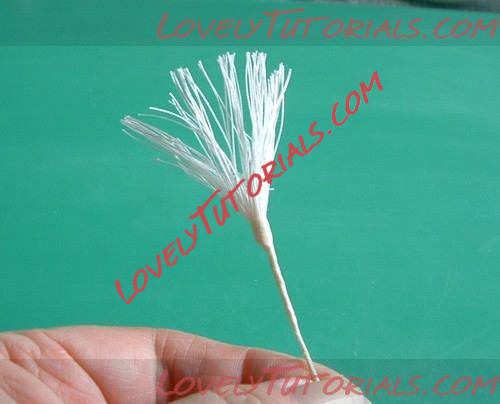
Take a piece of half width white tape and tape over the wire, making sure you cover the wire securing the loop. Cut through the loop and trim to straighten up the cotton threads. Using a palette knife or something similar, evenly select threads from all the way around the bunch and hold down with your finger and thumb.


Название: 269955.jpg
Просмотров: 63

Размер: 18.8 КбНазвание: 269956.jpg
Просмотров: 56

Размер: 14.4 КбНазвание: 269957.jpg
Просмотров: 64

Размер: 25.3 Кб

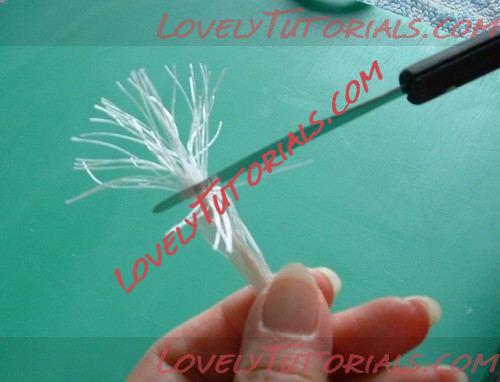
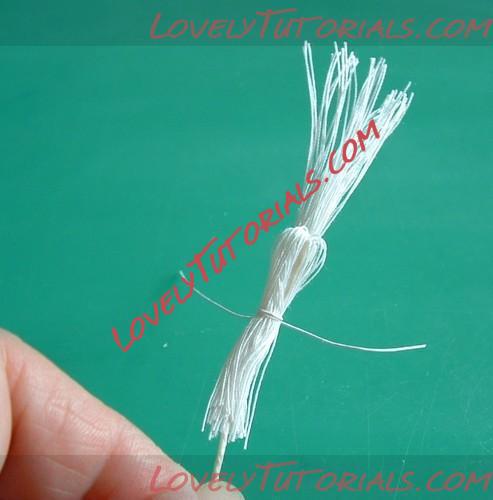
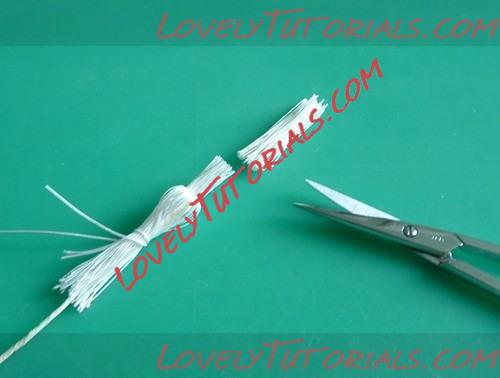
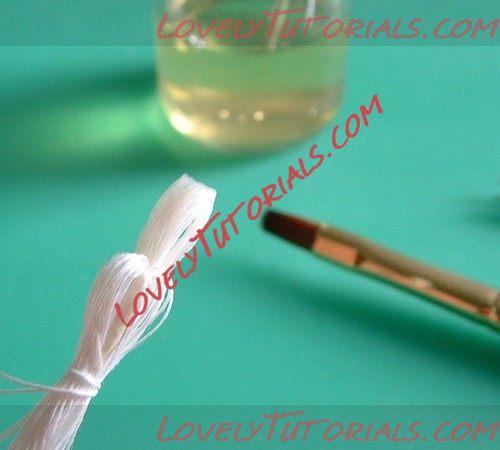
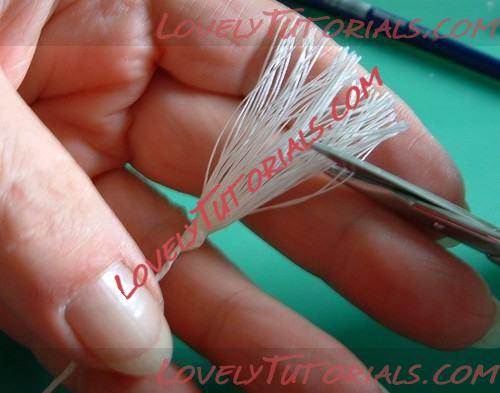
Wrap a fine wire around the down facing threads and give a twist to secure them. Using a sharp pair of scissors, cut through the remaining upright threads to the length you require. Using a paintbrush, brush egg white on these remaining upright threads and set aside to dry. If using pva glue for this step, make absolutely sure they are dry before continuing to the next step or the threads will stick together.


Название: 269958.jpg
Просмотров: 56

Размер: 26.4 КбНазвание: 269959.jpg
Просмотров: 58

Размер: 25.5 КбНазвание: 269964.jpg
Просмотров: 52

Размер: 17.3 Кб

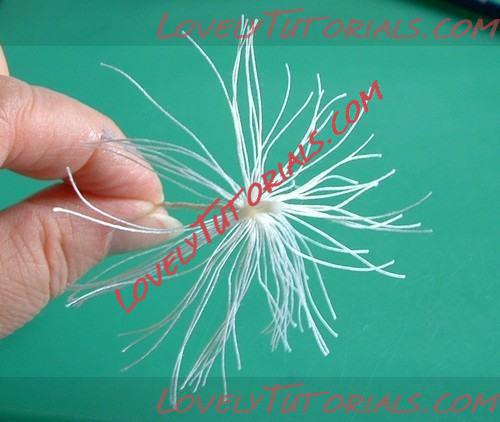
When the upright threads are dry, undo the wire holding the down threads and open them up. Pull all the threads back up into a bunch and trim to the length you want the stamens to be.

Alternative cotton stamens.


Название: 269969.jpg
Просмотров: 53

Размер: 16.2 КбНазвание: 269972.jpg
Просмотров: 53

Размер: 22.4 КбНазвание: 269975.jpg
Просмотров: 58

Размер: 20.4 КбНазвание: 269977.jpg
Просмотров: 49

Размер: 15.5 Кб
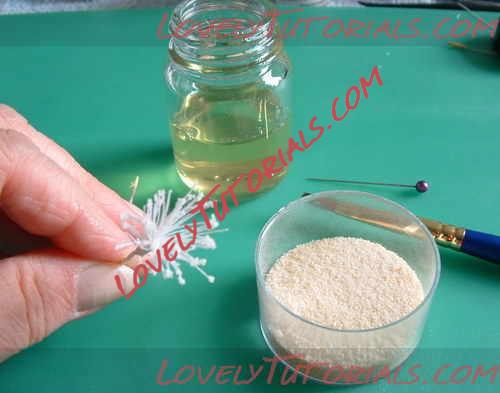
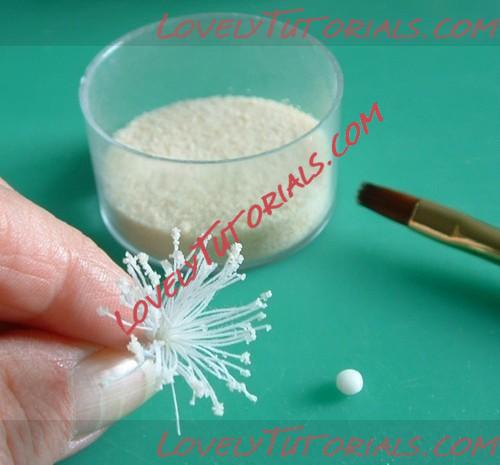
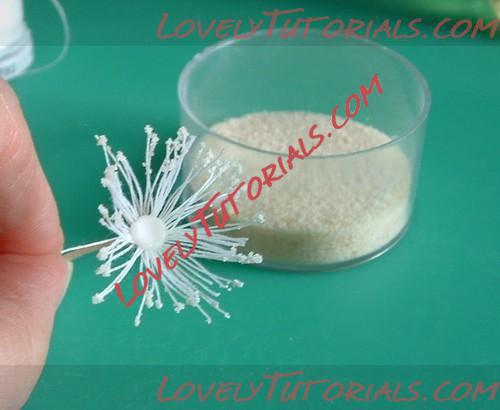
Here the stamen bunch is smaller. I have wrapped the cotton around a single finger and proceeded to step 5. I have then brushed the edges of the cottons with egg white and have dipped into natural coloured polenta grains. Then I have opened out the threads with a pin, dampened the very centre with a tiny amount of egg white, and popped a tiny ball of paste down into the centre. (Use a ball or bone tool to push it down into the centre) Then I have brushed a very tiny amount of egg white onto that small piece of paste and used a dresden tool to pick up and sprinkle with more of the polenta grains. This too can be dusted to the shade of your choice, and this type of stamen bunch can be used for wild roses if using this size, or if made larger and bushier could be used for some open roses. Cutting the threads shorter, it could be used for bramble type blossoms.
Старый 30.07.2011, 20:31
Ariana Ariana вне форума
Администратор
Регистрация: 07.09.2010
Сообщений: 7,940
По умолчанию
Огромная благодарность Irina Gurae за Мастер-класс
..нарезаем проволоку если есть, номер26..6 тычинок и пестик чуть побольше..


обворачиваем проволоку кусочком мастики-цветочной...


ну а теперь, каждую тычинку и пестик немного смазываем белком, или спец. клеем, погружаем в ПОДКРАШЕННУЮ МАНКУ..ее подкрашиваем сухим красителем желаемого цвета...оставляем сушиться...


..собираем..вот что у нас должно получиться...


или такого цвета, манка была бордовая...
Старый 03.03.2012, 09:02
Ariana Ariana вне форума
Администратор
Регистрация: 07.09.2010
Сообщений: 7,940
По умолчанию
МК взят с сайта acaketorememberva.blogspot.com
Огромная благодарность Автору-Kara Buntin
за МК

Making Stamens for Gumpaste Flowers Part 1


I have a big cake that's going to involve a ton of gumpaste flowers coming up in April, so I've started making the flowers already.

In the process of looking at my gumpaste porn, which is how I refer to the book and magazine instructions for gumpaste flowers that I've collected over the years, I kept running into the instructions for making stamens out of thread. I thought I'd give it a try since I hadn't done stamens that way for a while.
Название: IMG_0417.JPG
Просмотров: 12

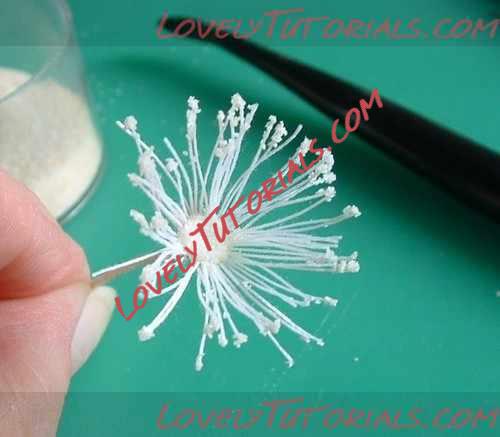
Размер: 24.1 КбSome flowers, like cherry blossoms, apple blossoms, peonies, clematis, wild roses, anemones, and poppies, have a lot of stamens. Sometimes it's more economical to make them out of thread than it is to buy them pre-made. (Although not always...See my last entry about buying stamens on ebay!)
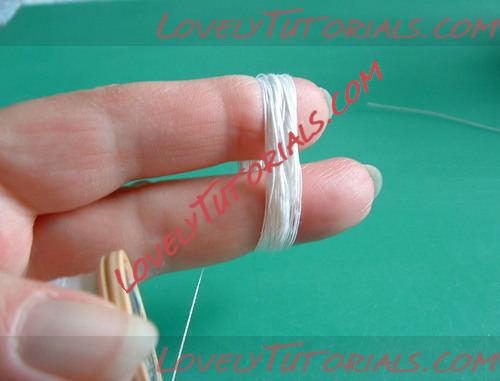
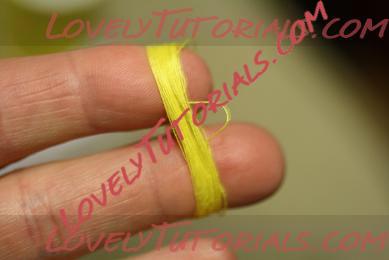
This is a fairly mindless activity that you can do while you're sitting watching tv in the evening. Start by wrapping thread around two fingers to form a loop.

Название: IMG_0422.JPG
Просмотров: 12

Размер: 25.2 Кб
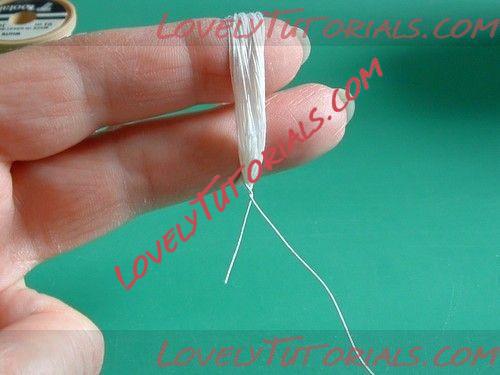
Next, twist the loop into a figure eight. (You can also do this by wrapping a wire around either end of the loop and then cutting the loop in half to make two centers, but I think that the figure eight is more secure.)

Название: IMG_0424.JPG
Просмотров: 13

Размер: 23.2 Кб
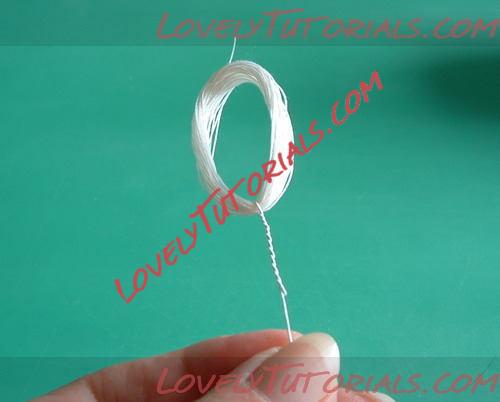
After that, twist a thin wire tightly around the twist of the figure eight to hold the thread in place, and wrap the wire around itself.

Название: IMG_0427.JPG
Просмотров: 11

Размер: 26.4 Кб
Cut the loops off of the thread loop, leaving as much length as you want for the type of center that you're making.

At this point you'll need to turn the tv off and go into the kitchen, or somewhere else that you have a counter, because the dusting colors are coming out and it could get messy.
Название: IMG_0429.JPG
Просмотров: 11

Размер: 26.9 Кб


Mix up some gum glue using water and tylose or gumtex, and dip the tips of the stamen into it. If you want the entire stamen to be stiff, you can dip the entire thing into the glue.

Название: IMG_0433.JPG
Просмотров: 11

Размер: 26.3 Кб
Dip the tips of the thread into the color dust that you want for that particular stamen, and then use a toothpick to separate any threads that are sticking together. You want to get a feathery look, so the threads should be separated.


Название: IMG_0439.JPG
Просмотров: 9

Размер: 24.6 Кб
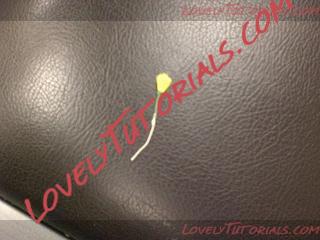
Let the stamens set up, then use them to make the flowers. I put one in a little blossom for this example. If you're using them for poppies or any other flower that has a large center with the stamens surrounding it, you should find a photo of the flower to see how you should arrange them. Those might not even need to be dipped into the gum glue, since the configuration is different.
Название: IMG_0440.JPG
Просмотров: 11

Размер: 47.9 Кб


If you need a stamen that doesn't spread out so much, just tape the base of the threads so that they're more upright.
Старый 03.03.2012, 09:06
Ariana Ariana вне форума
Администратор
Регистрация: 07.09.2010
Сообщений: 7,940
По умолчанию
МК взят с сайта acaketorememberva.blogspot.com
Огромная благодарность Автору-Kara Buntin
за МК

Making Stamens For Gumpaste Flowers Part 2
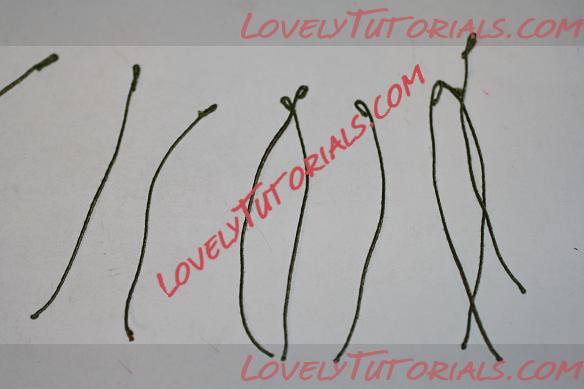
Another type of stamens is good for flowers like tulips, daylilies and some peony-type flowers. These are longer and have a little tip that has the pollen on it. When florists use dayliles they often remove the end of the stamens, because the pollen will get all over everything.

Название: 1.JPG
Просмотров: 9

Размер: 32.4 КбНазвание: 2.JPG
Просмотров: 11

Размер: 38.7 Кб
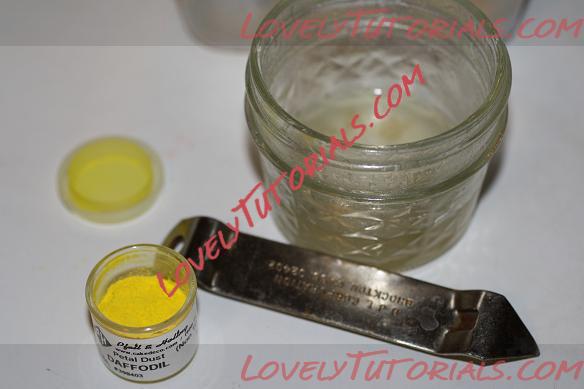
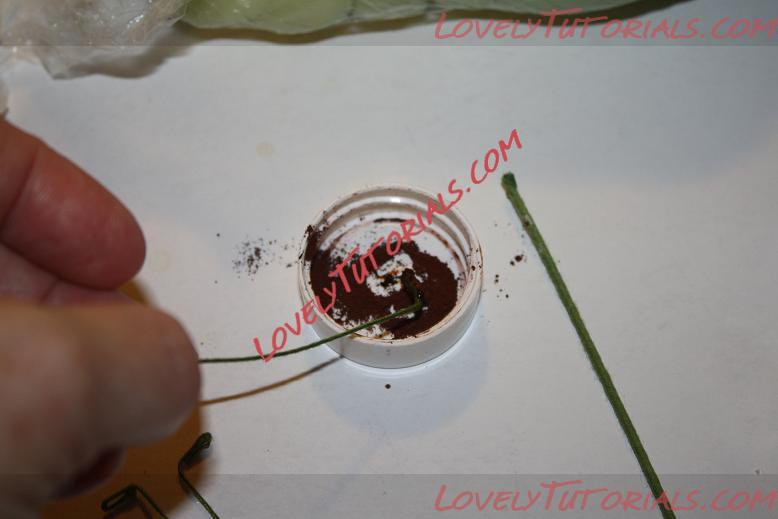
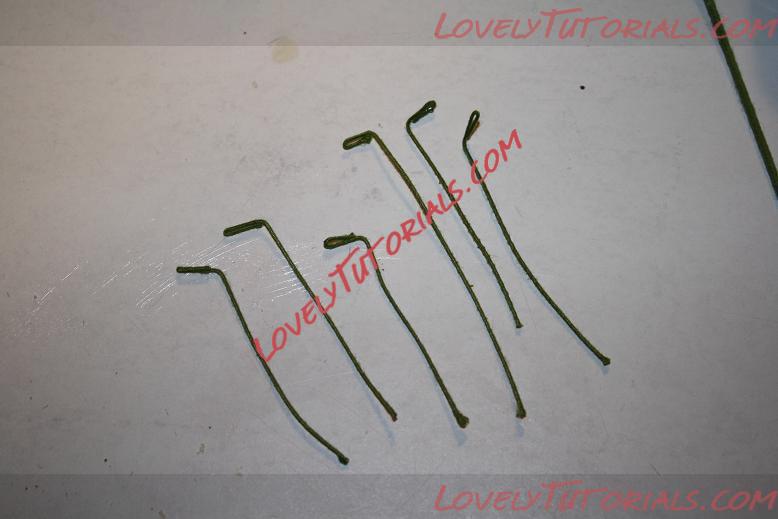
To make these, you can use either yellow or brown dusting powder. You'll need some 32 gauge wire, water or gum glue, Wilton gumtex (this is the only thing I've ever found that this is good for), and the color. Use the round end of a churchkey can opener to open the little powder containers unless you enjoy breaking you fingernails off.

First, cut the wires to about 3" or 4" long, then bend the tip back to be about the length of the area on the stamen that has pollen on it. Some wires might need to have the wire then curved like a little "L" to mimic the shape of the stamen, like daylilies have.


Название: 3.JPG
Просмотров: 12

Размер: 25.9 Кб
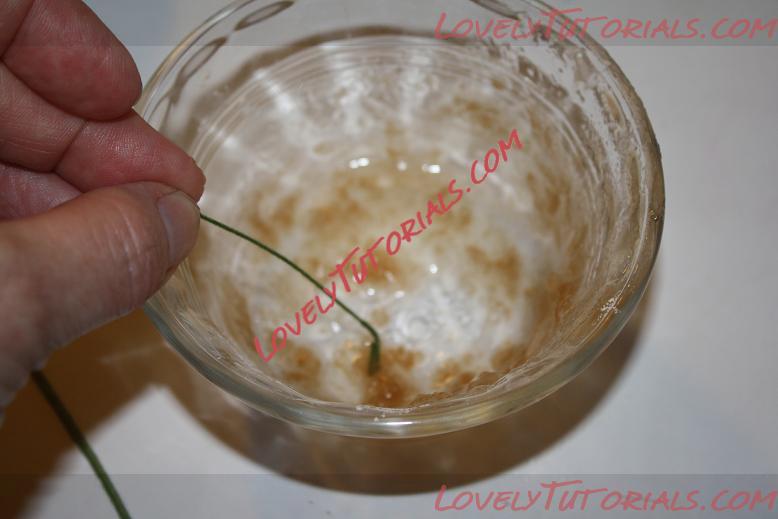
After that, dip the end of the wire in the water or gum glue, then dip it into the gumtex.


Название: 4.JPG
Просмотров: 11

Размер: 26.0 Кб
Next, dip it BACK in the water/gum glue, then into the color powder.


Название: 5.JPG
Просмотров: 12

Размер: 49.2 Кб
Stick the wire into a styrofoam block to dry, or put them on a waxed-paper covered cookie sheet. They shouldn't be touching while they dry or they could stick together.


Название: 6.JPG
Просмотров: 11

Размер: 32.1 Кб
You can also use confectioner's glaze, dip the wires, then dip it directly into the color, but this tends to gum up the color pretty quickly.


Название: 7.JPG
Просмотров: 13

Размер: 39.8 Кб
Let the wires dry, and shake the stamens gently to release any loose powder. You can see the amount of dust on my hand that came off of these stamens. Some of it will release, but most of it will stay on the wires.


You can use these in bunches for open peonies, or in groups of 6 for tulips and daylilies. Or you could wire a bunch together and call it ragweed if someone is looking for an allergy cake.
Старый 03.03.2012, 09:12
Ariana Ariana вне форума
Администратор
Регистрация: 07.09.2010
Сообщений: 7,940
По умолчанию
МК взят с сайта acaketorememberva.blogspot.com
Огромная благодарность Автору-Kara Buntin за МК

Gumpaste Daylily Stamens


Название: stamen step 1.JPG
Просмотров: 12

Размер: 52.2 Кб I did an entry a while ago about quick gumpaste daylilies, which are faster to make because they use an abbreviated version of the center stamen. For those of you who want a more realistic stamen, this is the version that's a little more time-consuming, but more true-to-life.

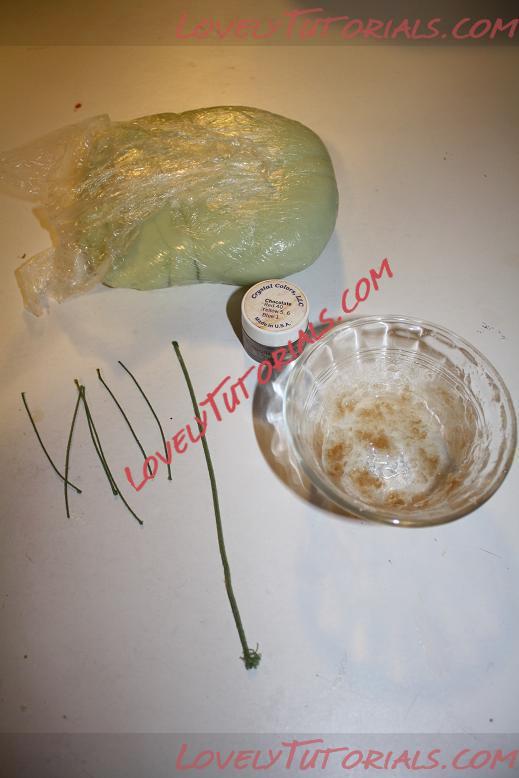
For each stamen you'll need about 6 thin gauge floral wires about 4" long, 1 thicker piece of 5" floral wire, some type of gum or sticky "glue" such as gum glue or egg white, gumpaste, brown or yellow petal dust, and floral tape.


Название: 2.JPG
Просмотров: 13

Размер: 44.5 Кб

Bend the end of the thin wires so that they look like a little foot. Dip the foot part of the wire into the gum glue, then into the petal dust. I'd put the petal dust into a separate container rather than dipping the stamens into the pot, since the gum glue could get mixed up into the petal dust and ruin it.Insert the dipped wires into a styrofoam block so that they can dry. This is another thing that you can make a bunch of at once, then just keep until you need them.The color of the stamens and the pistil vary by flower type, so you can make these in any color that are appropriate for your project.

Название: 3.JPG
Просмотров: 12

Размер: 51.0 КбНазвание: 4.JPG
Просмотров: 11

Размер: 42.2 КбНазвание: 5.JPG
Просмотров: 11

Размер: 26.6 КбНазвание: 6.JPG
Просмотров: 10

Размер: 29.6 Кб


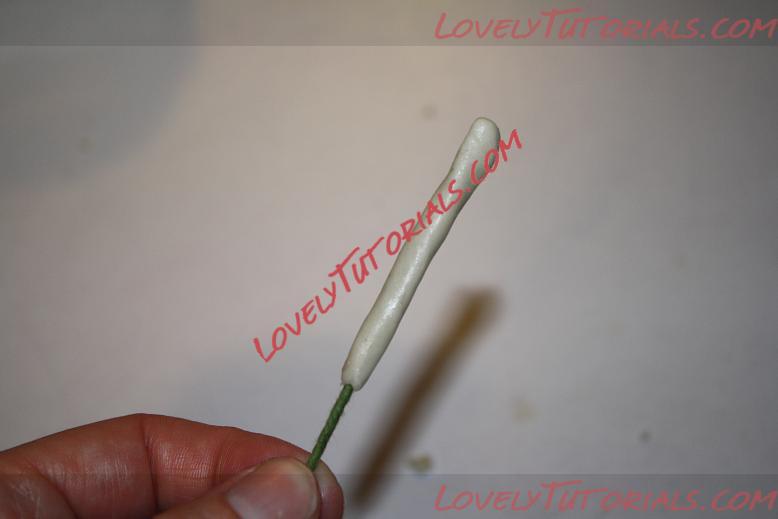
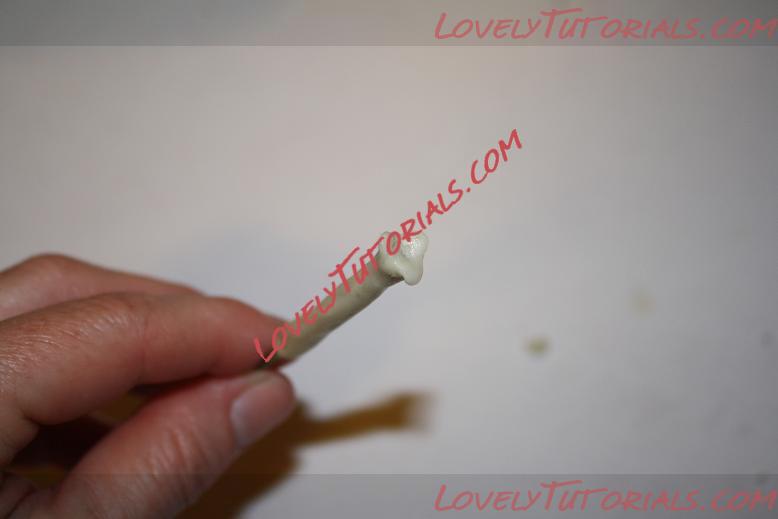
Next, take the thicker wire and attach about a 2" long sausage of gumpaste to it to make the pistil. Cut the tip of the sausage into thirds at the very tip, then flatten the three sections out and bend them back a little. You can either insert these into the styrofoam to dry also, or use them when they're still wet to wrap the stamens. Try both methods to see which one is easier for you. Some people find it easier to have a hard surface to wrap the stamens onto, but I'm too impatient so I use the center pistil as soon as I make it.
Название: 7.JPG
Просмотров: 10

Размер: 28.6 КбНазвание: 8.JPG
Просмотров: 11

Размер: 33.3 Кб


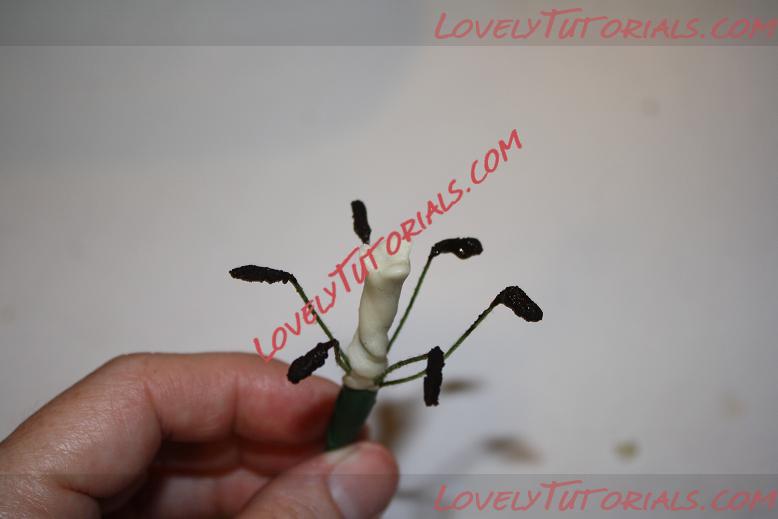
Using floral tape, wrap the 6 stamens around the pistil. If the center pistil was soft, insert the entire piece into styrofoam to dry, otherwise you can store them for future use.


©2022 Lovely Tutorials
Content Relevant URLs by vBSEO