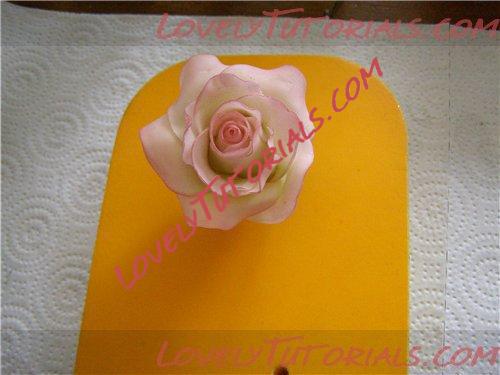
Cake Decorating Tutorials  (How To's) Tortas Paso a Paso

Вернуться   Cake Decorating Tutorials (How To's) Tortas Paso a Paso > Figure making tutorials > Flowers Trees Tutorials


Ваш профиль:
Your Avatar
Забыли пароль?
Регистрация


Ответ

роза,rose,

 
LinkBack Опции темы Поиск в этой теме
  #8  
Старый 23.09.2010, 06:00
Администратор
 
Регистрация: 07.09.2010
Сообщений: 7,940
По умолчанию роза Winter Roses

Огромная благодарность Sharon за Мастер-класс

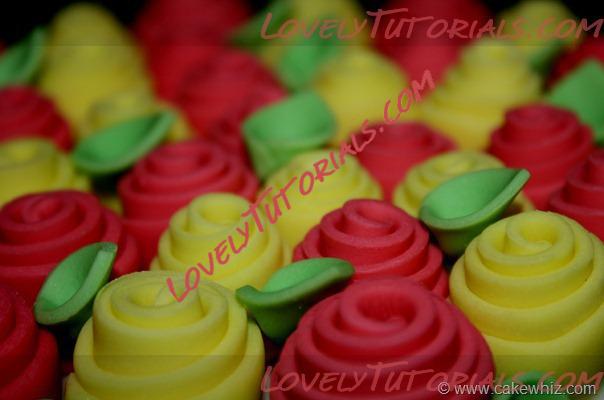
рождественская розочка
Название: rose_tutorial.jpg
Просмотров: 16

Размер: 34.2 Кб

Название: rose_tutorial2.jpg
Просмотров: 15

Размер: 35.8 Кб

Название: rose_tutorial3.jpg
Просмотров: 16

Размер: 37.3 Кб

Название: rose_tutorial4.jpg
Просмотров: 17

Размер: 26.9 Кб

Название: rose_tutorial5.jpg
Просмотров: 15

Размер: 38.0 Кб

Название: rose_tutorial6.jpg
Просмотров: 15

Размер: 22.6 Кб

Название: christmas_rose_tutorial7.jpg
Просмотров: 12

Размер: 28.2 Кб

Название: christmas_rose_tutorial8.jpg
Просмотров: 12

Размер: 27.9 Кб

Название: christmas_rose_tutorial9.jpg
Просмотров: 13

Размер: 41.2 Кб

Название: christmas_rose_tutorial10.jpg
Просмотров: 13

Размер: 37.8 Кб

Название: christmas_rose_tutorial11.jpg
Просмотров: 13

Размер: 47.3 Кб

Название: christmas_rose_tutorial12.jpg
Просмотров: 13

Размер: 44.3 Кб

Название: christmas_rose_tutorial13.jpg
Просмотров: 12

Размер: 40.4 Кб

Название: christmas_rose_tutorial14.jpg
Просмотров: 13

Размер: 36.4 Кб

Название: christmas_rose_tutorial15.jpg
Просмотров: 14

Размер: 55.3 Кб

Название: christmas_rose_tutorial16.jpg
Просмотров: 12

Размер: 32.8 Кб

Название: christmas_rose_tutorial17.jpg
Просмотров: 13

Размер: 40.4 Кб
Ответить с цитированием
  #9  
Старый 25.09.2010, 04:22
Администратор
 
Регистрация: 07.09.2010
Сообщений: 7,940
По умолчанию роза

спасибо Marcy72 за МК
Название: P1020399.JPG.jpg
Просмотров: 17

Размер: 112.8 Кб

Название: P1020400.JPG.jpg
Просмотров: 14

Размер: 116.7 Кб

Название: P1020401.JPG.jpg
Просмотров: 15

Размер: 111.7 Кб

Название: P1020402.JPG.jpg
Просмотров: 13

Размер: 103.5 Кб

Название: P1020415.JPG.jpg
Просмотров: 15

Размер: 105.7 Кб

Название: P1020416.JPG.jpg
Просмотров: 15

Размер: 96.2 Кб

Название: P1020417.JPG.jpg
Просмотров: 12

Размер: 98.5 Кб

Название: P1020419.JPG.jpg
Просмотров: 15

Размер: 107.0 Кб

Название: P1020421.JPG.jpg
Просмотров: 13

Размер: 93.0 Кб

Название: P1020428.JPG.jpg
Просмотров: 15

Размер: 110.3 Кб

Название: P1020429.JPG.jpg
Просмотров: 14

Размер: 119.5 Кб
Ответить с цитированием
  #10  
Старый 13.07.2011, 21:07
Администратор
 
Регистрация: 07.09.2010
Сообщений: 7,940
По умолчанию

Огромная благодарность Валентинка Порчелли за Мастер-класс

Название: sam_1106.jpg
Просмотров: 13

Размер: 47.5 Кб

Название: sam_1108.jpg
Просмотров: 14

Размер: 38.7 Кб

Название: sam_1110.jpg
Просмотров: 11

Размер: 33.1 Кб

Название: sam_1111.jpg
Просмотров: 11

Размер: 40.7 Кб

Название: sam_1113.jpg
Просмотров: 12

Размер: 44.5 Кб

Название: sam_1114.jpg
Просмотров: 13

Размер: 44.7 Кб

Название: sam_1115.jpg
Просмотров: 15

Размер: 39.4 Кб

Название: sam_1116.jpg
Просмотров: 12

Размер: 39.5 Кб

Название: sam_1121.jpg
Просмотров: 12

Размер: 36.5 Кб

Название: sam_1122.jpg
Просмотров: 9

Размер: 37.4 Кб

Название: sam_1123.jpg
Просмотров: 10

Размер: 75.1 Кб
Ответить с цитированием
  #11  
Старый 25.07.2011, 13:06
Администратор
 
Регистрация: 07.09.2010
Сообщений: 7,940
По умолчанию

спасибо огромное Melissa Diamond за МК
слова и фото автора


I started off by rolling out a 50/50 mix of fondant and gum paste to about 1/8″ thickness….go even thinner if you can. I like thin ruffles! - After rolling, I cut the fondant into strips. I have a fondant ribbon cutter which sped things up a bit…but you can use a sharp knife too and just eyeball it.
I used about six, approx. 11 inch long strips, which were about 1/2 inch wide.
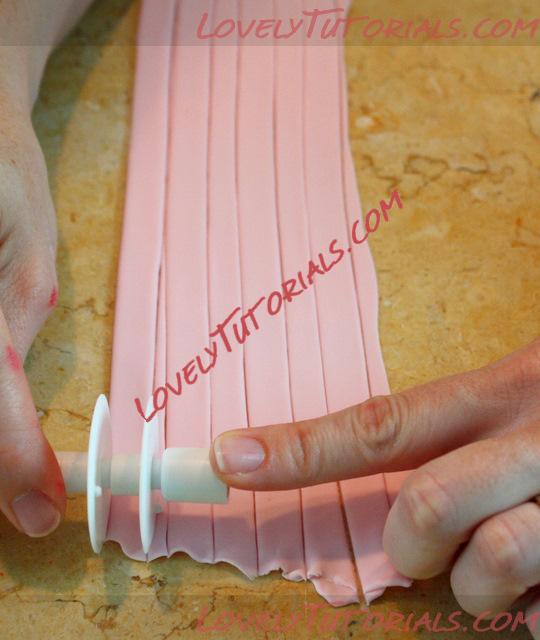
Название: IMG_2967.jpg
Просмотров: 15

Размер: 129.7 Кб
One at a time, I placed a strip on my cel pad , and using a ball tool, I applied pressure as I slid the ball along the edge of one side. This is going to naturally give a nice frilled effect as the fondant becomes thinner.
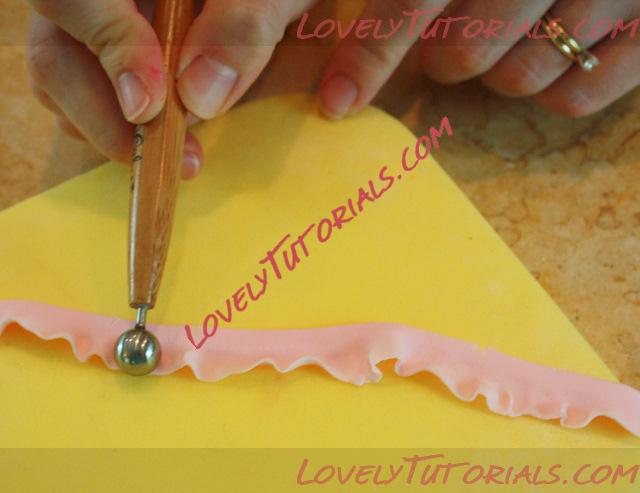
Название: IMG_2969.jpg
Просмотров: 17

Размер: 98.6 Кб
The other strips of fondant were waiting for their turn under a piece of vinyl that we bought from the fabric store. You can also keep them under a glass bowl or in an airtight container while they wait.
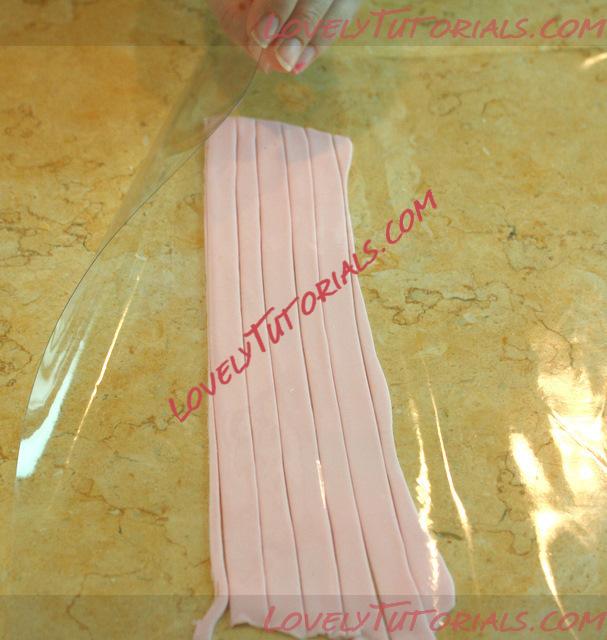
Название: IMG_2975.jpg
Просмотров: 15

Размер: 151.5 Кб
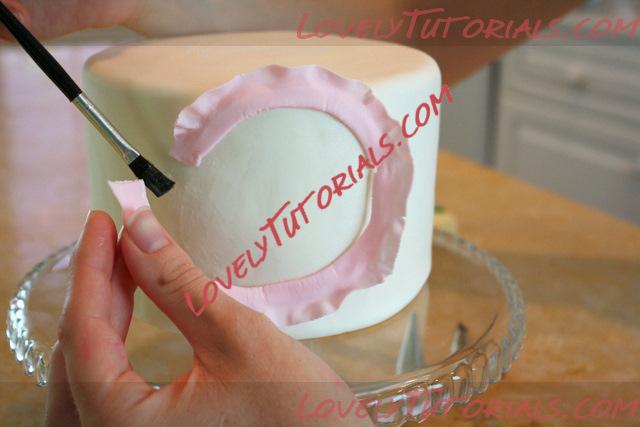
Now for the fun part— Decide how big of a flower you want to make, and use a paint brush to brush on some piping gel where your first strip will be placed. The first strip of fondant determines how large of a flower you are going to have.
Then, start arranging your strip. You may have to add a little more piping gel here and there. (Sugar glue or tylose glue works well too.)
Don’t press the frilly edge of the fondant into the glue–you’ll need that fluffiness for dimension.
Название: IMG_2981.jpg
Просмотров: 13

Размер: 89.8 Кб
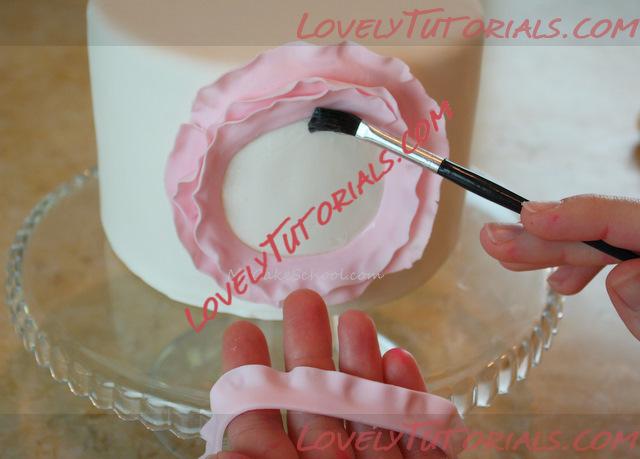
Continue with your circular pattern, brushing the area with piping gel and then wrapping around your fondant.
Название: IMG_2984.jpg
Просмотров: 12

Размер: 93.5 Кб
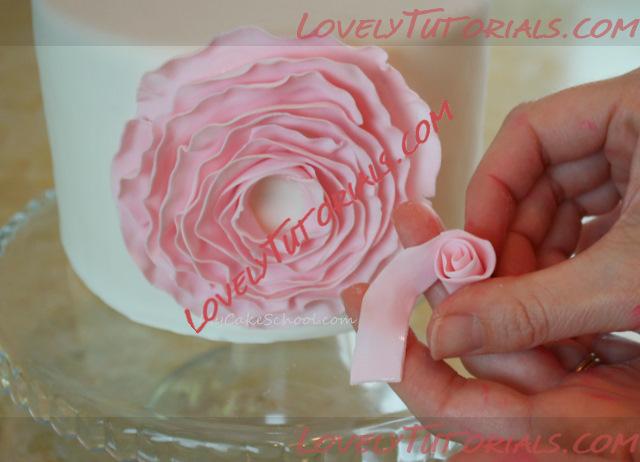
It only took about 5 strips before my flower was almost full. The last little space in the center of the flower I decided to fill with a rolled piece of fondant.
Название: IMG_2989.jpg
Просмотров: 13

Размер: 98.9 Кб
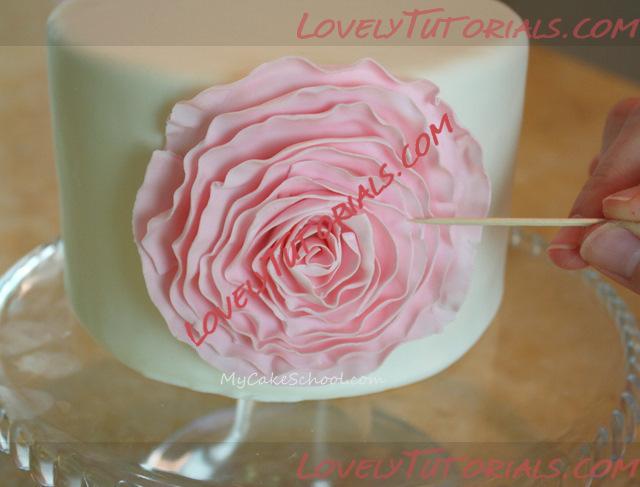
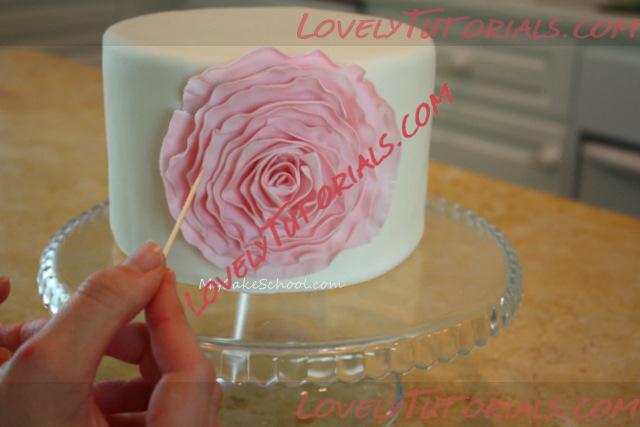
So pretty! You can use a toothpick or Q-tip to manipulate the petals however you like–
Название: IMG_2990.jpg
Просмотров: 13

Размер: 85.9 КбНазвание: IMG_2991.jpg
Просмотров: 14

Размер: 103.2 Кб
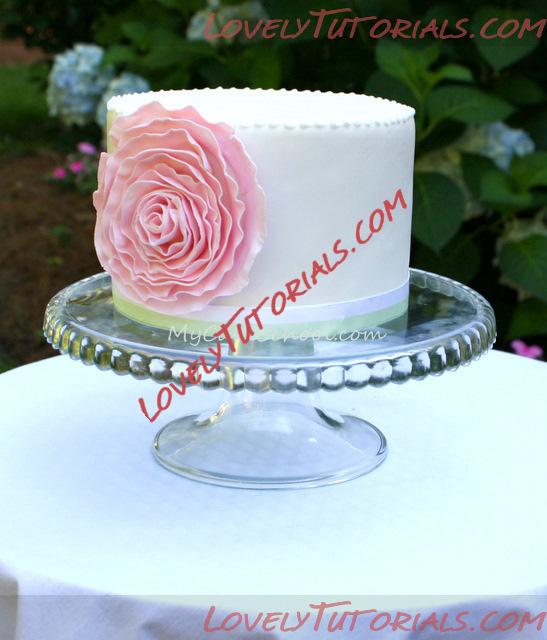
I finished it off with a tiny buttercream bead border around the top (using a tip 3) and a ribbon border around the bottom.
I couldn’t decide if I liked the flower better front and center like this…
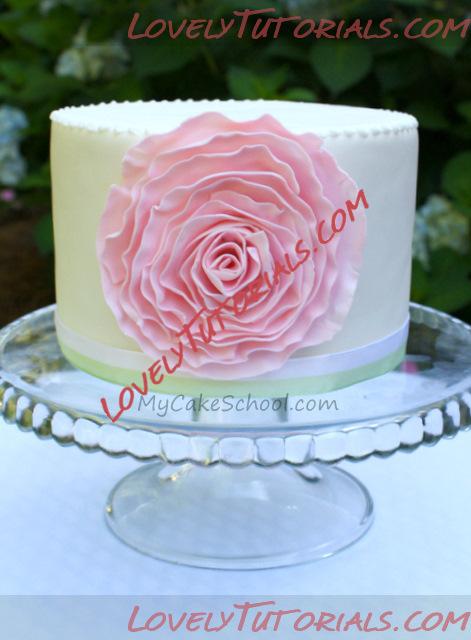
Название: IMG_3021.jpg
Просмотров: 13

Размер: 108.7 Кб
Or just off center like this…..

Название: IMG_3024.jpg
Просмотров: 12

Размер: 126.0 Кб
I think that I like it at both angles :0) – My favorite part about this flower is that once you have cut your fondant strips, the process goes very quickly! It’s a great way to add the elegance of a fondant/gum paste flower without the wait!
I hope that you liked this technique–& I hope you’ll consider adding a little frillyness to one of your creations very soon. Until next time, happy caking!
Ответить с цитированием
  #12  
Старый 25.07.2011, 20:05
Администратор
 
Регистрация: 07.09.2010
Сообщений: 7,940
По умолчанию роза из ленты-Ribbon rose

спасибо огромное Abeer за МК
слова и фото автора

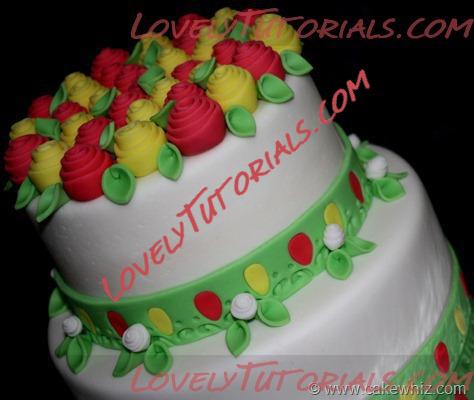
The cake is today’s posting is decorated with ribbon roses. I used to make these roses out of actual ribbons and glue them onto gift boxes. When I tried making these roses with fondant, it worked just as well and looked just as pretty! Try them out ….
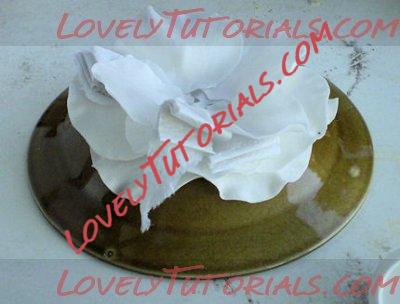
Название: 1.jpg
Просмотров: 9

Размер: 42.7 Кб
Ribbon rose
These roses can be made with fondant but that takes fairly long to dry. I suggest using a 50/50 mixture which dries faster. To make this mixture, mix half gum paste and half fondant and knead well and it is ready to use.
Step 1:
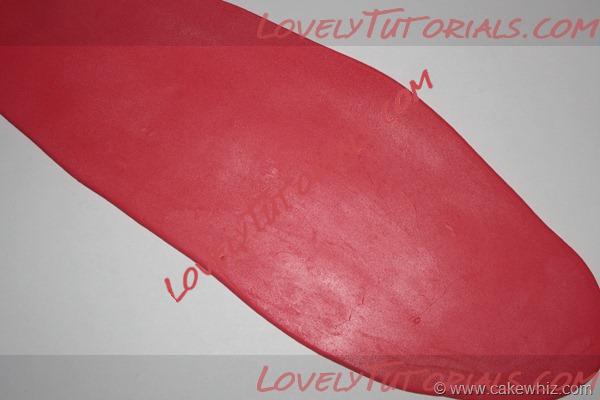
Roll out fondant or 50/50 mixture.
Название: 2.jpg
Просмотров: 11

Размер: 49.9 Кб
Step 2:
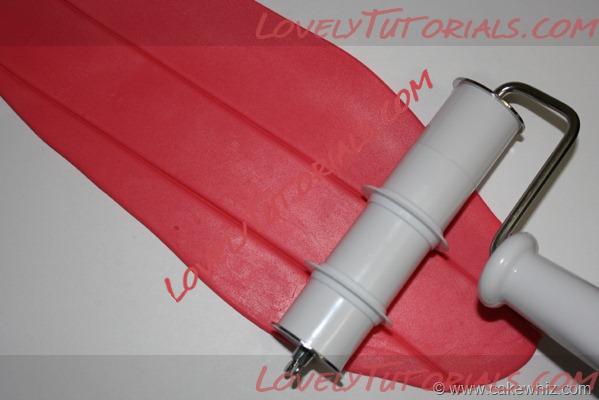
Using a pizza cutter or a fondant cutter, cut ribbons which are 1 inches wide and 8 inches long. If you want to make smaller roses, cut strips which are thinner and shorter.
Название: 3.jpg
Просмотров: 13

Размер: 50.0 Кб
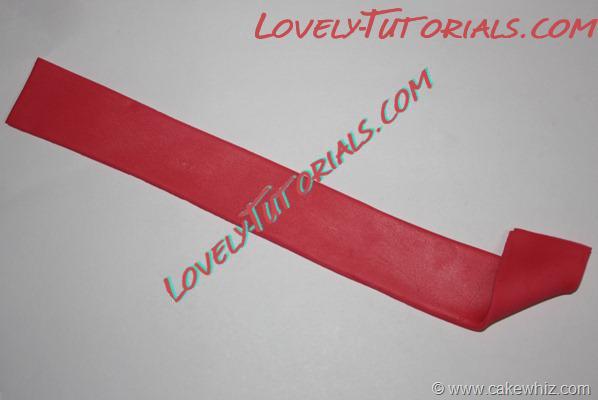
Step 3:
Fold over one corner of the strip.
Название: 4.jpg
Просмотров: 1

Размер: 18.4 Кб
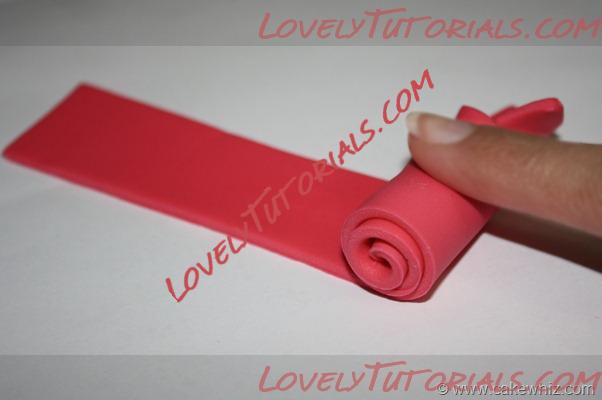
Step 4:
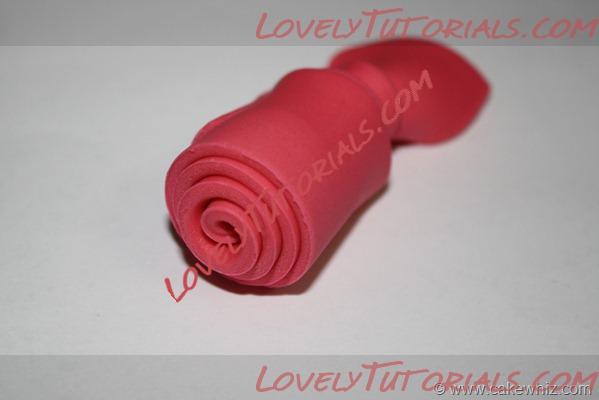
Start rolling and continue all the way to the end…
Название: 5.jpg
Просмотров: 10

Размер: 34.8 Кб
…until it looks like this.
Название: 6.jpg
Просмотров: 10

Размер: 33.9 Кб
Step 5:
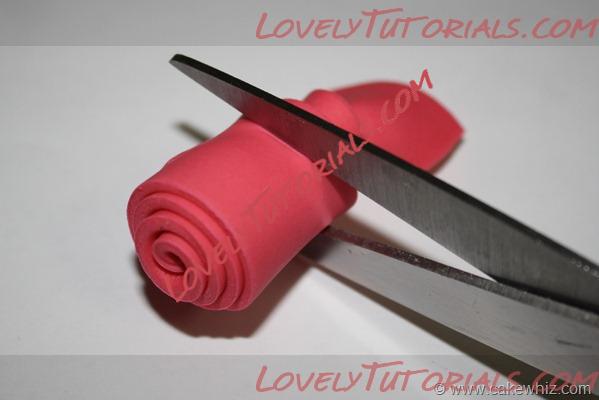
Cut the end of your rose with scissors.
Название: 7.jpg
Просмотров: 9

Размер: 40.4 Кб
Step 6:
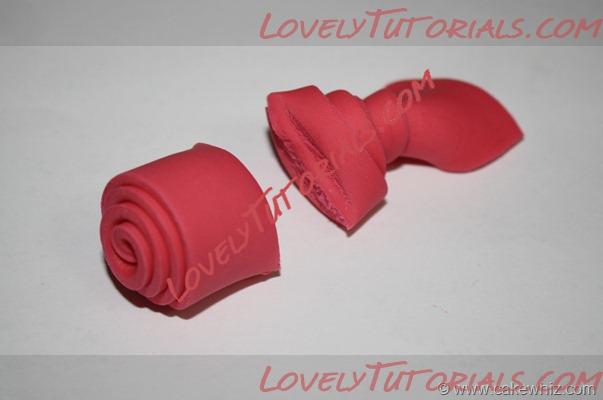
Discard the end.
Название: 8.jpg
Просмотров: 11

Размер: 36.1 Кб
Step 7:
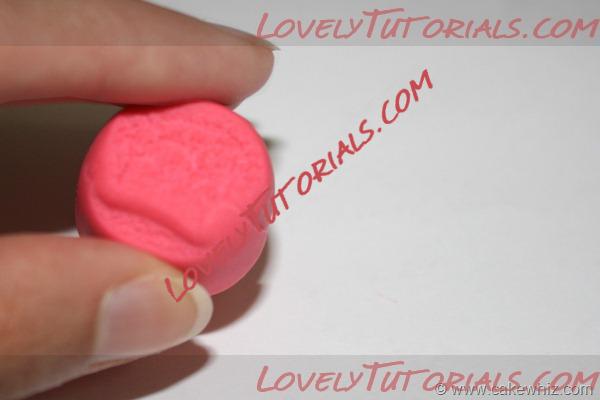
Smooth out the bottom of your rose using your fingers.
Название: 9.jpg
Просмотров: 11

Размер: 33.8 Кб
Step 8:
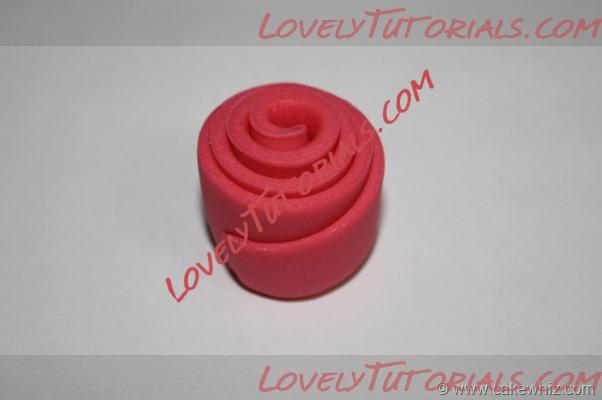
All done! Let these dry overnight.
Название: 10.jpg
Просмотров: 13

Размер: 31.2 Кб
Leaves
You can make leaves using leaf cutters. But, if you want to make leaves seen in my cake, follow these steps:
Step 1:
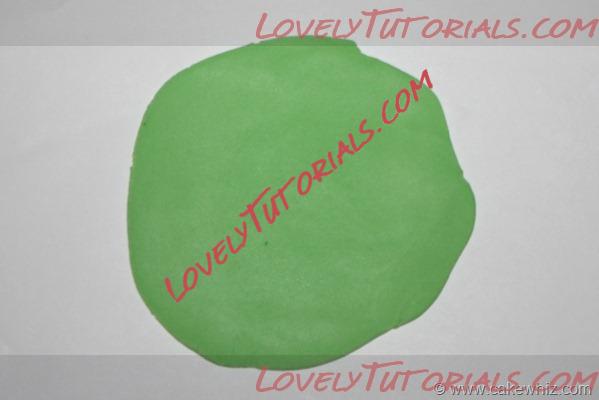
Roll out green fondant.
Название: 11.jpg
Просмотров: 11

Размер: 35.5 Кб
Step 2:
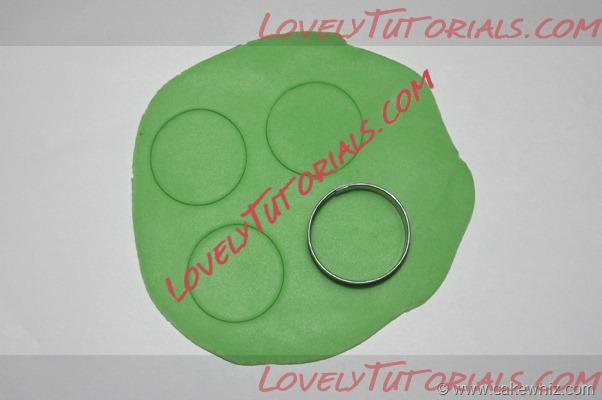
Cut out circles using a medium circle cutter from the Wilton circle cutter set.
Название: 12.jpg
Просмотров: 11

Размер: 43.4 Кб
Step 3:
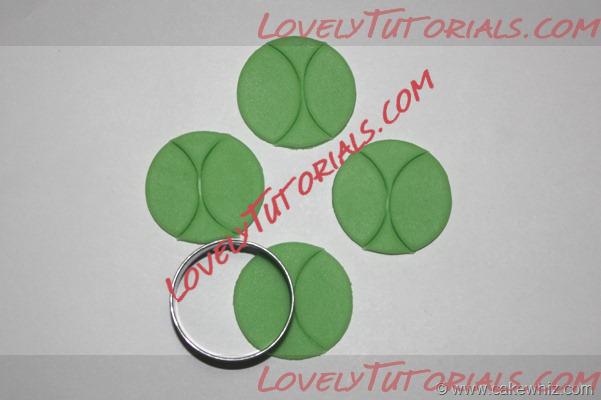
Using the same medium circle cutter, cut out two halves of each circle…
Название: 13.jpg
Просмотров: 11

Размер: 44.4 Кб
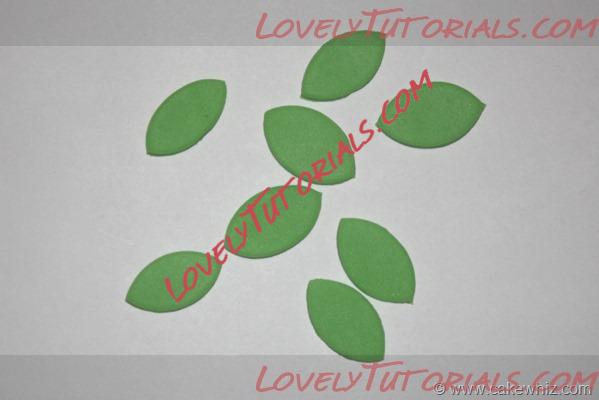
…and you would end up with these leaf shapes. If you wish, you can stop here and actually use these as leaves for your cake OR you can continue with the rest of the steps…
Название: 14.jpg
Просмотров: 11

Размер: 40.6 Кб
Step 4:
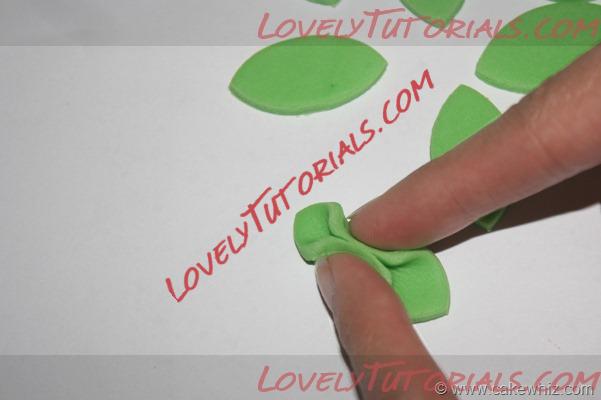
Pinch the center of each leaf until the ends stick together.
Название: 15.jpg
Просмотров: 13

Размер: 37.4 Кб
Step 5:
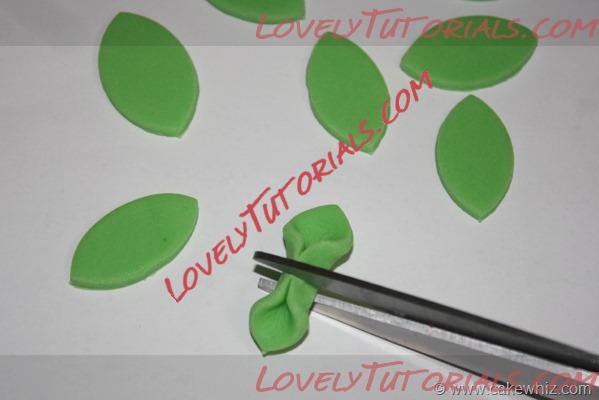
Cut the pinched center with scissors. You now have two leaves.
Название: 16.jpg
Просмотров: 11

Размер: 40.5 Кб
Step 6 :
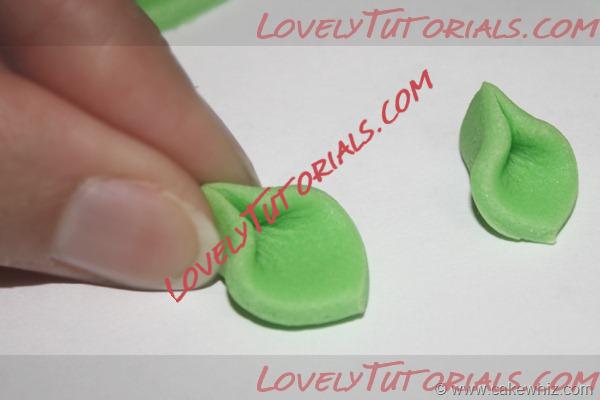
Smooth out the ends of of leaves with your fingers.
Название: 17.jpg
Просмотров: 10

Размер: 37.8 Кб
Step 7:
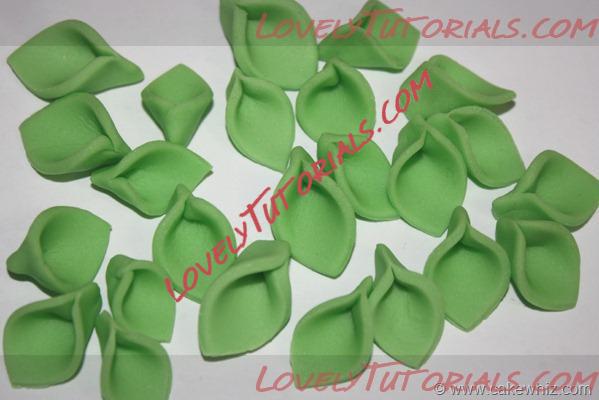
All done! Let them dry overnight.
Название: 18.jpg
Просмотров: 10

Размер: 55.5 Кб
Now that you know how to make ribbon roses and leaves, have fun with it! Try making different colors of roses or different sizes. Use them to decorate your cupcakes , cakes, petit fours and even cake balls/ cake pops…
Название: 19.jpg
Просмотров: 10

Размер: 49.0 Кб
Ответить с цитированием
  #13  
Старый 27.07.2011, 09:24
Администратор
 
Регистрация: 07.09.2010
Сообщений: 7,940
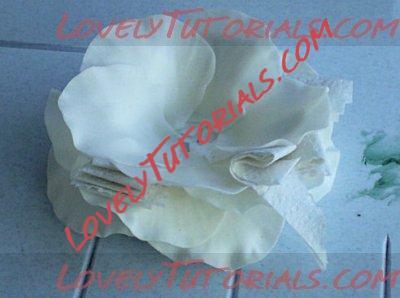
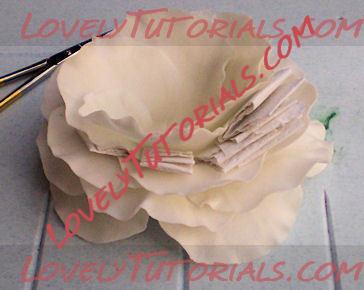
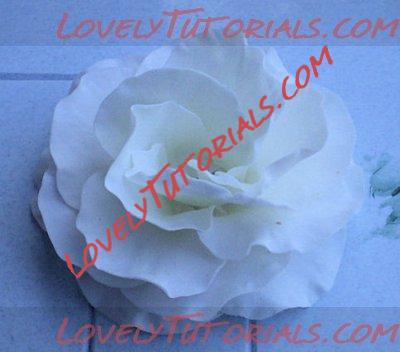
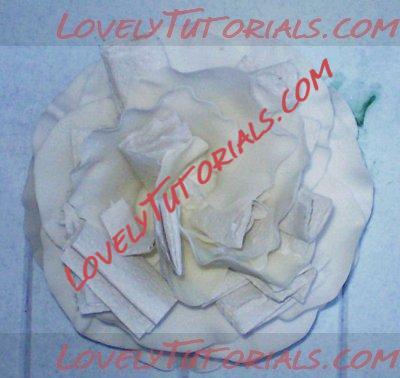
По умолчанию Gumpaste large open rose tutorial

спасибо огромное sifbeth за МК
Название: openrosetut1.jpg
Просмотров: 11

Размер: 28.1 Кб

You need a large rose petal cutter, a ball tool, a frill stick, paper towel and of course, gumpaste in your desired color.
Название: openrosetut1a.jpg
Просмотров: 10

Размер: 16.5 Кб
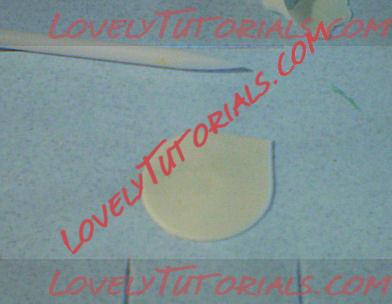
For the base you need 5 petals. Roll out the gumpaste fairly thick and cut out 5 shapes. Cover the 4 so they don’t dry out.
Название: openrosetut2.jpg
Просмотров: 8

Размер: 18.5 Кб
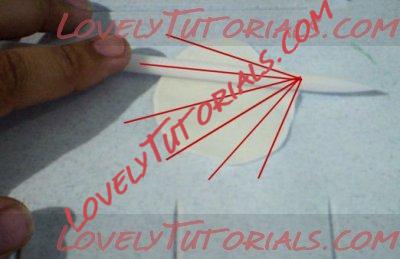
Grab your frill stick and roll the petal flat. Postiton the frill stick from the pointed end and along the red lines for an even rolled petal.
Название: openrosetut3.jpg
Просмотров: 9

Размер: 14.9 Кб
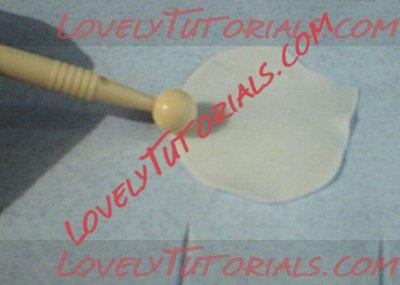
Use the ball tool to create lots of motion and to flatten the edges.
Название: openrosetut4.jpg
Просмотров: 9

Размер: 20.4 Кб
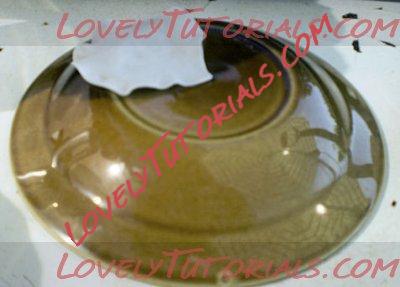
Steal an ugly old bowl from your grandma and drape the petal over it.
Название: openrosetut5.jpg
Просмотров: 10

Размер: 34.3 Кб
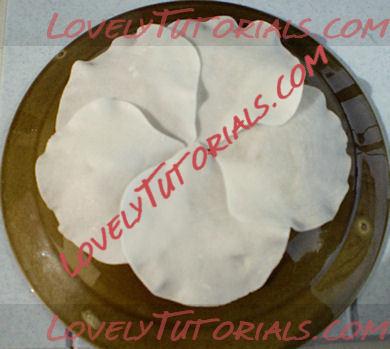
Give the remaining 4 petals the same treatment and postiton them over the bowl in a circle and glue them together. Be careful not to glue them to the bowl though! Make the circle as perfect as possible, as you will use the bottom layer as a guide for the shaping of the entire rose. Let it all dry for several hours.
Название: openrosetut6.jpg
Просмотров: 10

Размер: 19.3 Кб
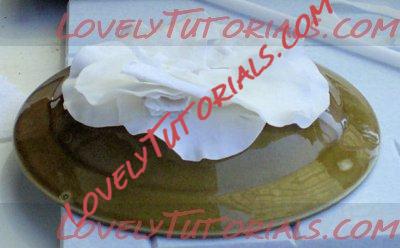
Now make one more layer of petals and glue them to the bottom layer. To shape the rose, I use folded paper towels cut in small pieces and inserted as supports. Take your sweet time to do this, but you need to get it done before it dries too much. The point is to lift the petals up from the bottom layer. Let it dry.
Название: openrosetut7.jpg
Просмотров: 9

Размер: 21.5 Кб
Add one more layer. Let dry.
Название: openrosetut8.jpg
Просмотров: 11

Размер: 19.5 Кб
It gives a great effect to lift one side of the petal higher than the other.
Название: openrosetut9.jpg
Просмотров: 12

Размер: 30.8 Кб
And now for the last layer of 5 petals. This in the top of the rose and the petals must be close together. Use lots more paper towel for this!
Название: openrosetut10.jpg
Просмотров: 10

Размер: 21.1 Кб
This is how I shaped my rose. As you can see I closed it pretty good on the top. You can make it more open if you want to.
Название: openrosetut10.5.jpg
Просмотров: 11

Размер: 26.1 Кб
Let dry completely and carefully remove the paper towel.
Название: openrosetut11.jpg
Просмотров: 9

Размер: 19.4 Кб
I painted mine with Edable Arts “Scarlet” powder color mixed with iso propyl alcohol and sprinkled cornmeal in the middle to make the flower center, as there is no wire in this flower that will hold stamens.
Ответить с цитированием
  #14  
Старый 31.07.2011, 11:34
Администратор
 
Регистрация: 07.09.2010
Сообщений: 7,940
По умолчанию

Огромная благодарность Irina Gurae за Мастер-класс
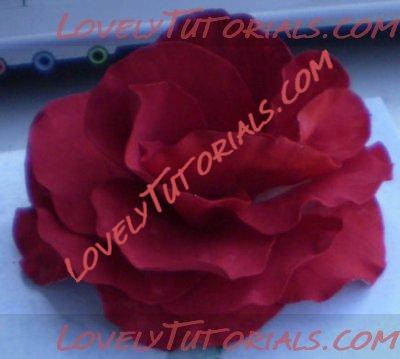
роза из цветочной мастики..на проволоке...

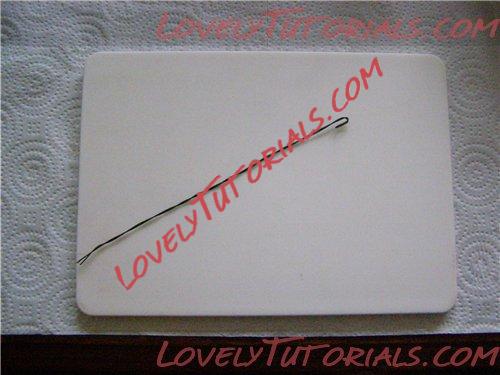
берем проволоку и делаем крючочек..
Название: 1.jpg
Просмотров: 22

Размер: 31.9 Кб

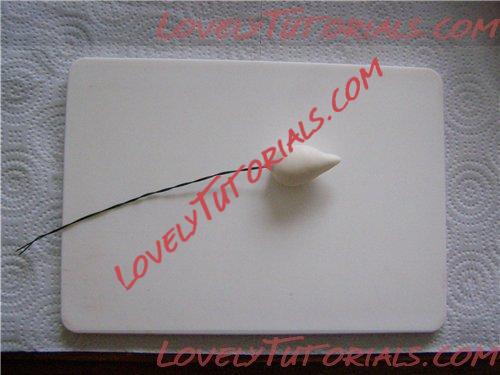
из цветочной мастики делаем конус и вставляем проволоку..оставляем на ночь...
Название: 2.jpg
Просмотров: 19

Размер: 29.1 Кб

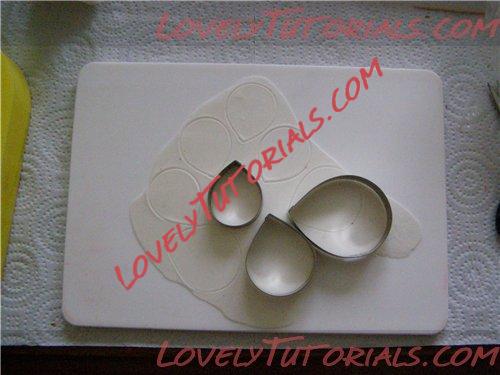
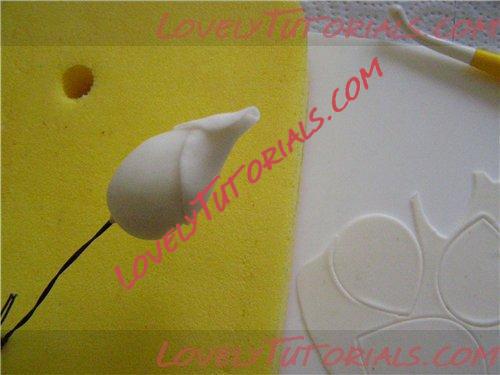
раскатываем мастику, вырезаем лепесточки...колличество лепесточков зависит, какой пышности вы хотите сделать розу... можно так..маленьких-4..средних-8..больших-5..
Название: 3.jpg
Просмотров: 25

Размер: 32.6 Кб

каждый лепесточек немного фалдим...


начинаем с маленького лепесточка обворачивать наш конус...приклеить можно БЕЛКОМ...
Название: 4.jpg
Просмотров: 22

Размер: 27.4 Кб

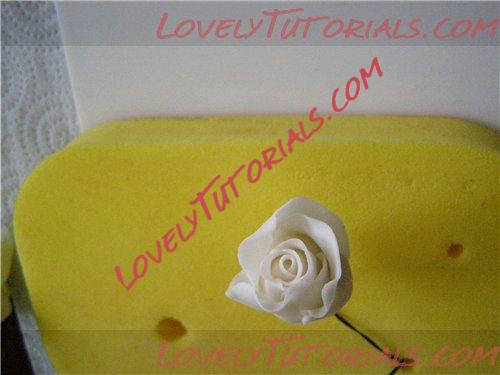
приклеиваем лепесточки..справа налево...ну а в общем, как кому удобно...
Название: 5.jpg
Просмотров: 21

Размер: 24.9 Кб

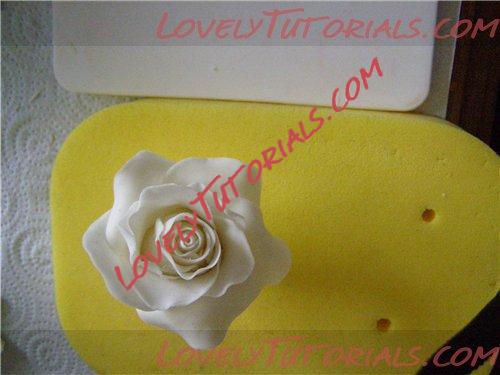
в итоге получается такая роза...
Название: 6.jpg
Просмотров: 20

Размер: 29.8 Кб

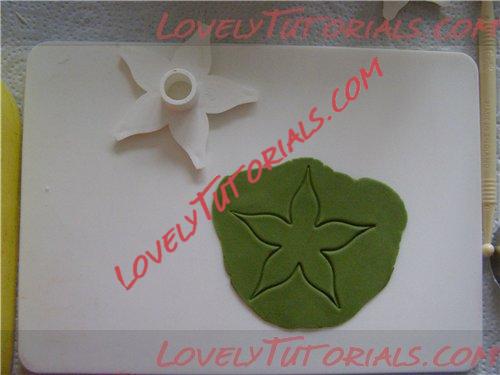
вырезаем пятилистник..и приклеиваем к розе.......
Название: 7.jpg
Просмотров: 20

Размер: 23.4 Кб

по желанию, можно раскрасить
Название: 8.jpg
Просмотров: 20

Размер: 30.5 Кб
Ответить с цитированием
Ответ

Метки
anlegget, anläggning, armado de los ramos, arranjo, artesanatos passo a passo, augalas, baking, biljka, bitki, blad, blade, blader, bladeren, blatt, bloem, bloemen, blomma, blommor, blomst, blomster, blume, blumen, blüten, blütenpaste, blätter, boeket, bouquet, buchet, buket, bukett, bukiet, buquê, cake decorating, cake decorating techniques, cerâmica plástica, chiodi di garofano, clavo de olor, clous de girofle, cloves, cold porcelain, cold porcelain figurines, cold porcelain flowers, confeitando bolos, csokor, cukrinių gėlių, curso completo de flores, curso de modelado, cvijet, cvijeće, decoracion de pasteles, decoración de tortas, decorare le torte, decorazioni, deko fondant, dekorace na dort, dekoracija, dekoracije, dekorasyon, dekorácie, el abc del armado de ramos, feuille, feuilles, fimo, fimo flowers, fiore, fiori, fleurs, floare, flogistica, flor, floral inspirations, flores, flores azucar, flores e folhas, flori, floristics, floristik, floristikk, floristique, florística, flower, flower paste, flowering plants, flowers, flowers on a wire, foglia, foglie, folha, folhas, folhas pintadas, fondan, fondant, fondente, fotopostup, frunze, gum pasta, gum paste, gum paste flowers, gumpaste, gumpaste flowers class, gül, güller, gėlė, gėlės, hand painting, handmodelliert, hideg porcelán, hladno porculan, hoja, hojas, how to, how tцветы на проволоке, how-to's, hřebíček, impianto, jak na, kage dekoration, kagedekoration, kakebaking, kaldt porselen, kallt porslin, kalt porzellan, kasvi, kolde porcelæn, koud porselein, krok za krokem, kukka, kukkakimppu, kukkia, kvetina, kvety, květina, květiny, kwiat, kwiaty, kylmä posliini, kytica, la modélisation, lapai, lapas, leaf, leaves, lehdet, lehti, levelek, levél, list, listí, lišće, liście, liść, lístia, lístky na drátku, making sugar flowers, making the rosebud, marshmallow, masa flexible, mazzo, modelado, modelagem, modelare, modeling, modeling paste, modeliranje, modellazione, modelleme, modellering, modellieren, modellierpaste, modelləşdirmə, modelovanie, modelování, modelowanie, montando, motivtorten, nelken, návody a postupy, návody na květy a lístky, növény, oasis o esponja de floristeria, pap, paso a paso, passo a passo, passo-a-passo, pasta flexible, pflanze, plant, planta, plante, plantes, plantă, pocelana fria, polymer clay, polymer clay flowers tutorial, porcelaine froide, porcelana fria, porcelana fría, porcellana fredda, postup klinček, postupak za ukrasavanje, puokštė, ramo, rastlina, rece porţelan, rododendron, roos, rosa, rosas, rose, rosen, roser, roses, rosor, rostlina, rozen, rožė, rožės, roślina, ruusu, ruusut, ruža, ruže, rózsa, róża, róże, růže, schritt für schritt anleitung, schritt-für-schritt, sculpey flowers, sculpting, simple, soğuk porselen, stamens, steg, steg for steg, step by step, step-by-step, strauß, studený porcelán, styrofoam, sugar cane flowers, sugar cloves, sugar flower, sugar flowers, sugar flowers for cake decorating, sugar paste flowers, sugar rose, sugarcraft, sugarpaste, sukker art, technique utilisée fleurs en sucre cru, tecnicas de decoracion, tecniche, thai flowers, torte, torte decorate, torten dekorieren, torti, trandafir, trandafiri, trin for trin, trin-for-trin, trinn for trinn, tutorial, tutorijal, ukrašavanje torti, uputstvo za dekoraciju, virág, virágok, wedding cake, wedding cakes, wire, yaprak, yapraklar, zimno porcelany, zuckerblumen, ดอกไม้, सजा केक, मॉडलिंग, モデル, çiçek, çiçek modelleme, ökade, šalto porceliano, 建模, 裝飾蛋糕, 진달�?, κρύα πορσελάνη, μπουκέτο, αζαλέα, λουλούδι, λουλούδια, τα φύλλα, τριαντάφυλλο, τριαντάφυλλα, φύλλα, φυτό, кветка, кветкі, квіти, квітка, как слепить розу, керамическая флористика, куст, гвоздика, полимерная глина, полевые цветы, пошагово, природа, мк, моделиране, майстер-класи, маршмеллоу, мастика, мастер-класс, мастер-класс по лепке, азалия, азалія, букет, завод, листа, листья, листя, лепим цветы, лепка, лепка из глины, лепка из пластики, лепка розы без проволки, лепка цветов, ліплення, лісце, рози, роза, розы, рослина, растение, растения, ружа, ружы, украшение тортов, украшение торта, свадебный торт, сахарная мастика, сахарный клей, уроки прикрашання, студен порцелан, торт, троянди, троянда, фимо, флористика, флора, холодного порцеляни, холодного фарфора, холодный фарфор, халоднага фарфору, цветок, цветочная паста, цвете, цветя, цветы, цветы из полимерной глины, цветы из холодного фарфора, цветы на торт, цветы ручной работы, шаг за шагом


©2022 Lovely Tutorials