Cake Decorating Tutorials  (How To's) Tortas Paso a Paso
Cake Decorating Tutorials (How To's) Tortas Paso a Paso
Старый 16.09.2010, 07:44
Ariana Ariana вне форума
Администратор
Регистрация: 07.09.2010
Сообщений: 7,940
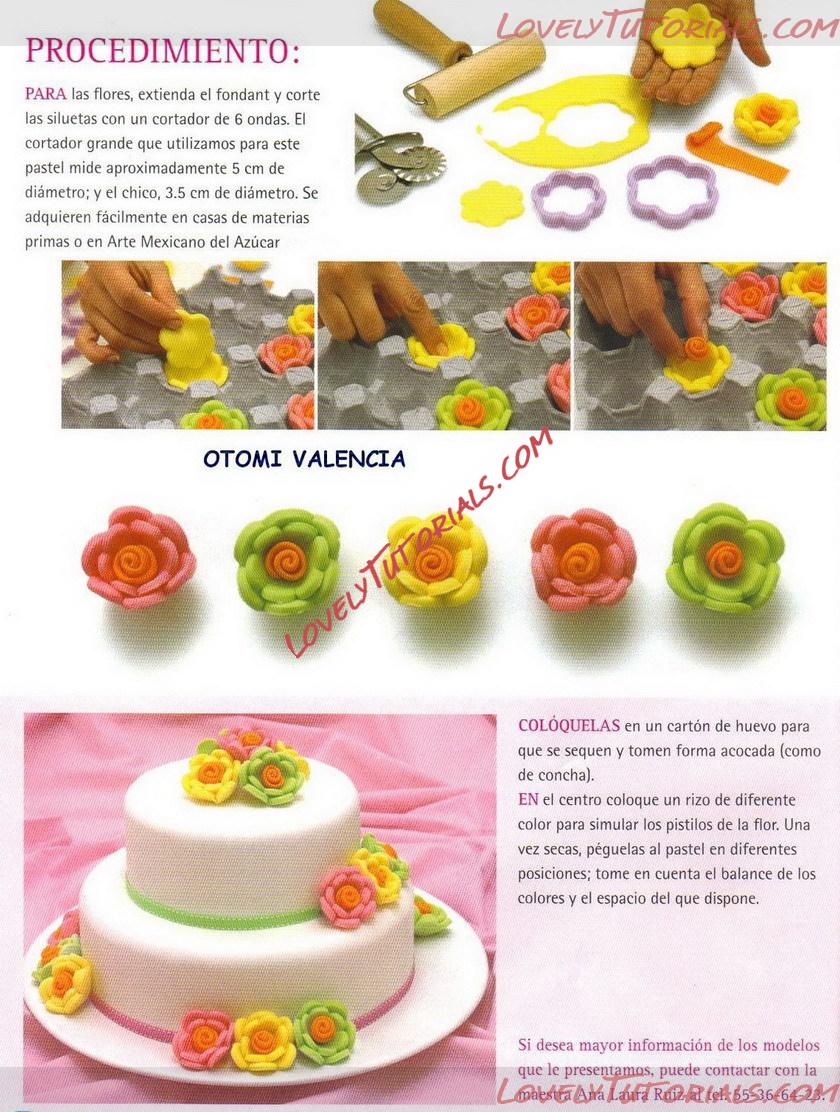
По умолчанию Фантазийные цветы -Fantasy flowers
Огромная благодарность Автору за Мастер-класс
Название: 01.jpg
Просмотров: 10

Размер: 297.3 Кб
Старый 10.10.2010, 05:02
Ariana Ariana вне форума
Администратор
Регистрация: 07.09.2010
Сообщений: 7,940
По умолчанию цветочки
Огромная благодарность DanielaK за Мастер-класс
Название: 1.jpg
Просмотров: 28

Размер: 56.7 Кб

Название: 2.jpg
Просмотров: 19

Размер: 50.4 Кб

Название: 3.jpg
Просмотров: 19

Размер: 53.2 Кб

Название: 4.jpg
Просмотров: 19

Размер: 53.8 Кб

Название: 5.jpg
Просмотров: 18

Размер: 56.9 Кб

Название: 6.jpg
Просмотров: 17

Размер: 59.9 Кб

Название: 7.jpg
Просмотров: 23

Размер: 56.3 Кб

Название: 8.jpg
Просмотров: 21

Размер: 54.4 Кб

Название: 9.jpg
Просмотров: 19

Размер: 53.8 Кб

Название: 11.jpg
Просмотров: 20

Размер: 66.8 Кб
Старый 10.10.2010, 05:33
Ariana Ariana вне форума
Администратор
Регистрация: 07.09.2010
Сообщений: 7,940
По умолчанию цветочки
Название: Collage di Picnik-mod.jpg
Просмотров: 29

Размер: 21.4 Кб

Название: Collage di Picnik-mod1.jpg
Просмотров: 28

Размер: 25.7 Кб
Старый 08.10.2011, 17:05
Ariana Ariana вне форума
Администратор
Регистрация: 07.09.2010
Сообщений: 7,940
По умолчанию
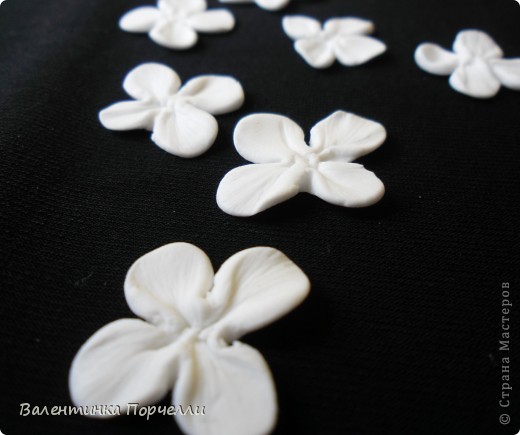
спасибо огромное Валентинке за МК
слова и фото автора
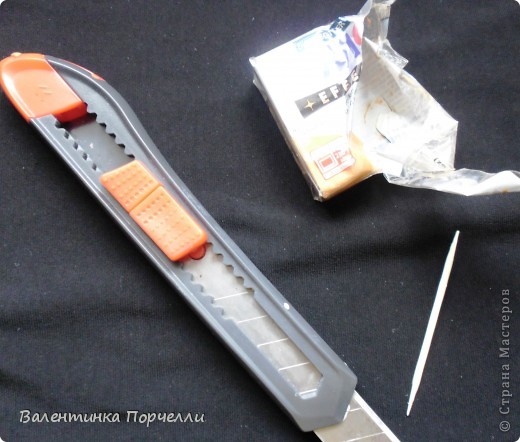
Инструменты-пластика,нож для бумаги и зубочистка!


2.
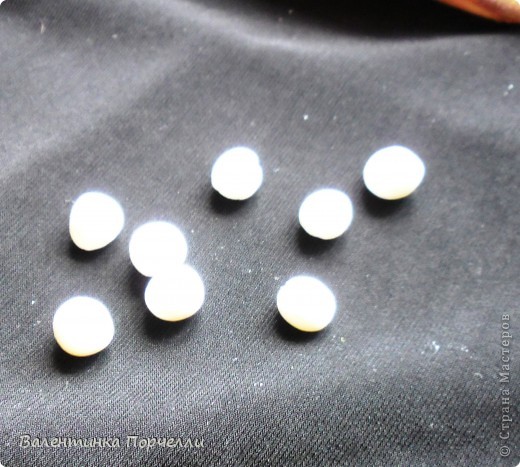
Катаем шарики


3.
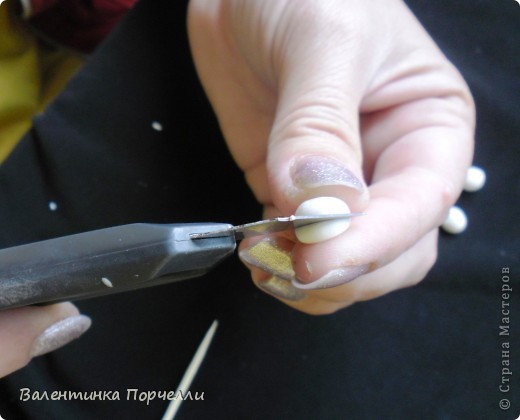
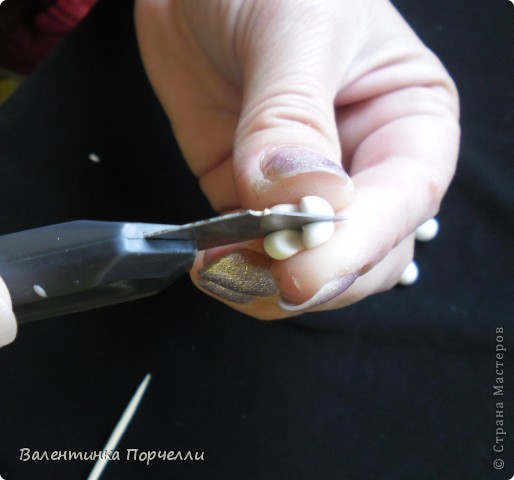
Режем сначала пополам(но не совсем до конца прорезаем)


4.
Потом ещё пополам.Получается вроде-крест накрест.


5.
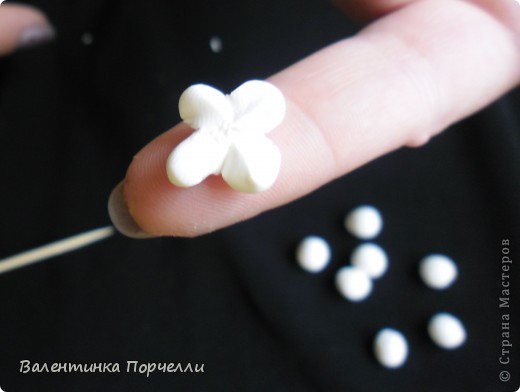
Расправляем.Я всё делаю на пальце.


6.
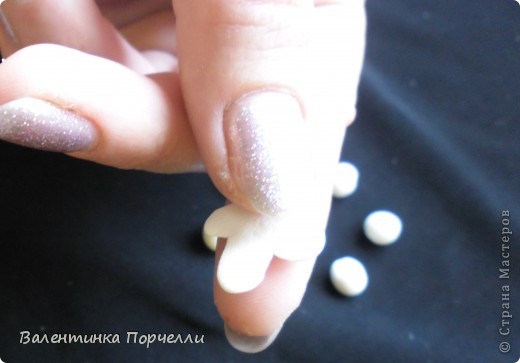
Чуть приплющиваем.


7.
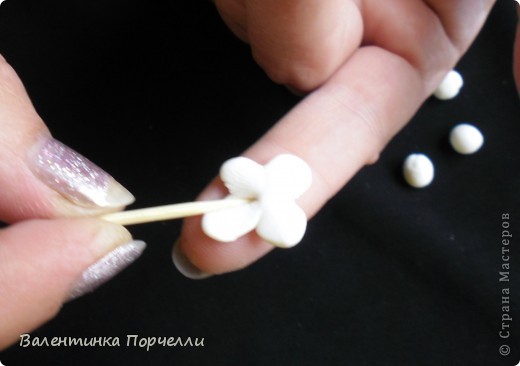
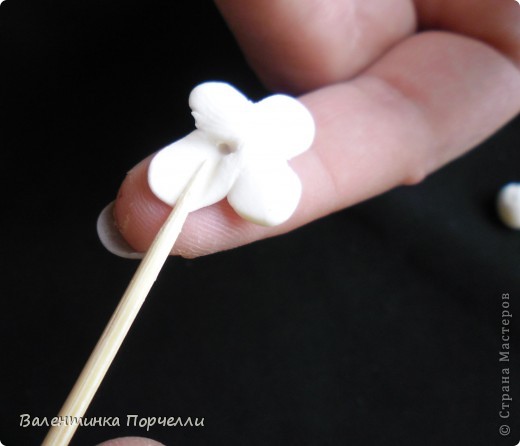
А потом зубочисткой раскатываем лепестки.


8.
Вот так.Надеюсь понятно объясняю)))))


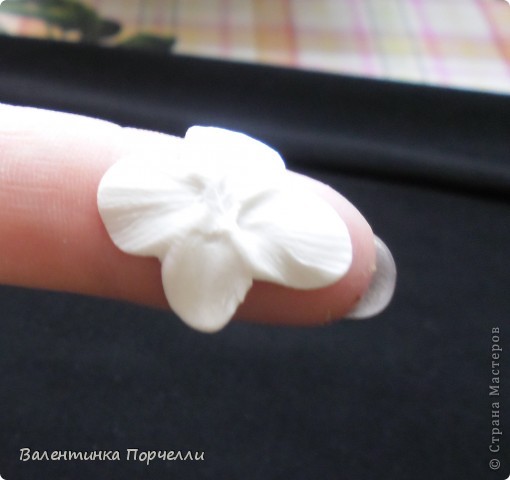
9.
Вот что получилось.Но это не всё))


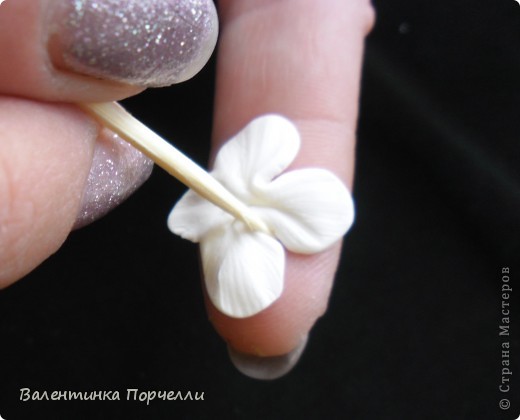
10.
Опять же зубочисткой немножко между листиками делаем форму.Расправляем.


11.


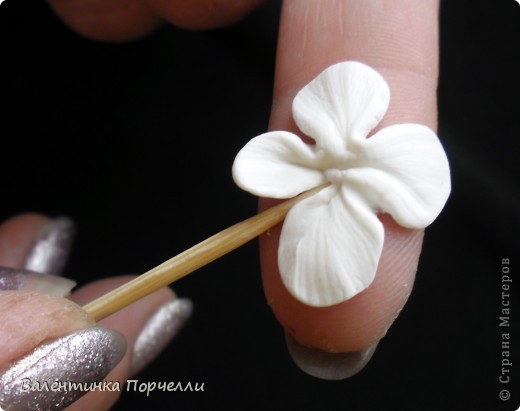
12.
результат!


13.
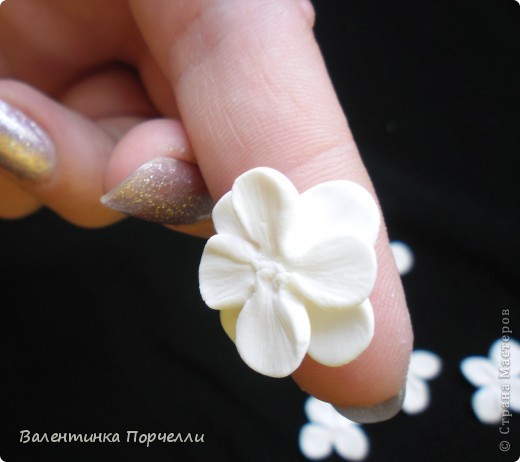
Можно сделать двойной.сверху одного положить другой


14.
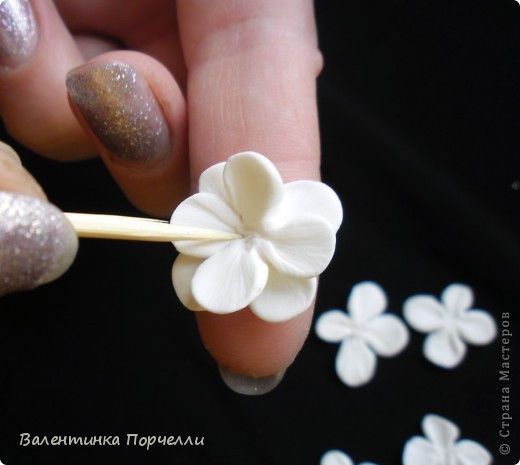
И зубочисткой серединку придавить,а края немного расправить.


15.
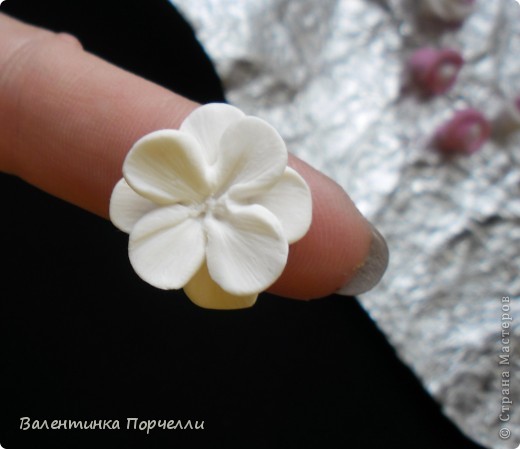
Вуаля!А внутрь я потом добавляю бусинку.
Старый 02.11.2011, 11:44
Ariana Ariana вне форума
Администратор
Регистрация: 07.09.2010
Сообщений: 7,940
По умолчанию


Старый 28.11.2011, 19:05
Ariana Ariana вне форума
Администратор
Регистрация: 07.09.2010
Сообщений: 7,940
По умолчанию
Название: 1.jpg
Просмотров: 0

Размер: 57.9 Кб
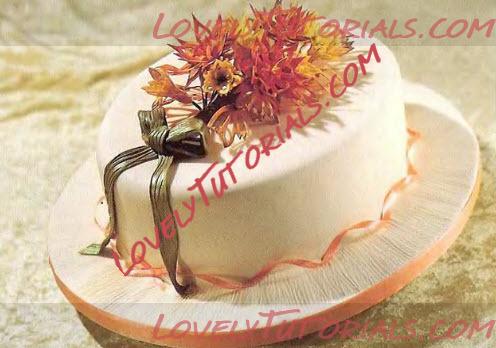
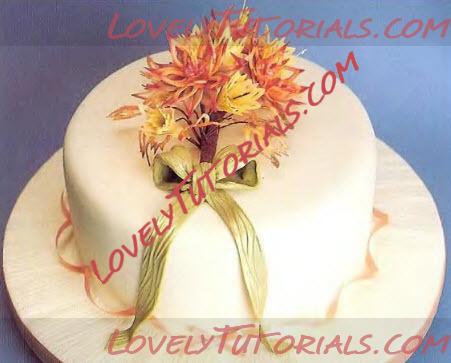
The Autumn Fairy Cake
Prepare the cake board for the cake by covering it with sugarpaste. Texture with the Varipin in a circular action. Sugarpaste the cake separately and position carefully onto the coated board.
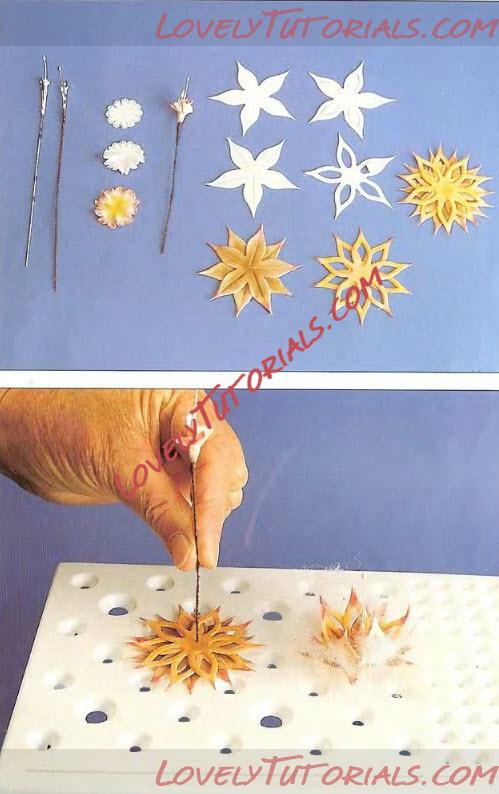
Flowers (see Illustration 6).
1. Take 1 long and 6 shorter stamens (made by folding 3 stamens in half) and wrap a piece of rose wire around the base. Cut off the base of the stamens at an angle. Tape down on to a 26 gauge wire with half width Brown florist tape.
2. Roll out White flowerpaste and cut out one carnation (CIM). Put cornflour on the board and frill with the plain frilling tool. While still soft, place on some kitchen roll paper and dust the centre Canary and Lime Green. Dust the edges Burgundy.
3. Glue the base of the stamens and thread the wire through the centre of the carnation. Squeeze the base of the carnation to fit snugly just underneath the stamens.
4. Roll out White flowerpaste and cut out 2 calyxes (R11C). Vein each sepal with a central vein from the tip to the centre. Dust the calyxes Chocolate and the tips Burgundy. Glue the centre and lay the second on top. interleaving the sepals. Press down in the centre.

Название: 2.jpg
Просмотров: 0

Размер: 100.1 Кб

5. Cut out 2 - Lace Flowers LF4. Remove the centres with the tip of the veining tool. Dust the centre of the flower and part of the petals Orange merging to Canary and the tips Burgundy. Glue the centre of one and lay the second on top, interleaving the sepals (see Illustration 6).
6. Glue the centre of the calyx from Step 4 and lay the flowers on top, interleaving the sepals. Remove the flower to the Orchard flowerstand (S1) and place the centre of the flower over a large hole - (see Illustration 7).
7. Glue the base of the centre from Step 3 and thread through the centre of the flower. Prop the petals and sepals with cloud drift (acrylic fibre) and leave to dry thoroughly. Dust the back Orange with Burgundy tips.
8. Steam the flowers for a few seconds over the spout of a boiling kettle or run a non-drip steam iron above the flowers to allow the dusts to merge for that natural appearance. Then paint the stamens Yellow.
9. Bud. Hook the end of a 26 gauge wire. Roll a small ball of Green paste. Burn the hook with a lighter and press into the ball of Green paste. Roll into a cone. (Because the heat melts the paste and seals the cone, you can work on this item straight away and do not have to wait for it to dry).
10. Cut out 4 Lace Leaves (LL4) from Yellow flowerpaste for each bud. Remove the centres. Glue the green cone and wrap the first leaf around the cone. Glue the base and wrap the second leaf opposite the first. Add two more leaves opposite to leaves 1 and 2. Press in at the base.
11. For a more open bud. press in about a third of the way up from the base. Dust the base and the bud randomly with Cosmos colouring. Hang on the flowerstand upsidedown to dry.
12. The Leaves. Roll out White paste on the grooved board (to give a thicker stem) then texture by rolling across the width with the Varipin. Cut out a Lace Leaf. Insert a 33 gauge wire into the base of the leaf and then remove the centre pieces. Allow to dry with a little curve. Dust to choice.
The Bow
1. Roll out paste 'A' with a smooth rolling pin thicker than normal. Then roll it with the veined 'Varipin' pressing down firmly. Cut a rectangle (half the bow) approx. 8 x 2.5cm (311 x 1"). Turn the paste over and fold and glue a little "hem" down each side. Turn the paste right side up.
2. Dust the paste with a Lustre dust. To make a fold (or ruffle) in the bow, place a Slimpin pin longitudinally in the centre under the paste. Squeeze the ends of paste inwards and stick in place with glue. Double over to form the half bow. Support with "cloud drift". Leave to dry.
3. Repeat the previous steps for the other half of the bow.
4. For the two ties, repeat Steps 1 & 2 above, but make each piece approximately 15 x 2.5cm (6" x 1") long. Trim the ends to suit. Drape them over the cake and prop with "cloud drift" to give a flowing look.
5. Stick the two half bows onto the cake with paste glue where the ties meet. Prepare a small piece of paste as in Steps 1 & 2 and wrap over the join of the half bows to make the knot.
For a neat finish, twirl a ribbon around the base and secure with a bow before assembling the fairy flowers and the paste bow onto the cake.
Название: 2.5.jpg
Просмотров: 0

Размер: 47.2 Кб
Старый 01.05.2012, 07:26
Ariana Ariana вне форума
Администратор
Регистрация: 07.09.2010
Сообщений: 7,940
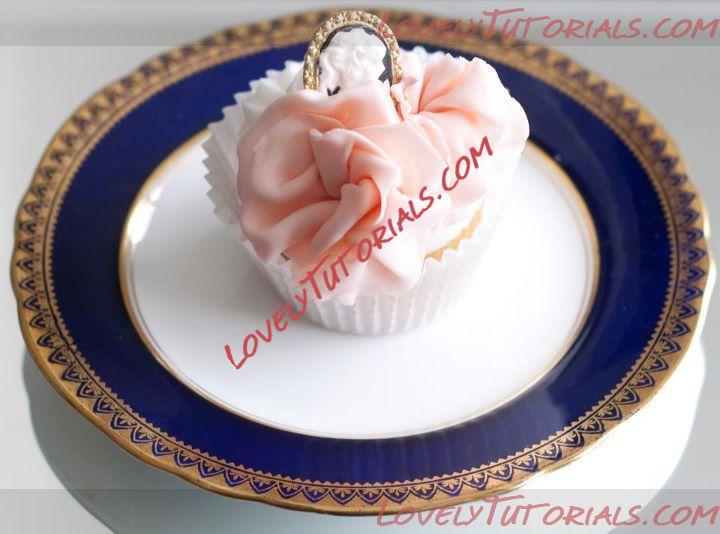
По умолчанию How to make a ruffled gumpaste flower
Огромная благодарность Sophie Bifield Cake Company за Мастер-класс
How to make a ruffled gumpaste flower
Название: How to make a ruffled gumpaste flower.jpg
Просмотров: 0

Размер: 45.1 Кб

Название: How to make a ruffled gumpaste flower 2.jpg
Просмотров: 0

Размер: 39.2 Кб
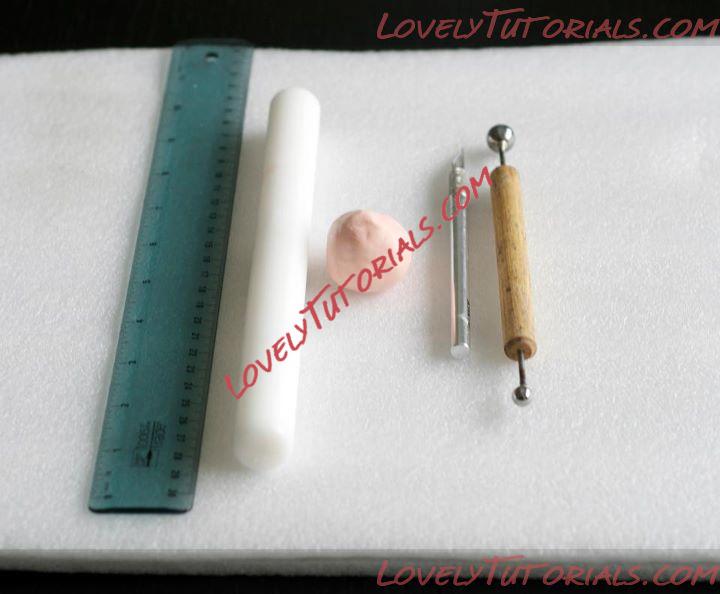
You will need: 1. Foam board 2. Ruler 3. Rolling Pin 4. Gumpaste 5. Xacto Knife 6. Ball Tool

Название: How to make a ruffled gumpaste flower 3.jpg
Просмотров: 0

Размер: 26.1 Кб
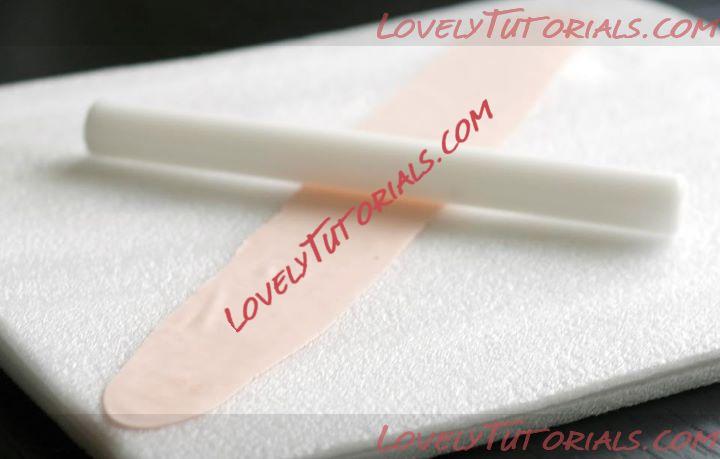
1. Roll gumpaste into a strip. Width of strip will depend on how big you would like your flower to be.
Название: How to make a ruffled gumpaste flower 4.jpg
Просмотров: 0

Размер: 35.1 Кб
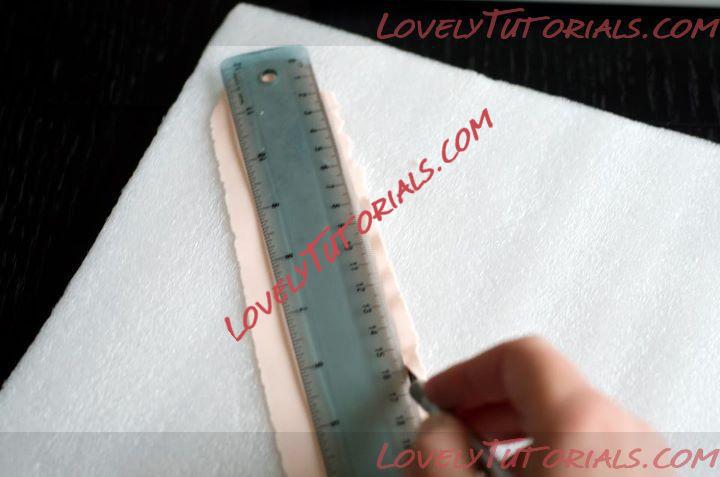
2. Cut a straight line down one side of the gumpaste.
Название: How to make a ruffled gumpaste flower 5.jpg
Просмотров: 0

Размер: 25.4 Кб
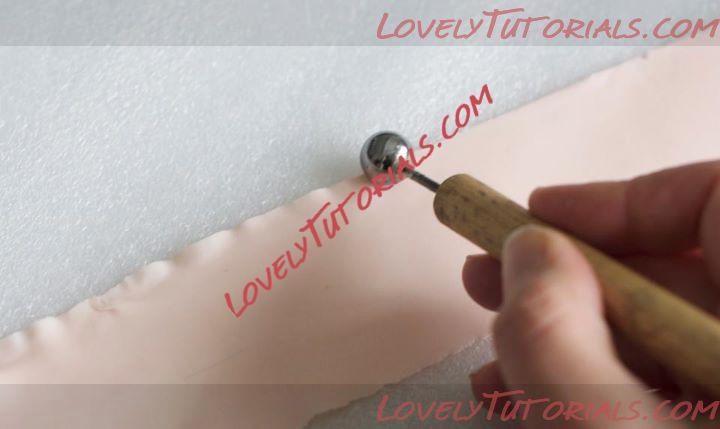
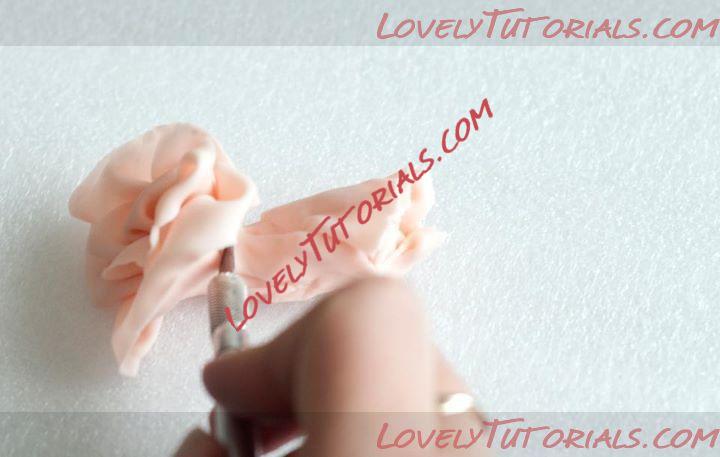
3. Use a ball tool to ruffle the straight edge of the gumpaste.

Название: How to make a ruffled gumpaste flower 6.jpg
Просмотров: 0

Размер: 20.4 Кб
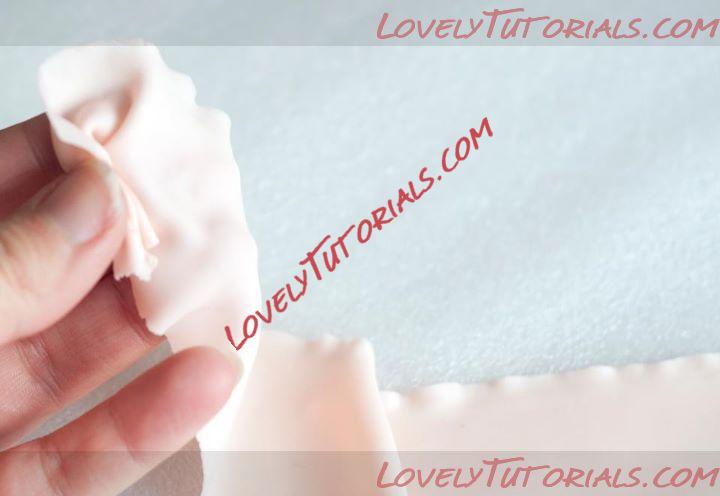
4. Pinch the end of the gumpaste together. This will be the centre.


Название: How to make a ruffled gumpaste flower 7.jpg
Просмотров: 0

Размер: 25.0 Кб
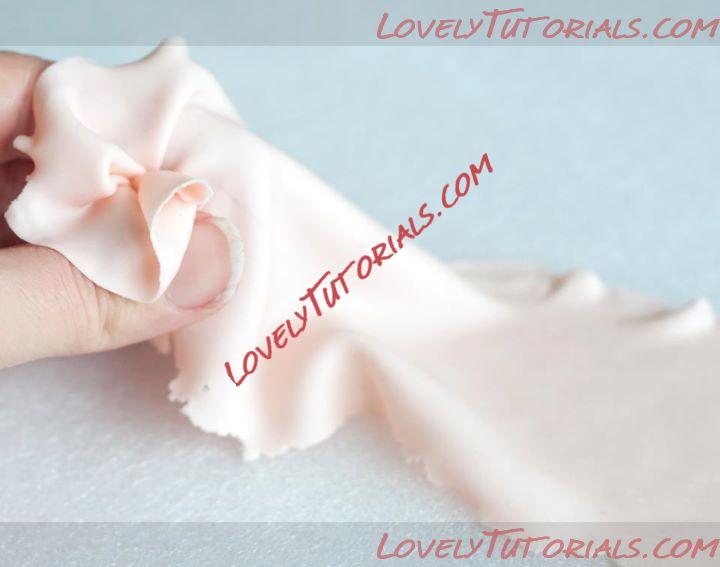
5. Continue to pinch and gather in a clockwise direction (Or anti-clockwise if you prefer)


Название: How to make a ruffled gumpaste flower 8.jpg
Просмотров: 0

Размер: 23.6 Кб
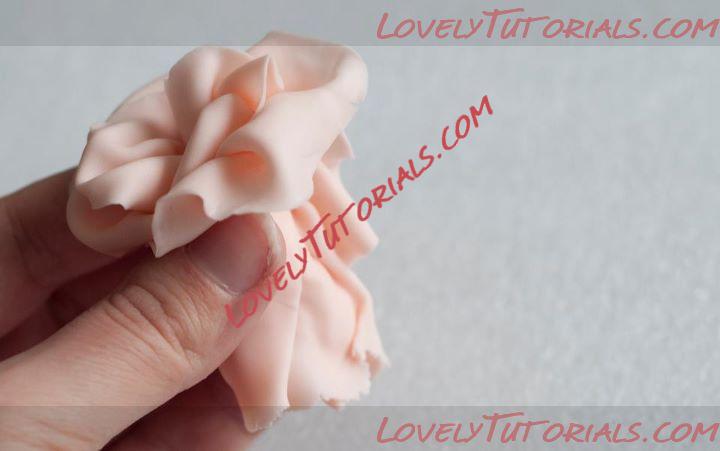
6. Once all gumpaste is gathered, pinch the loose end into the base of the flower.

Название: How to make a ruffled gumpaste flower 9.jpg
Просмотров: 0

Размер: 33.0 Кб
7. Gently cut off the stem being careful not to squash the flower.

Название: How to make a ruffled gumpaste flower 10.jpg
Просмотров: 0

Размер: 44.1 Кб
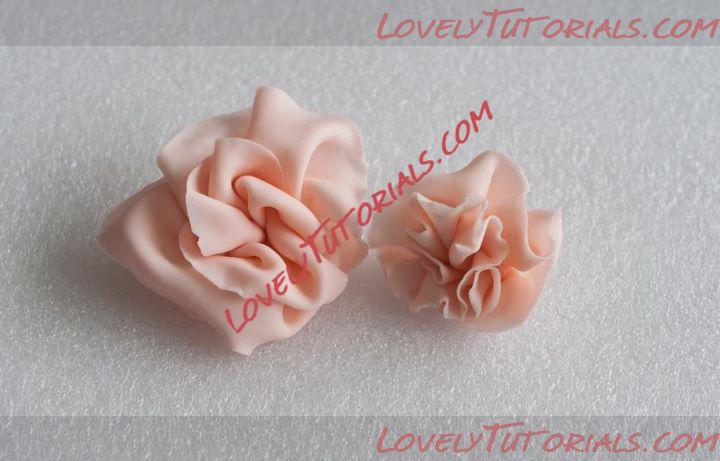
How ruffled your flower is will depend on how tightly you gathered and pinched the gumpaste in step 5.
armado de los ramos, arranjo, artesanatos passo a passo, baking, blomster, blüten, blütenpaste, cake decorating, cake decorating techniques, cerâmica plástica, chiodi di garofano, clavo de olor, clous de girofle, cloves, cold porcelain, cold porcelain figurines, cold porcelain flowers, confeitando bolos, cukrinių gėlių, curso completo de flores, curso de modelado, decoracion de pasteles, decoración de tortas, decorare le torte, decorazioni, deko fondant, dekorace na dort, dekoracija, dekoracije, dekorasyon, dekorácie, fimo, fimo flowers, fiori, fleurs, flogistica, floral inspirations, flores, flores azucar, flores e folhas, floristics, floristik, floristikk, floristique, florística, flower, flower paste, flowering plants, flowers, flowers on a wire, folhas pintadas, fondan, fondant, fondente, fotopostup, gum pasta, gum paste, gum paste flowers, gumpaste, gumpaste flowers class, hand painting, handmade, handmodelliert, how to, how to make a ruffled gumpaste flower, how-to's, hřebíček, jak na, kage dekoration, kagedekoration, kakebaking, krok za krokem, kvety, la modélisation, leaves, making sugar flowers, marshmallow, masa flexible, modelado, modelagem, modelare, modeling, modeling paste, modeliranje, modellazione, modelleme, modellering, modellieren, modellierpaste, modelləşdirmə, modelovanie, modelování, modelowanie, montando, motivtorten, nelken, pap, paso a paso, passo a passo, passo-a-passo, pasta flexible, pocelana fria, polymer clay, polymer clay flowers tutorial, postup klinček, postupak za ukrasavanje, schritt für schritt anleitung, schritt-für-schritt, sculpey flowers, sculpting, simple, stamens, steg for steg, step by step, step-by-step, styrofoam, sugar cane flowers, sugar cloves, sugar flower, sugar flowers, sugar flowers for cake decorating, sugar paste flowers, sugarcraft, sugarpaste, sukker art, tecnicas de decoracion, tecniche, thai flowers, torte, torte decorate, torten dekorieren, torti, trin for trin, trin-for-trin, trinn for trinn, tutorial, tutorijal, ukrašavanje torti, uputstvo za dekoraciju, wedding cake, wedding cakes, wire, zuckerblumen, ดอกไม้, सजा केक, मॉडलिंग, モデル, çiçek modelleme, 建模, 裝飾蛋糕, кветкі, квіти, куст, гвоздика, полимерная глина, полевые цветы, пошагово, природа, мк, моделиране, майстер-класи, маршмеллоу, мастика, мастер-класс, букет, листья, лепим цветы, лепка, ліплення, растения, украшение тортов, украшение торта, свадебный торт, сахарная мастика, сахарный клей, уроки прикрашання, торт, фимо, флористика, флора, холодный фарфор, цветочная паста, цветя, цветы, цветы из полимерной глины, цветы из холодного фарфора, цветы на проволоке, цветы на торт, шаг за шагом


©2022 Lovely Tutorials
Content Relevant URLs by vBSEO