Огромная благодарность
Angie Scarr за Мастер-класс
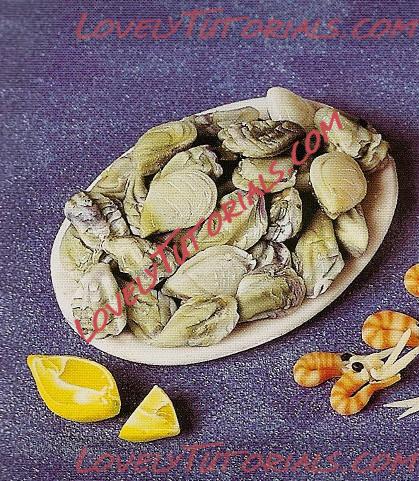
Oysters
With oysters, you can afford to make the proportions of colour, size and shape vary, as they do in nature. Experiment with these for a realistic display.


Method
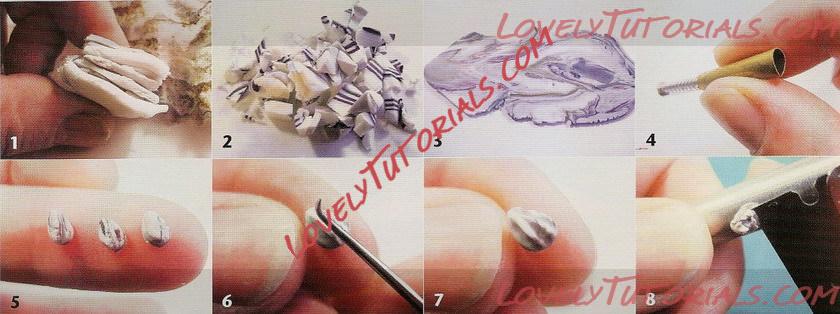
1 Using a few real oyster shells if possible as a reference, make a stack of the colours in the proportions they appear in a real oyster shell. Mix approximately 80% foundation colour mix 1 to the other colours.
2 Chop up the stack roughly and roll out either by hand or with a pasta maker.
3 Chop and roll again.
4 and 5 Using a tiny teardrop-shaped cutter, cut several little shapes.
6 and 7 Press three narrow, fan-shaped indentations lengthwise into the oyster.
8 Using the tip of a blade, carefully score into the ridges from front to back.
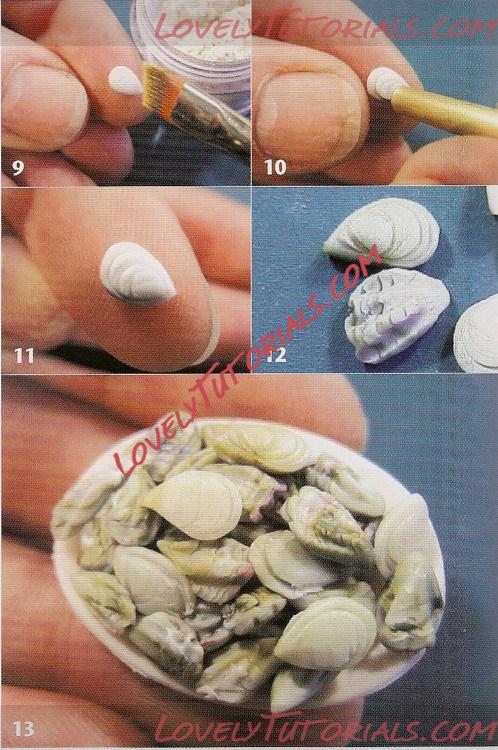
9 Cut a few shapes out from the very whitest bits of your clay to make upside-down oysters. Dust this with pearl-coloured metallic powder.
10 and 11 Mark the surface several times with the edge of your cutter, working backwards from the widest part of the oyster.
12 and 13 Your oysters are now complete and ready to display on a serving dish.


