Огромная благодарность
Angie Scarr за Мастер-класс


Method
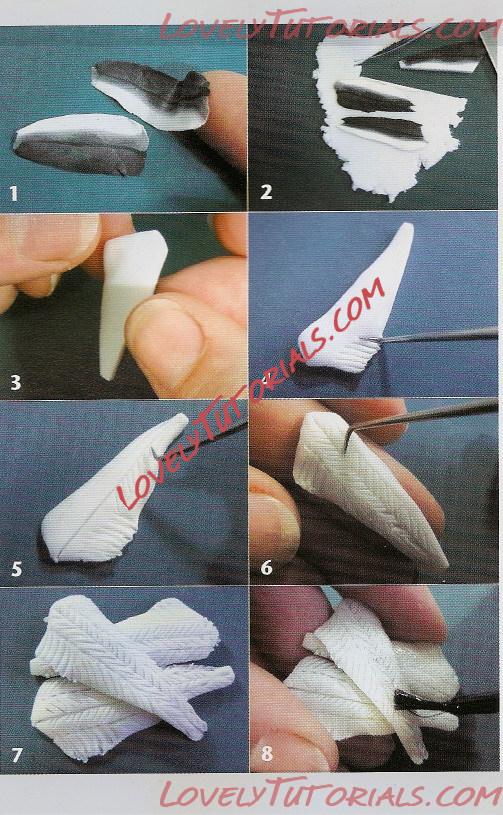
1 Cut very thin slices from the haddock cane.
2 Lay the slices on a strip of translucent/white mix. Cut the fillet shapes out. Turn over and trim the shape to a fish fillet shape.
3 Soften the edges and press the side of the fillet with the white side underneath. This is to simulate the thin chest cavity part of the fillet.
4 Using a pointed tool, mark this part with a series of diagonal stripes to simulate the long rib bones.
5 Mark a central Jine up the centre of the fish and two further lines, one on each side. Effectively, you are dividing the fillet into four sections. Then, with the very tip of your tool, start to draw a herringbone pattern into the clay.
6 Fill the whole of the fillet with a herringbone pattern, working diagonally upwards from the centre to the lines and downwards from the side lines to the ed
If you wish, redraw the outer lines in dots for realism.
7 To display, pile two or three fillets on top of each other, gently pressing the edges of the uppei ones down slightly as if they are hanging over those beneath.
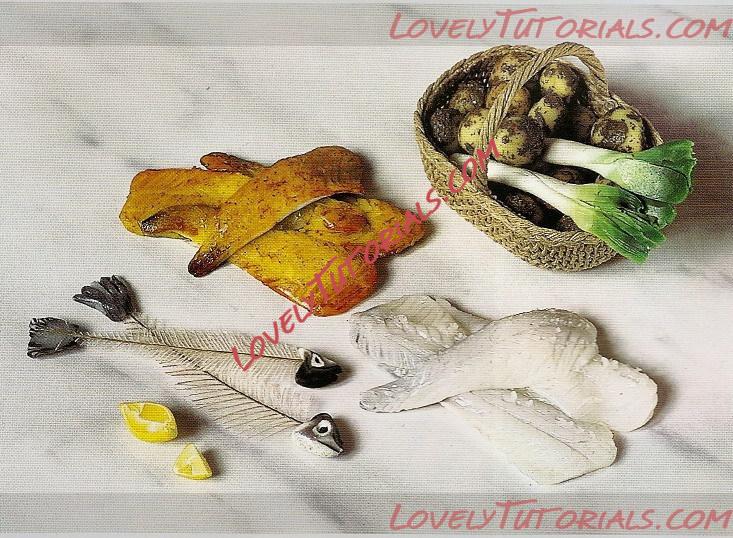
8 Use a little gloss varnish on a paintbrush to simulate the wetness of the fish. For smoked haddock, follow the same method using yellow clay and golden glaze.

Method
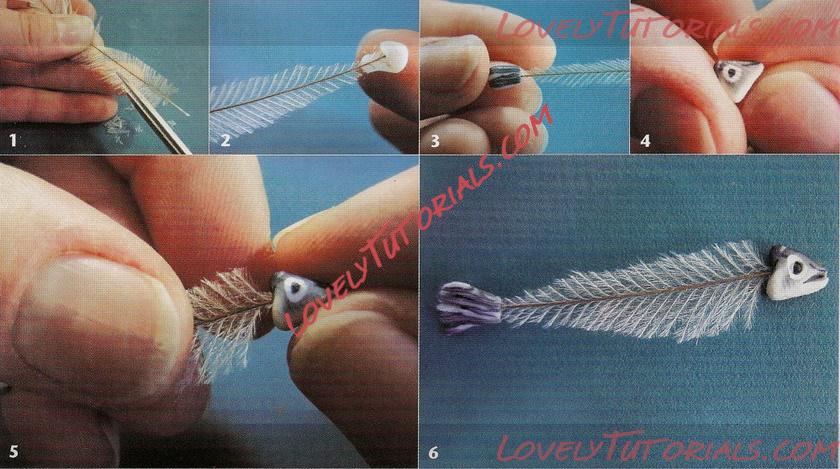
1 Take an emu feather and
trim it into a fish shape approximately 2.5cm in length. Leave a little of the feather virtually bare at the top and at the tail end so that you can attach the head and tail at these points.
2 Stick a little Mix Quick or
translucent clay to the underside of the tail end.
3 Cut a thin tail piece from the ready-made cane and attach it on the top of the tail.
4 Make a slice of the fish head cane and shape it into a triangle (rather than a diamond shape as you did for the haddock).
5 Push this onto the head end of the feather stem. If it comes away while setting in the oven, don't worry, it will glue back on later.
6 Brush the head and tail with a subtle hint of silver powder. Once hardened, you can varnish for a wet look.


