Огромная благодарность
Angie Scarr за Мастер-класс
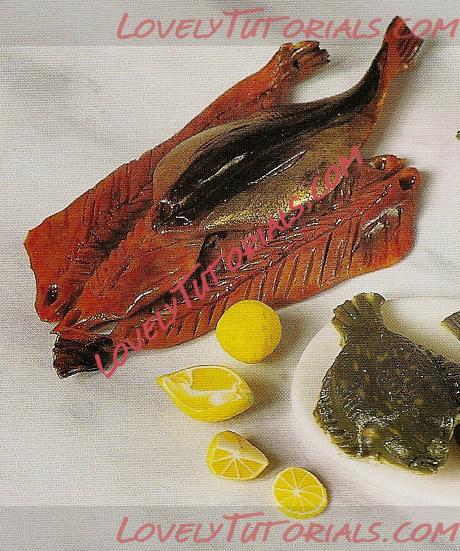
More lovely fishies! In this section, 1 make use of a combination of silver metallic powder, acrylic paint and clear-coloured glaze to give a lifelike simulation of the surface of kippers. For the orange-spotted belly of the plaice, I also use slices from a spot-patterned cane as an overlay to a different-coloured backing.


Method
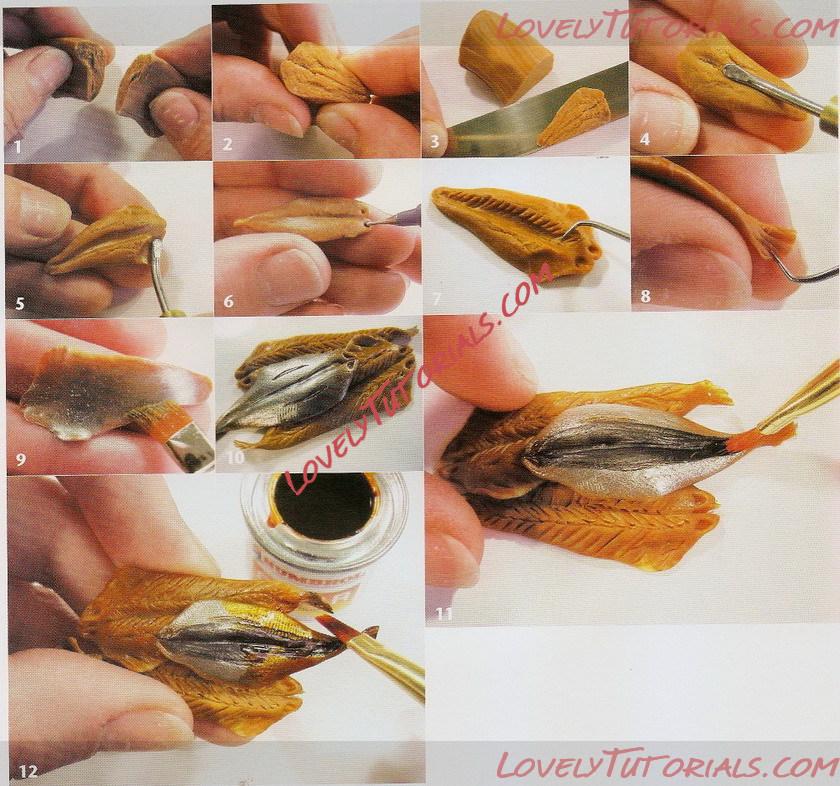
1 Tear a strip of orange/ brown clay mix in half.
2 Rejoin the two halves of
clay together.
3 Shape the clay into a rough kite shape, then slice off
the top.
4 Soften the edges and then form a valley-like gouge down the centre with a curve-ended modelling tool.
5 Make an indentation on both sides for the chest cavity.
6 Push a ball-ended tool right through on both sides of the head to form holes for the fish eyes.
7 Draw lines in a herringbone pattern diagonally up from the centre to the top of the ridge on each side and down the other, rather like the haddock fillets
http://www.lovelytutorials.com/forum...ead.php?t=3340
8 Make a tail that appears to turn sideways by pinching and lightly twisting. Then mark the tail with your dental tool.
9 Turn the kipper over and paint the back with silver powder. Please note that if you are piling the fillets into a group display like the haddock, miss out this step since it won't be visible. However, it is a good idea to go through steps 3 to 8 to get the right thickness and movement to your model.
10 If you are making a shop display, pile the fillets up to harden in the oven, with perhaps just one upside-down fish for added realism.
11 When your fish is hardened, paint a subtle black stripe down the centre with black acrylic paint. Leave this to dry thoroughly.
12 Cover all the fish with a thin layer of clear varnish to give it an authentic, nicely smoked look. Once lightly painted, do a second layer, concentrating on certain areas such as the eye sockets, tail, ridges and edges.


