Cake Decorating Tutorials  (How To's) Tortas Paso a Paso
Cake Decorating Tutorials (How To's) Tortas Paso a Paso
Вернуться   Cake Decorating Tutorials (How To's) Tortas Paso a Paso > Chocolate techniques and how to's
Перезагрузить страницу Темперирование шоколада -Temper or Pre-Crystallize Chocolate Using Cocoa Butter
Старый 10.11.2012, 09:44
Ariana Ariana вне форума
Администратор
Регистрация: 07.09.2010
Сообщений: 7,940
По умолчанию Темперирование шоколада -Temper or Pre-Crystallize Chocolate Using Cocoa Butter
Огромная благодарность Автору Eddy Van Damme за Мастер-класс


Название: 01.jpg
Просмотров: 0

Размер: 102.6 Кб
Oftentimes I am asked which is your favorite method of tempering or pre- crystallizing chocolate couverture. My answer is always the same: The cocoa butter method. Using cocoa butter to temper or pre- crystallize chocolate couverture is fast, hygienic and provides a finished result with high fluidity. Three factors which are very important.
If you are somewhat unclear on why we have to temper or pre-crystallize chocolate, or what chocolate couverture is in the first place, you may find it useful to read the other articles and methods of pre-crystallizing or tempering chocolate I have on my site. In a nutshell, when chocolate is melted and then properly pre-crystallized, it will harden with a crisp snap, it will easily retract from a mold and it will have a beautiful gloss. Without the pre-crystallization process it will be dull, grayish streaked, crumbly, stick to molds and will not be crisp.
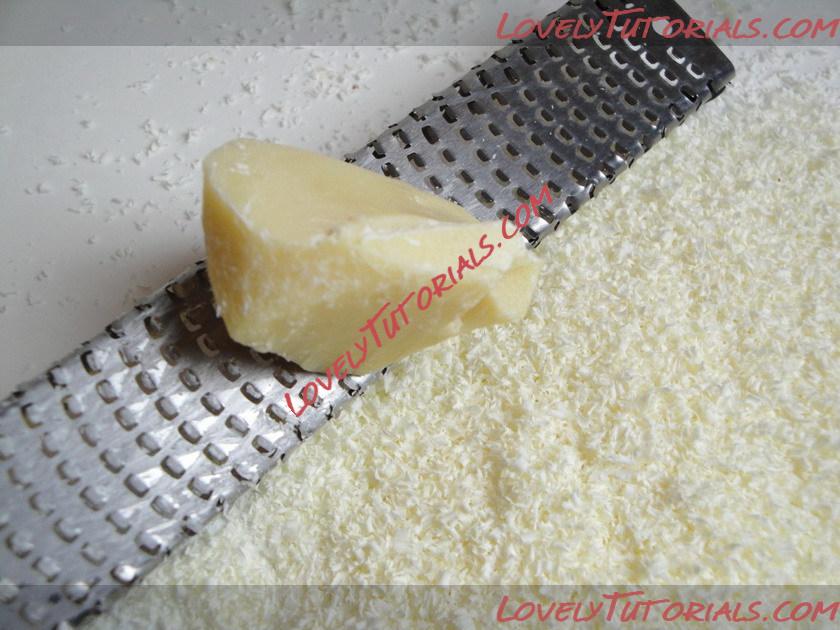
Several types of cocoa butter products are on the market specifically made to be used for pre-crystallizing chocolate couverture. Since I had a hard time with these products clumping and not properly melting into the couverture, I decided years ago, to use and test standard cocoa butter for the tempering process. And my results are the exact same as using a specific cocoa butter product engineered for pre-crystallizing or tempering chocolate couverture. Using a micro plane and cocoa butter is all I use for quick, reliable tempering of chocolate. The cocoa butter I use is made by Callebaut.
Название: 02.jpg
Просмотров: 1

Размер: 96.7 Кб
Название: 03.jpg
Просмотров: 0

Размер: 140.6 Кб
What I like about the cocoa butter method the most:
1. Even though 1% of cocoa butter will properly pre- crystallize the couverture, adding more will not have any negative effects on the finished products. In fact, adding a little more will allow you to use the tempered chocolate at a higher temperature.
2. The chocolate couverture will be more fluid if compared to any other method of tempering. (Testing performed using the same brand at same temperatures)
3. Unless if using a tempering machine, it is the fastest method.
Название: 04.jpg
Просмотров: 0

Размер: 154.8 Кб
Just in case……couverture chocolate is what we need when tempering or pre-crystallizing chocolate. Couverture chocolate contains a minimum of 31% cocoa butter (Do not confuse cocoa butter with the % number of cocoa mass you see on chocolate bars- such as 64% cocoa mass etc), this amount of cocoa butter ensures a product which will be relative fluid when in a tempered state. Non couverture chocolate (think of standard chocolate chips) does not contain enough cocoa butter and will be a viscous mess when melted or pre-crystallized.
Название: 05.jpg
Просмотров: 0

Размер: 87.7 Кб
Tempering or pre-crystallizing chocolate couverture using cocoa butter.

You will need 1 % of cocoa butter to pre-crystallize or temper the chocolate couverture. For example to every 2lb 3 oz (1 kg) of chocolate couverture you will add 1 % (1/3 oz or 10 gram) cocoa butter.
Melt the chocolate to 115°F (46°C) over a very low simmering water bath (Bain Marie) or overnight in a chocolate melter. Let the chocolate cool to 95°F (35°C) for dark chocolate and 93°F (33.5°C) for milk and white chocolate.
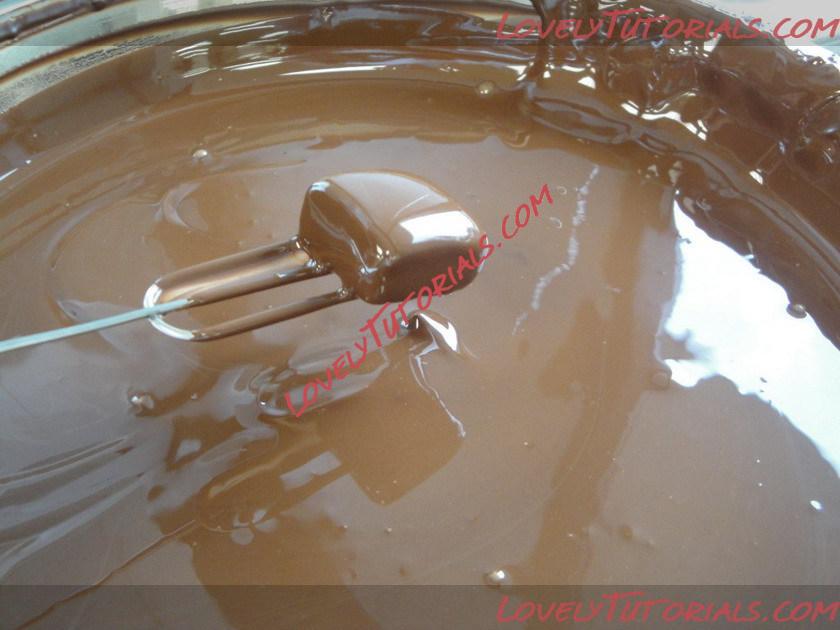
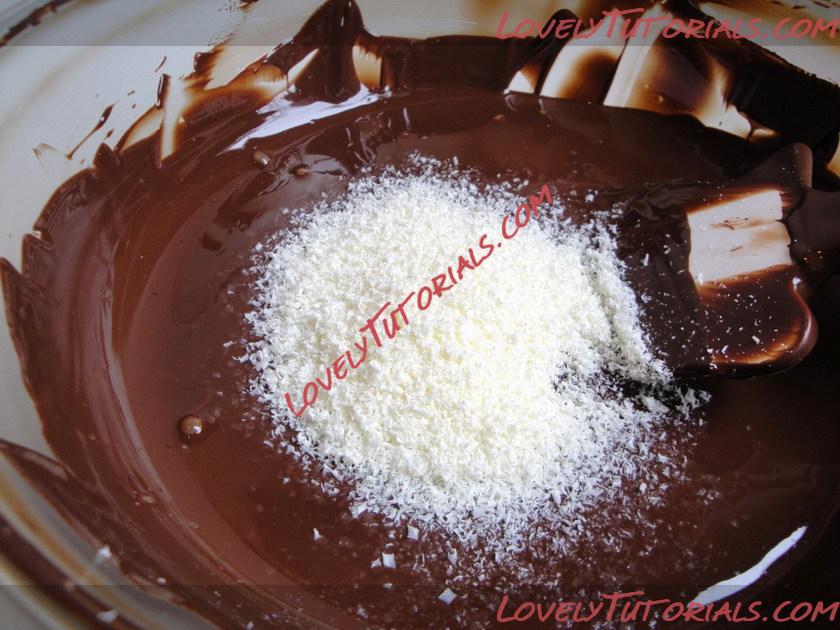
2. Immediately add 1 % micro planed cocoa butter. Stir to dissolve the cocoa butter and homogenize the mass.
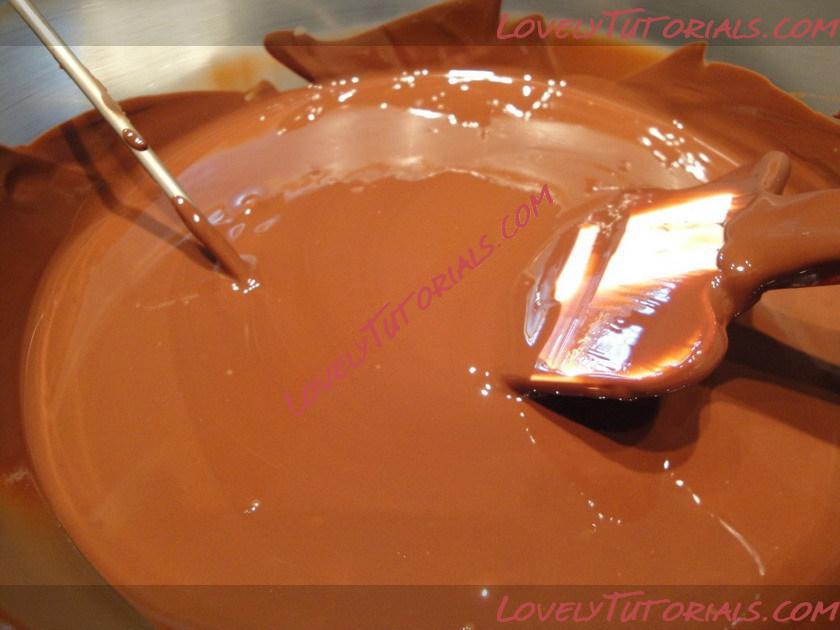
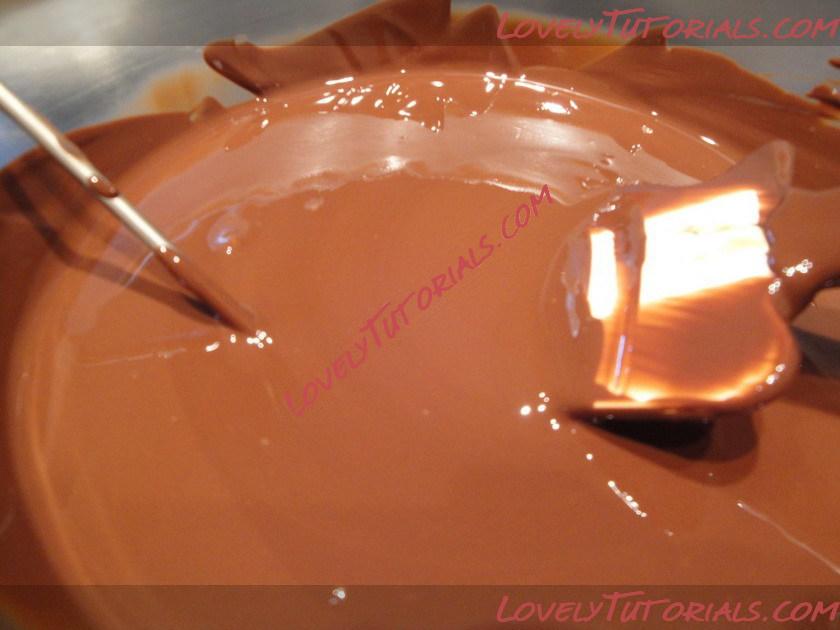
3. Let the chocolate cool to 90°F (31.5°C) for dark chocolate. For white and milk chocolate allow the chocolate to cool to 87°F (29.5°C)


If the chocolate flavor overpowers the cookie you have a few options: 1) Purchase and use chocolate with lower cocoa mass content. 2) Purchase lower cocoa mass content chocolate and blend with your current one. 3) Blend your currant chocolate with some milk chocolate. 3) dip the cookie in less chocolate.
Having said that, the truth is that one company will make chocolate with a lets say 56% cocoa mass which is not very bitter while another brand will be more better. (Like coffee, 100% coffee beans is used in all brands, one turns out very mild while the other can be very bitter) Therefore the percentages are really just a guide.
Старый 10.11.2012, 10:15
Ariana Ariana вне форума
Администратор
Регистрация: 07.09.2010
Сообщений: 7,940
По умолчанию How to Temper Chocolate
Огромная благодарность Автору scoochmaroo за Мастер-класс
How to Temper Chocolate


Название: 01.jpg
Просмотров: 0

Размер: 23.0 Кб
The 4 simple steps you need to know to temper chocolate perfectly every time. There's no magic in getting chocolate to temper - it just seems that way! Follow these easy steps and never be intimidated by chocolate again.

When you buy chocolate, it is already "in temper." This means that all of the fat crystals are aligned to give the chocolate perfect snap and shine. When you melt chocolate to change its shape or use it in a recipe, you are taking it out of temper. The heat causes the fat molecules get all jumpy and if they aren't realigned correctly, you get what's called "bloom." Bloomed chocolate still tastes great, it just loses its visual and textural appeal. But even bloomed chocolate can be brought back into temper!

Tempering chocolate can seem like a big mystery, but all you need is a bowl, a pan and a thermometer to get it right every time. For the most accurate results, I recommend using an instant-read thermometer.


Step 1
Setup

If you have a double boiler, more power to you! If you don't, you can set up a simple "bain-marie:"
  • Rest a metal bowl on a saucepan with 1 inch of water in bottom.
  • Make sure the bottom of the bowl is at least 1 inch above the surface of the water - not resting in the water.
Using chopped chocolate or chocolate wafers, reserve a quarter of the amount of chocolate in a separate bowl to use as a "seed" later.

Grab a silicone spatula and a good thermometer, and you're ready to rock.


Step 2
Melt

Bring the water in your saucepan to a SIMMER (do not boil)

Stir the chocolate continuously until it has all melted smoothly.

Bring the chocolate to:
  • 118oF (48C) for Dark Chocolate
  • 112oF (45C) for Milk Chocolate
Remove the bowl of chocolate from the saucepan and carefully wipe the steam from bottom of the bowl.


ONE DROP OF WATER IN THE MELTED CHOCOLATE WILL CAUSE IT TO SEIZE and, well, ruin it completely. So, you know, be careful.


Step 3
Seed

Now we seed the melted chocolate with the reserved chocolate pieces. This will help bring down the temperature of the chocolate.

Add in the unmelted chocolate, and stir until smooth. Keep stirring with your spatula until the temperature of the chocolate reaches:
  • 89-90oF (32C) for Dark Chocolate
  • 86-88oF (30C) for Milk Chocolate
You may set your bowl of chocolate into another bowl of cool water to help speed up this process.


Step 4
Rewarm & Maintain

If the temperature of your chocolate drops too low, just SLOWLY reheat it over the bain-marie until it reaches its proper temperature:
  • 89-90oF (32C) for Dark Chocolate
  • 86-88oF (30C) for Milk Chocolate
Your chocolate is now ready to use!

Maintain the tempered chocolate at these temperatures using both the cool water bath and the bain-marie as needed.
Старый 07.05.2014, 11:18
Anka Anka вне форума
Администратор
Регистрация: 23.04.2014
Сообщений: 513
По умолчанию
Если Вы хотите, чтобы шоколад имел глянцевый блеск, твердость, характерную колкость, его нужно не просто растопить и разлить в формы, а правильно темперировать.

Существует несколько способов темперирования (кристаллизации) шоколада, для домашних условий наиболее удобны такие:

(Для кулинарного шоколада в виде монет подходит и первый, и второй способ, но гораздо проще и быстрее делать по 2 способу. Для какао тертого и масла какао – только 1 способ)

1 способ:
Этап 1 – распустить шоколад до температуры нагрева, которая зависит от вида шоколада (см.таблицу). Распустить удобнее всего в микроволновке на маленькой мощности (300-400 Вт), часто помешивая, чтобы избежать перегрева. Или на водяной бане, но будьте аккуратны – избегайте попадания влаги!
Этап 2 – поместить чашу с шоколадом в более широкую миску с небольшим количеством холодной воды. Постоянно помешивая шоколад, охладить его до температуры охлаждения (см.таблицу). Избегайте попадання влаги!
Этап 3 – нагреть шоколад в микроволновой печи до рабочей температуры. (включайте печь на 6-8 сек, потом проверяйте температуру). Шоколад готов к дальнейшей работе.

2 способ – кристаллизация с помощью каллет:
Кристаллизацию можно провести очень просто, если добавить ранее кристаллизованный шоколад к растопленному шоколаду. Для этого можно воспользоваться шоколадом в виде каллет. Каллеты ранее были темперированы и содержат масло какао в кристаллической форме.
Этап 1 – распустить шоколад до температуры нагрева, которая зависит от вида шоколада (см.таблицу).
Этап 2 – добавить в теплый шоколад еще 15-20% каллет, имеющих температуру 15-20°C. (*предварительно немного измельчить). Хорошо перемешайте шоколад до тех пор, пока Каллеты не растворятся.
Этап 3. Проверьте температуру шоколада – если она ниже рабочей, подогрейте, если рабочая – шоколад готов.

Вид шоколада Нагрев Охлаждение Рабочая температура
Черный 45-50 26-27 31-32
Молочный 40-45 26-27 29-30
Белый 40 25-26 28

Как проверить кристаллизацию.
Для проверки результата темперирования, нанесите немного шоколада на кончик ножа. Если шоколад хорошо оттемперирован, он станет твердым в течение 3-х минут при температуре воздуха 18-20°C, и будет обладать хорошим блеском. Если этого не произошло, продолжайте темперирование.
Старый 07.05.2014, 11:22
Anka Anka вне форума
Администратор
Регистрация: 23.04.2014
Сообщений: 513
По умолчанию
Темперирование шоколада

Темперирование — это такая процедура, благодаря которой шоколад становится блестящим и хрустким.
Ее смысл: сначала шоколад надо нагреть до 41-50С, потом быстро охладить до 27-29С, потом снова нагреть до рабочей температуры — для темного шоколада это 32С (длдя молочного и белого ниже).
Первый способ темперирования
Я делала так:
Для водяной бани налила кипяток в кастрюлю, стоящую на деревянной доске (чтобы подольше не остывала), в нее поставила ковшик меньшено размера с длинной ручкой, чтобы было удобно придерживать левой рукой, когда буду размешивать плавящийся шоколад. Воду в процессе расплавления больше не греем.
Нарубила мелко нарубленный темный горький 100% без сахара шоколад и растопила на водяной бане. Добавила стевию, ваниль, размешала так чтобы не создавать пузырьков воздуха.
Если делаем для обливных конфет, хорошо положить 10%-20% масла какао либо растительного масла с приятным запахом или без запаха. Шоколад с увеличенным содержанием жиров (мы используем в рамках диетического подхода только растительные масла) становится больше похожим на глазурь, более привлекательным на вид и вкусным, с ним легче работать.
Вылила 2/3 шоколада на мраморную доску (есть у меня такая разделочная доска) и лопаткой из нержавейки около минуты собирала шоколад от краев к центру доски.
Когда шоколад начал заметно густеть, вернула его в ковшик с 1/3 теплого шоколада, хорошенько размешала и буквально на 5 секунд вернула на водяную баню.
Сделала пробу на качество темперирования: опустила в шоколад кончик ножа и положила «шоколадный» нож в холодильник.
Через 3 минуты потрогала шоколад — он твердый, блестящий и не сразу плавится под пальцами — «тает во рту, а не в руках».
Если нет мраморной доски или плоского фарфорового блюда — вот другой способ темперирования.
Растопленный на водяной бане шоколад поставить в морозилку.
Дождаться чтобы образовалось плотное кольцо от краев размером вполовину диаметра миски.
Вынуть из морозилки, хорошо размешать.
Если, несмотря на интенсивные движения, не весь шоколад размешался — вернуть на 5-10 сек в кастрюлю с кипятком на водяную баню и постоянно перемешивать.
Шоколад должен стать температуры поверхности ваших рук — 32С.
Можно также сделать пробу на качество темперирования.


источник
addım-addım təlimat, adım, adım adım yönergeler, artesanatos passo a passo, bemutató, bolando bolos, cake decorating, cake decorating techniques, chocolade, chocolat humeur, chocolate, chokolade, cioccolato, ciocolată, confeitando bolos, csokoládé, czekolada, czekolada temperament, de chocolate temperamento, decoracion de pasteles, decoración de tortas, decorada en fondant, decorare le torte, decorazioni, deko fondant, dekorace na dort, dekoracija, dekoracije, dekorasyon, dekorácie, fender, fimo, fotopostup, hand-made, handmade, how to, how-to's, humeur chocolade, indulat csokoládé, instrucţiuni, instrukcijas, instrukcje, jak na, kage dekoration, kagedekoration, kakebaking, korak, korak za korakom navodila, korak-po-korak upute, koristeet ja koristelu, krok, krok po kroku, krok za krokem, krok-za-krokem, las instrucciones, las técnicas, le chocolat, le tecniche, les techniques, master-class, master-klasse, master-klasy, meistras klasės, metodikas, mistr třídy, motivtorten, nuotaika šokoladas, nálada čokoláda, návod, opplæringen, pamoka, pap, pas, pas-cu-pas, paso, paso a paso, passo, passo a passo, passo-a-passo, passo-passo le istruzioni, postupak za ukrasavanje, schokolade, schritt für schritt anleitung, schritt-für-schritt, schritt-für-schritt-anleitungen, sjokolade, stap, stap-voor-stap, stap-voor-stap instructies, steg for steg, steg-för-steg-instruktion, step, step by step, step-by-lépésre, step-by-step, step-by-step instructions, technieken, techniken, techniki, techniky, technikák, techniques, tecnicas de decoracion, tecniche, tehnici, tehnike, teknikker, teknikler, temper or pre-crystallize chocolate using cocoa butter, temper suklaa, temperament choklad, temperament chokolade, temperament schokolade, temperament sjokolade, temperament čokolada, temperamento cioccolato, temperamentul ciocolată, templar el chocolate, torte, torte decorate, torten dekorieren, torti, trin, trin for trin, trin-for-trin, trin-for-trin instruktioner, trinn, trinn for trinn, trinn-for-trinn-instruksjoner, tutorial, tutoriale, tutorias, tutorias/ideas para decorar los bizcochos, tutoriel, tutorijal, técnicas, ukrašavanje torti, uputstvo za dekoraciju, सजा केक, चॉकलेट, ट्यूटोरियल मास्टर वर्ग, कदम, कदम दर कदम निर्देश, तकनीक, チョコレート, çikolata, étape, étape par étape les instructions, öfke çikolata, öğretici, čokolada, čokoláda, žingsnis, žingsnis po žingsnio, şokolad, 宗師級教程,一步,一步一步的指示 �技術,udžbenik, 巧克力, 裝飾蛋糕, βήμα, βήμα προς βήμα οδηγίες, οδηγίες βήμα βήμα, παντεσπάνι art, σοκολάτα, σοκολάτα ιδιοσυγκρασία, τεχνικές, φροντιστήριο, инструкция, как сделать, крок за кроком, крок за крокам, нораў шакаладу, нрав шоколад, нрав шоколада, нрав шоколаду, покроково, пошагово, пошаговые фотки, пакрокава, миниатюра, мк, майстор-класа урок, майстар-клас, майстер-клас, майстер-класи, мастер-класс, ручной работы, ручная работа, украшение тортов, уроки прикрашання, стъпка, стъпка по стъпка инструкции, темперирование шоколада, техники, техника, техніка, туториал, туторіал, тэхніка, шоколад, шакалад, шаг за шагом, інструкцыя, інструкція


©2022 Lovely Tutorials
Content Relevant URLs by vBSEO