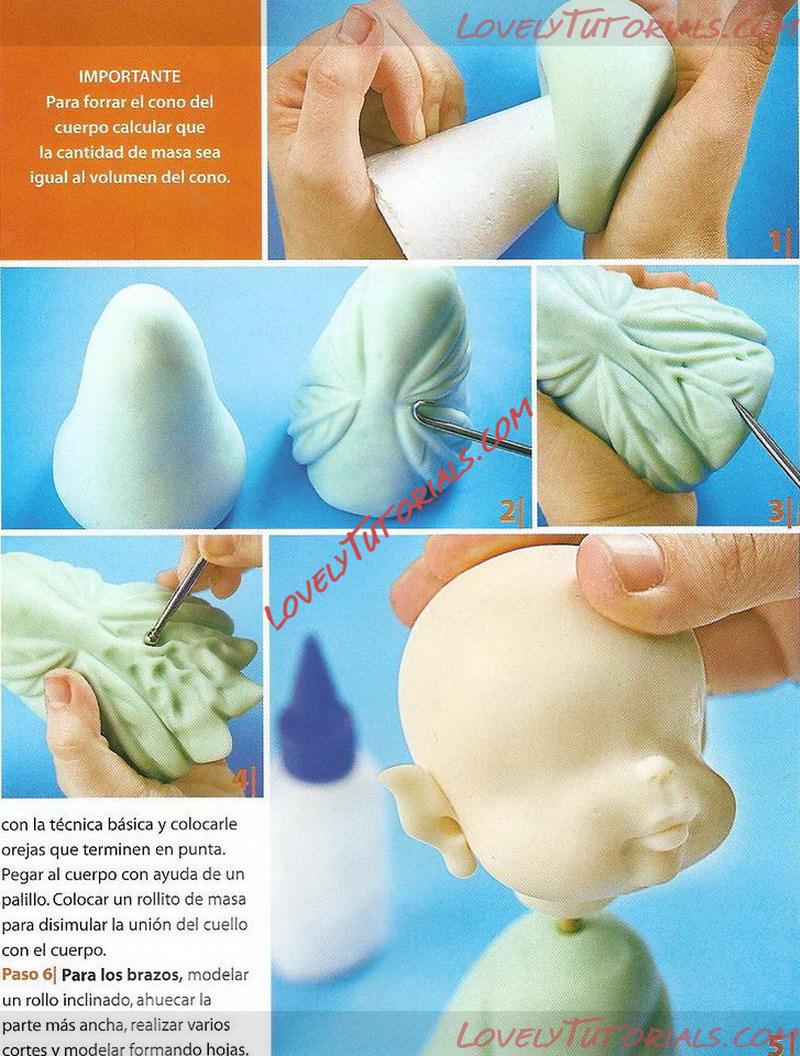
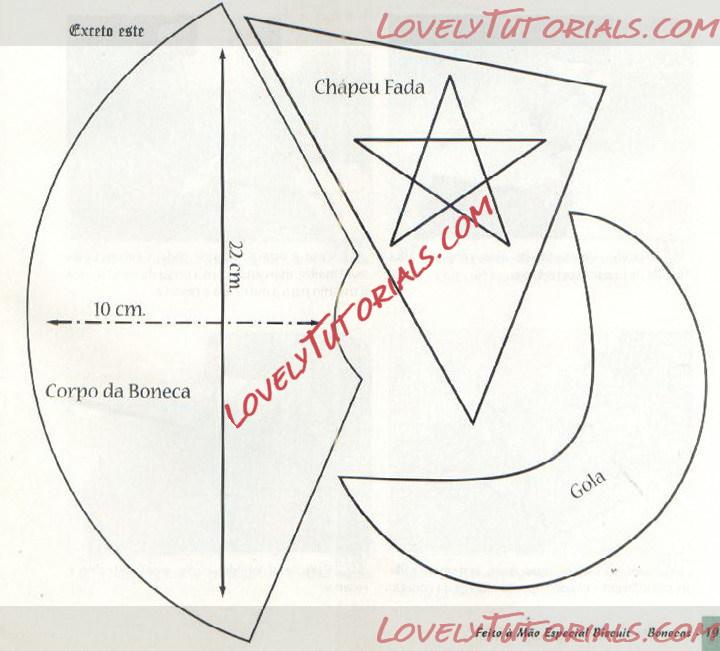
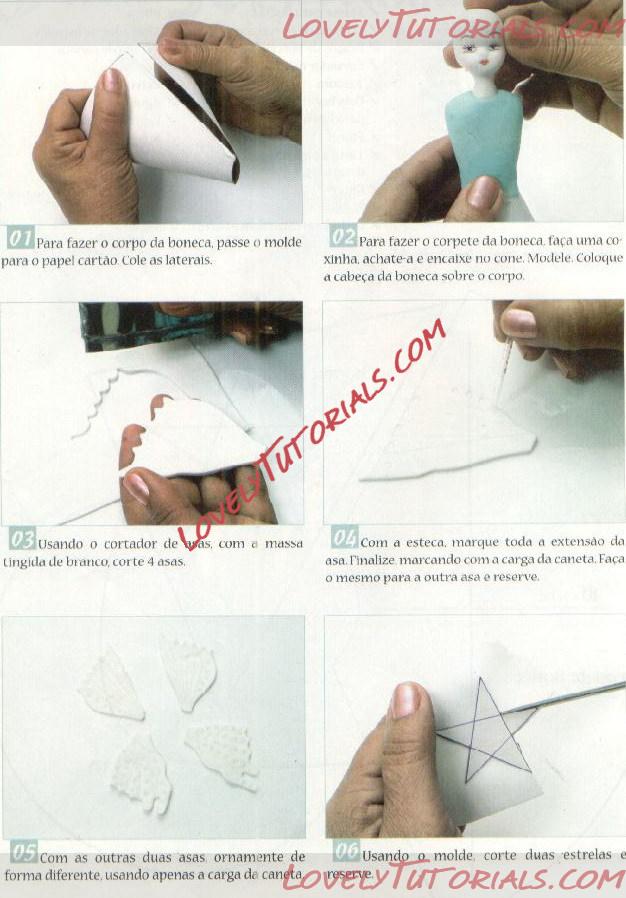
 1. To make the doll's body, pass the template onto the cardboard. Glue the sides.
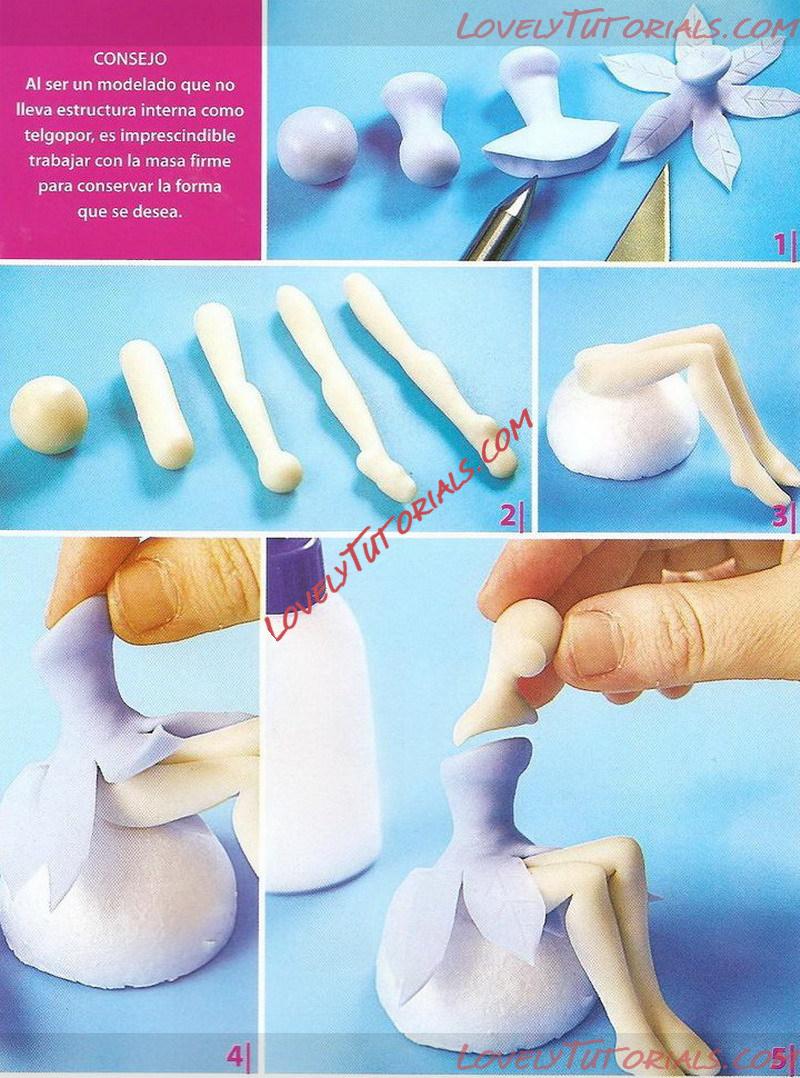
2. To make the doll's bodice, make a drumstick, flatten it and fit the cone. Model Place the head of the doll on the body.
3. Using the wings cutter with the anointed white paste, cut 3 wings.
4. With the stanchion, mark the entire length of the wing. Finish by marking with the pen charge. Do the same for the other wing and set it aside.
5. With the other two wings decorate differently, using only the pen charge.
6. Using the mold, cut two stars and reserve.
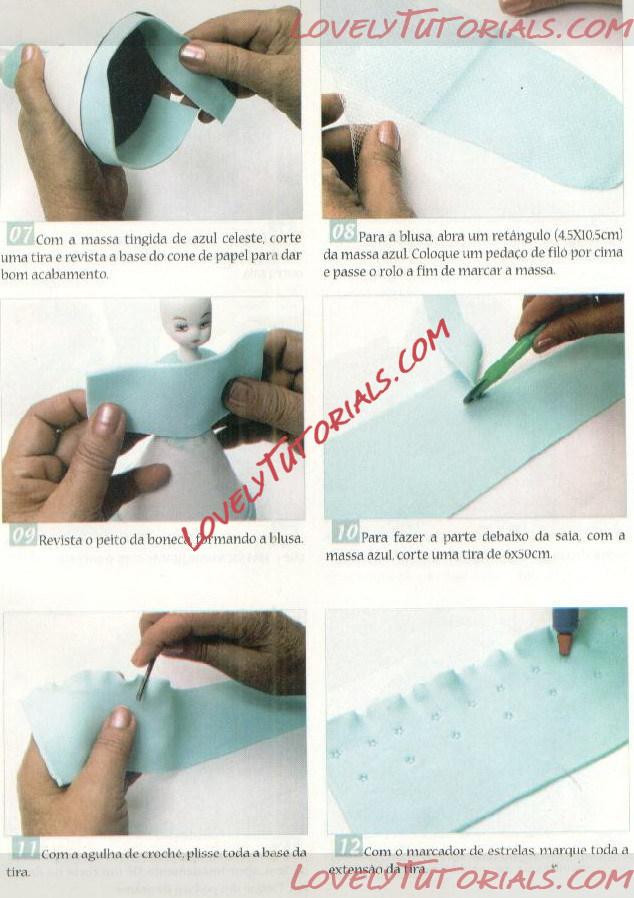 7. With the dough dyed blue, cut a strip and coat the base of the paper cone to give a good finish.
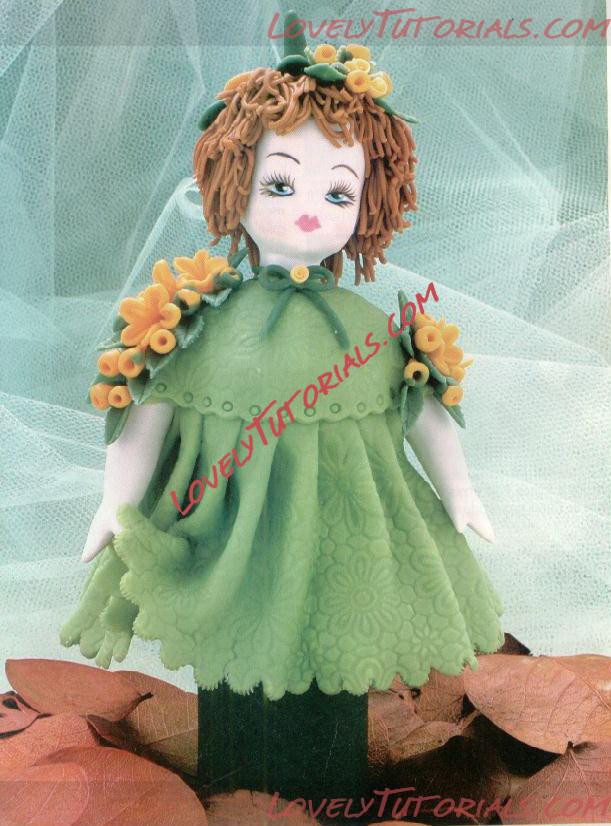
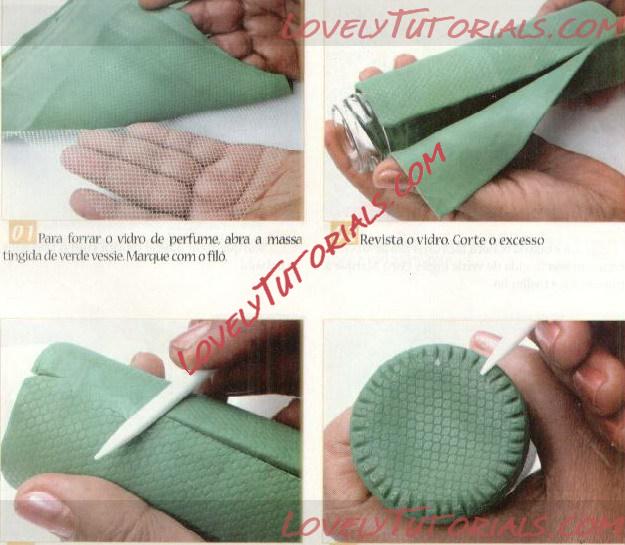
8. For the blouse, open a rectangle (4.5X10.5cm) of the blue mass. Place a piece of filo on top and roll the roll to mark the dough.
9. Coat the breast of the doll forming the blouse.
10. To make the part under the room with blue dough, cut a 6x50 cm strip.
11. Using the crochet hook, pleat the entire base of the strip.
12. With the star marker, mark the entire length of the strip.
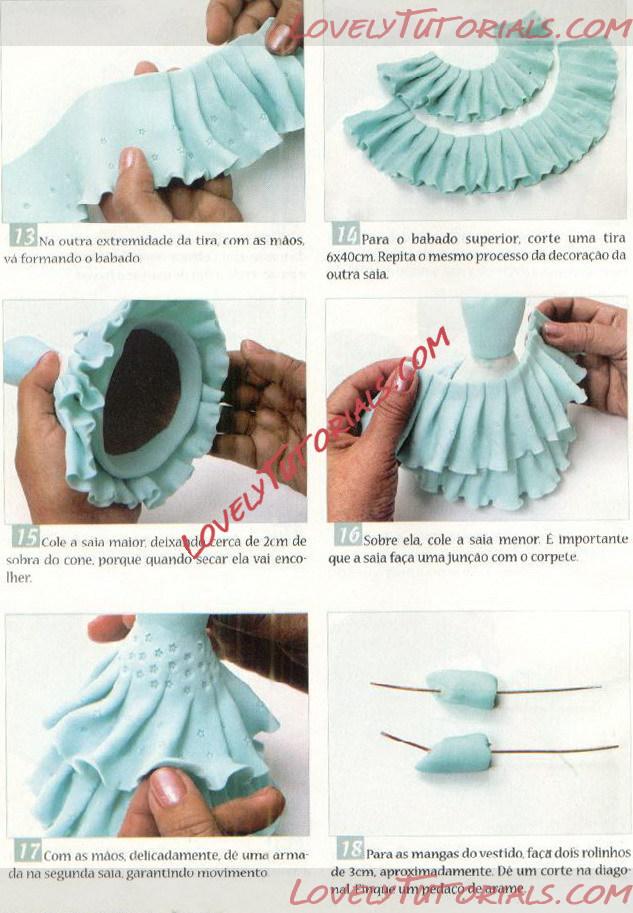 13. At the other end of the strip, the hands will form the ruffle.
14. For the top ruffle, cut a 6x40cm strip. Repeat the same process for decorating the other skirt.
15. Put the larger skirt on, leaving about 2cm left over the cone. because when it dries it will shrink.
16. About her. stick the smaller skirt. It is important that the skirt matches the bodice.
17 With your hands. gently, with an armada on the second skirt, ensuring movement.
18. For the dress sleeves, make two rolls of approximately 3cm. From a diagonal cut, pretend a piece of wire.
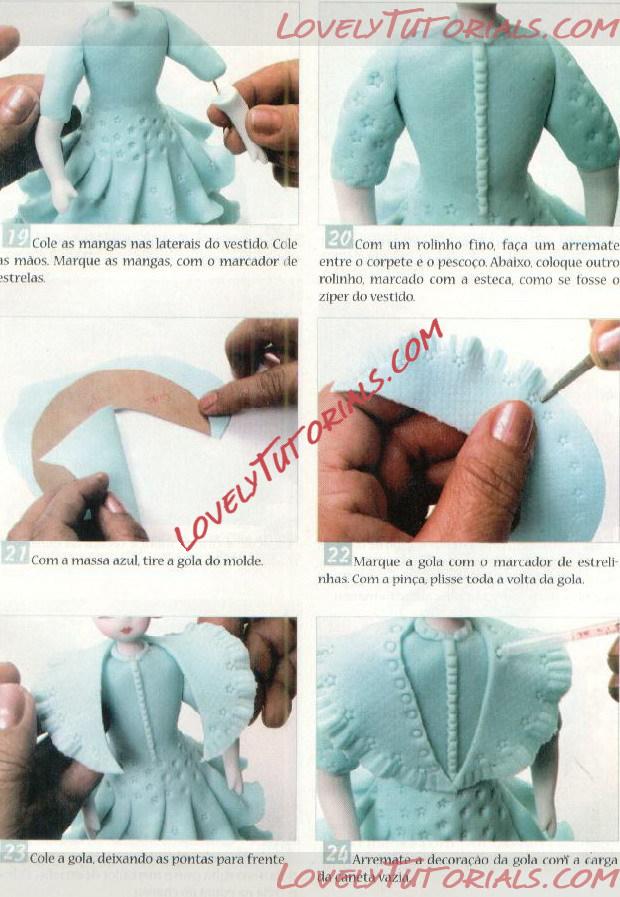 19. Glue the sleeves to the sides of the dress Glue your hands. Mark the sleeves with the star marker.
20. With a thin roll. make a finish between the bodice and the neck. Below, put another roll. marked with the esteca. as if it were the zipper of the dress.
21. With the blue dough. remove the collar from the mold.
22. Mark the collar with the star marker. With the tweezers, pleat all the way around the collar.
23. Glue the collar. leaving the tips forward.
24. Secure the decoration of the collar with the load and the empty pen.
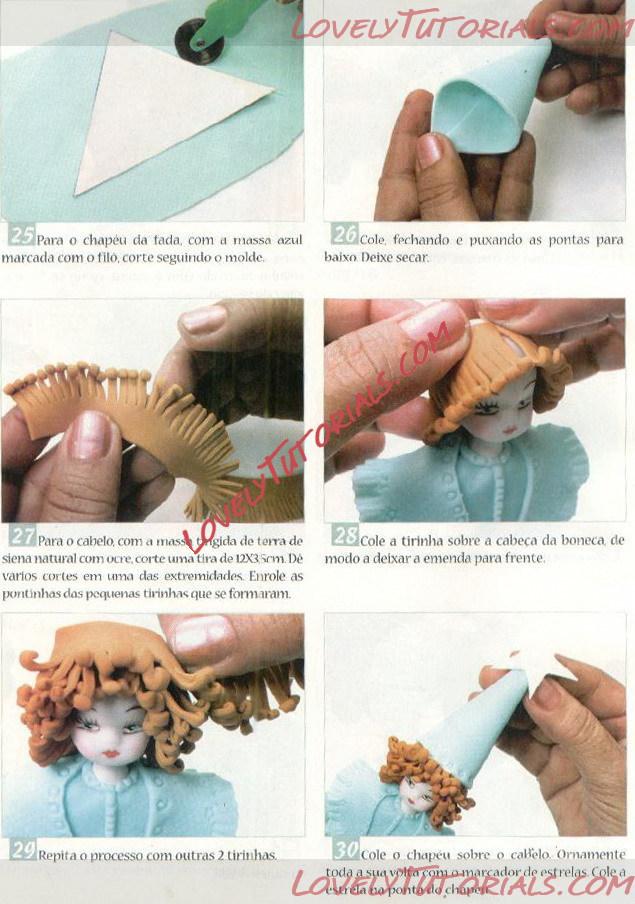 25. For the hat of the tada. with the blue mass marked with the phylum. cut following the mold.
26. Lap closing and pulling the tips down Let it dry.
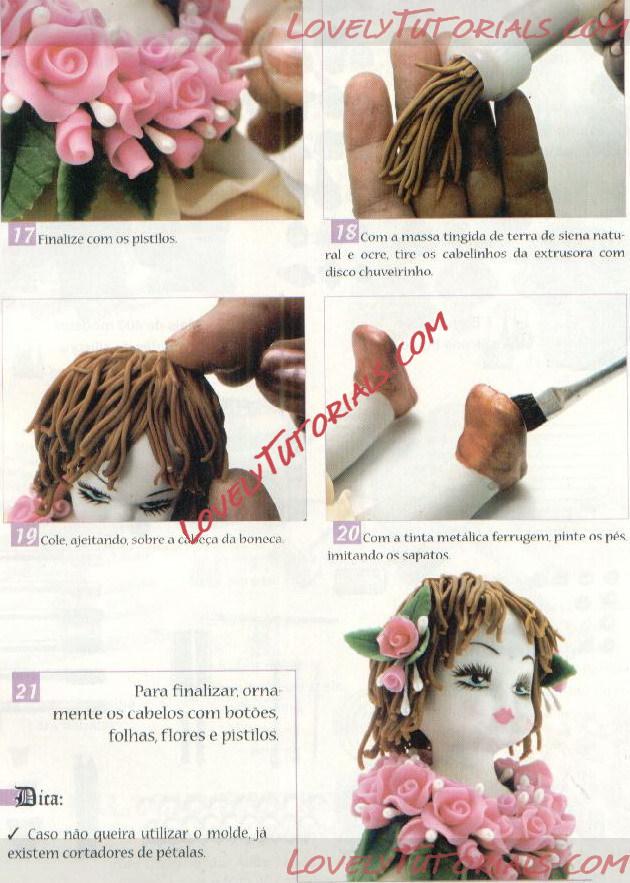
27. For the hair, with the tinted mass of natural sienna earth with ocher cut a 12X3.5cm strip. From several cuts at one end Wrap the tips of the small strips that have formed.
28. Glue the strip over the doll's head in order to leave the seam forward.
29. Repeat the process with another 2 strips.
30. Glue the hat over your hair. Decorate all the way around with the star marker Stick the star on the end of the hat.
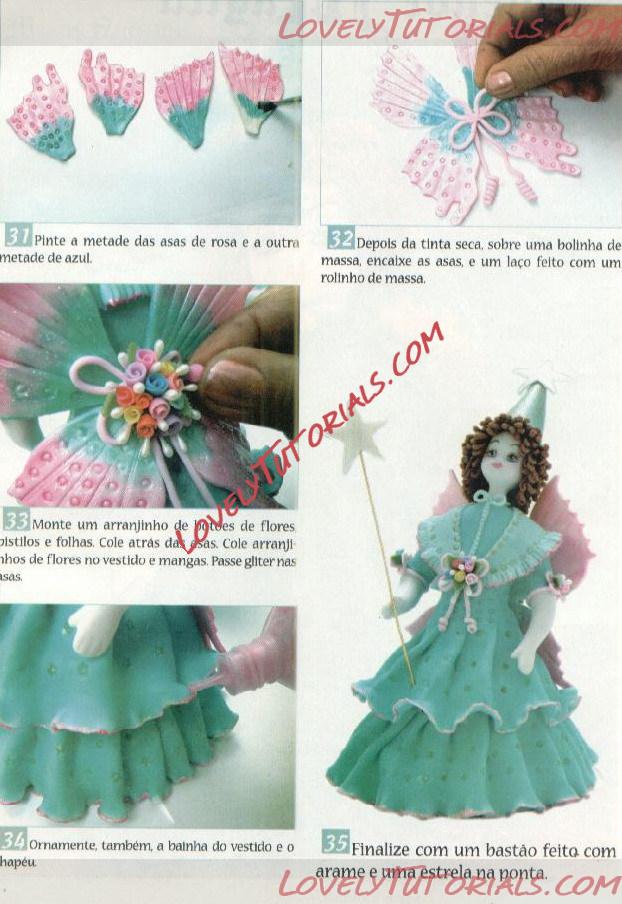
31. Paint half the wings pink and the other half blue.
32. After the paint dries. on a dumpling, fit the wings. and a bow made with a rolling pin.
33. Set up an arrangement of pistil flower buds and paste leaves behind the wings. Glue flower arrangements to the dress and sleeves.
34. Ornaments, too, the hem of the dress and the hat.
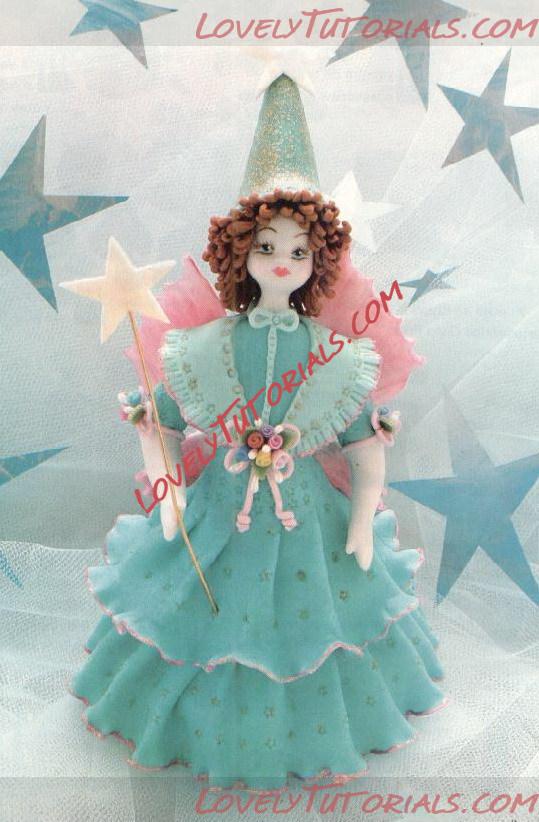
Finish with a stick made with wire and a star on the end.
Real magic can never be made by offering someone else's liver. You must tear out your own, and not expect to get it back.


