Cake Decorating Tutorials  (How To's) Tortas Paso a Paso
Cake Decorating Tutorials (How To's) Tortas Paso a Paso
Вернуться   Cake Decorating Tutorials (How To's) Tortas Paso a Paso > Figure making tutorials > Characters
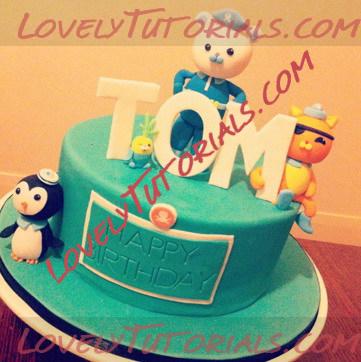
Перезагрузить страницу МК лепка "Капитан Барнаклс" -The Octonauts -How to make Captain Barnacles
Старый 29.11.2012, 07:17
Ariana Ariana вне форума
Администратор
Регистрация: 07.09.2010
Сообщений: 7,940
По умолчанию МК лепка "Капитан Барнаклс" -The Octonauts -How to make Captain Barnacles
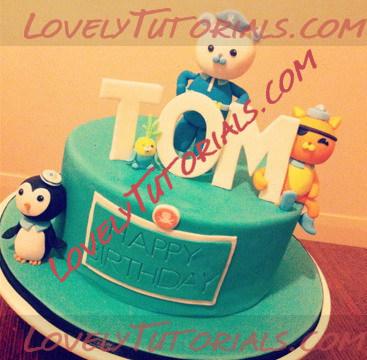
Огромная благодарность Автору Bronnie Bakes за Мастер-класс


Название: 1.jpg
Просмотров: 0

Размер: 59.5 Кб
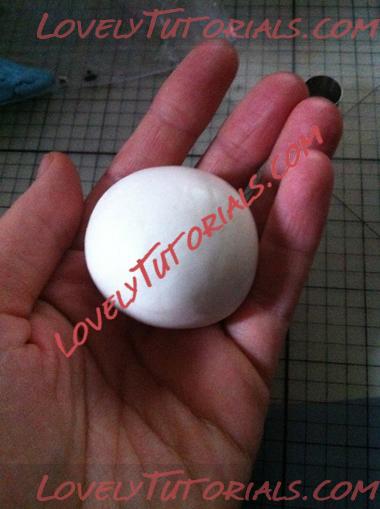
Start by rolling a white circle of fondant for the head. Make sure your fondant has been mixed with a hardening agent or you are using gum/sugarpaste
Название: 2.jpg
Просмотров: 0

Размер: 158.7 Кб
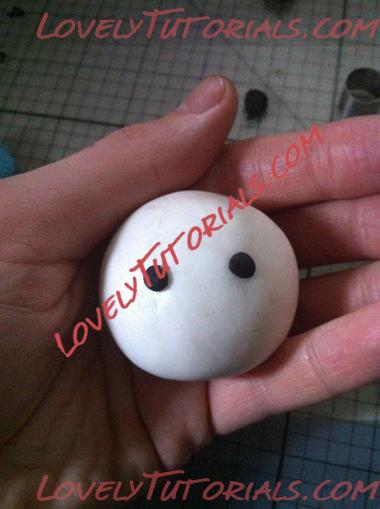
Roll out two small balls of black and attach to the face with some edible glue or water
Название: 3.jpg
Просмотров: 0

Размер: 153.2 Кб
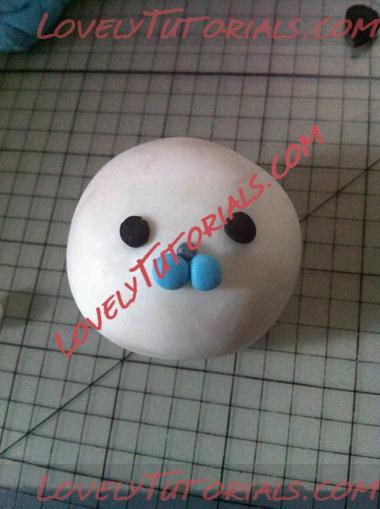
Add a small grey ball and two light blue balls for the nose/mouth
Название: 4.jpg
Просмотров: 0

Размер: 165.2 Кб
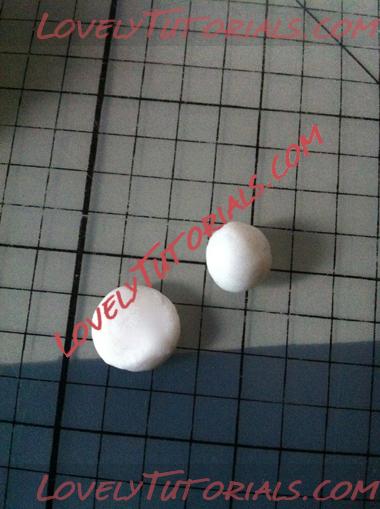
Roll out two balls for the ears and flatten them.
Название: 5.jpg
Просмотров: 1

Размер: 168.8 Кб
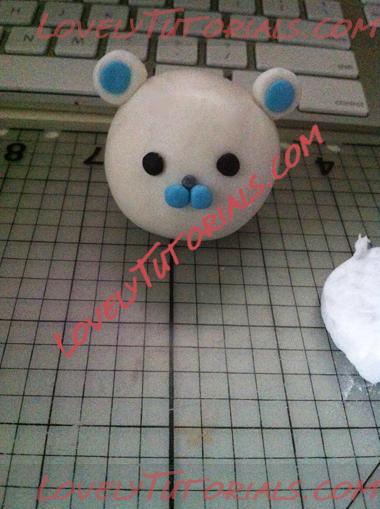
Roll out a smaller blue circle, attach to the ear and then stick the ears to the head.
Название: 6.jpg
Просмотров: 0

Размер: 191.3 Кб
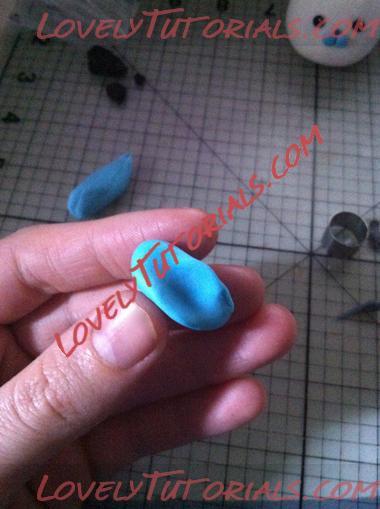
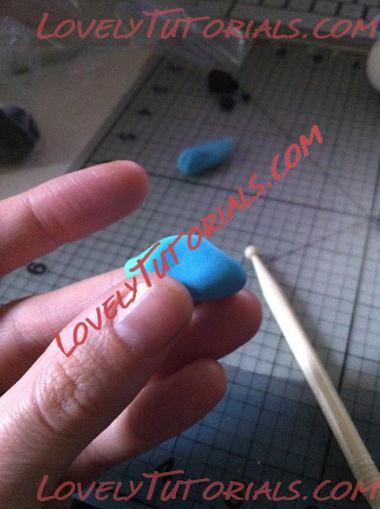
Roll out a jellybean shape for the hat and using your finger, indent the middle (there is probably a much better way for doing this)
Название: 7.jpg
Просмотров: 0

Размер: 171.3 Кб
Pull up the middle of the hat gently with your fingers to get the right shape
Название: 8.jpg
Просмотров: 0

Размер: 161.4 Кб
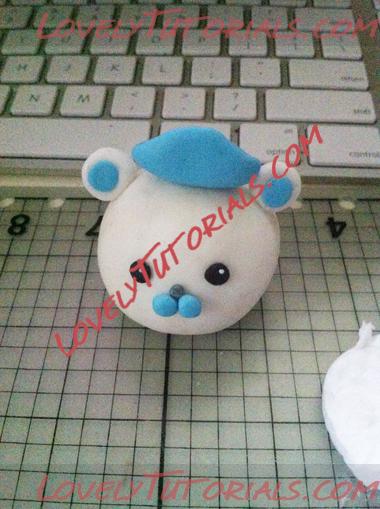
Stick onto the head
Название: 9.jpg
Просмотров: 0

Размер: 201.5 Кб
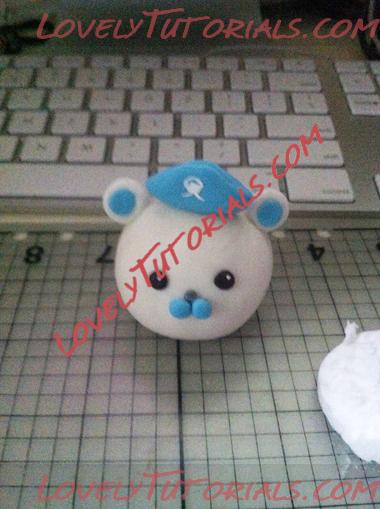
Using a fine paintbrush or toothpick, draw the Octopus/like shape that he has on his hat
Название: 10.jpg
Просмотров: 0

Размер: 186.4 Кб
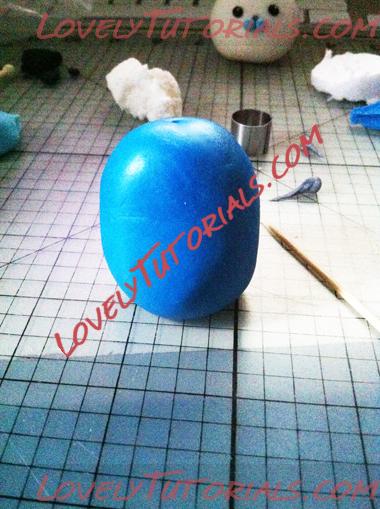
Roll out an oval shape of blue for the body
Название: 11.jpg
Просмотров: 0

Размер: 224.9 Кб
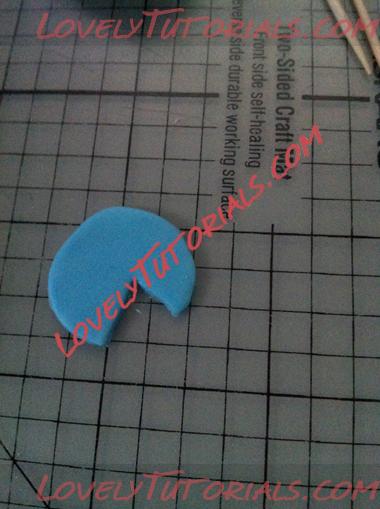
Roll out a circle of paler blue and cut away a small triangle
Название: 12.jpg
Просмотров: 0

Размер: 169.3 Кб
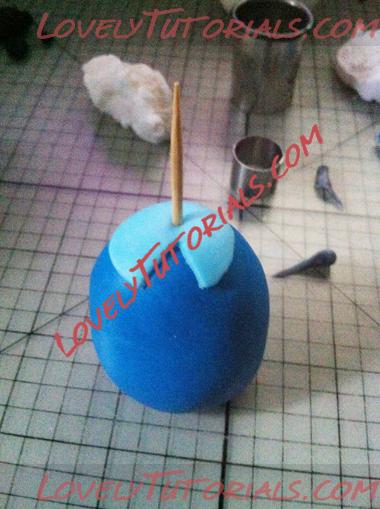
Attach to the body and then place a toothpick or piece of dry pasta to act as your support.
Название: 13.jpg
Просмотров: 1

Размер: 199.8 Кб
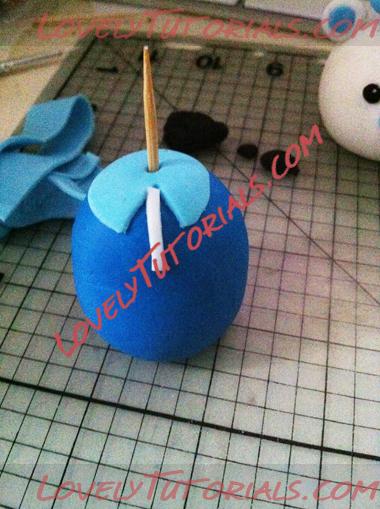
Roll out some white and cut a small strip. Attach to the body
Название: 14.jpg
Просмотров: 0

Размер: 220.2 Кб
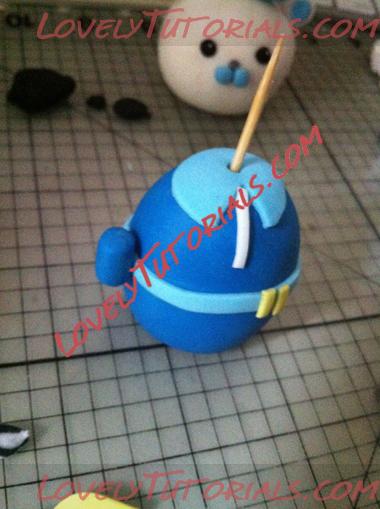
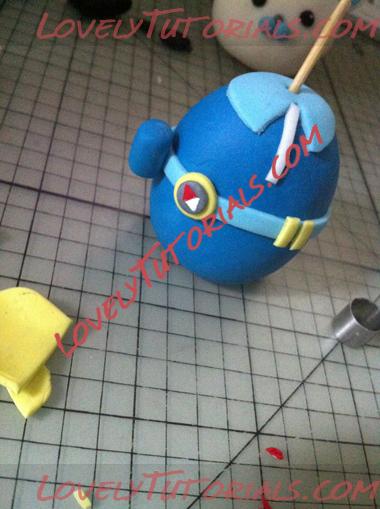
Roll out a strip of light blue for the belt and add two small yellow strips and a dark blue rectangle for the walkie talkie (or whatever that thing is!)
Название: 15.jpg
Просмотров: 0

Размер: 182.6 Кб
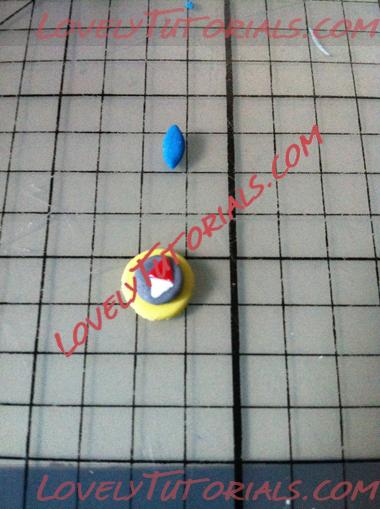
Roll out a yellow circle and then attach a smaller grey circle and a small red triangle. Using white food colouring mixed with a little alcohol, paint on the other triangle (or you may want to cut it out of fondant – I found it was easier to get the two triangles to ‘match’ by painting on the second)
Название: 16.jpg
Просмотров: 0

Размер: 184.7 Кб
Stick onto the belt
Название: 17.jpg
Просмотров: 0

Размер: 182.3 Кб
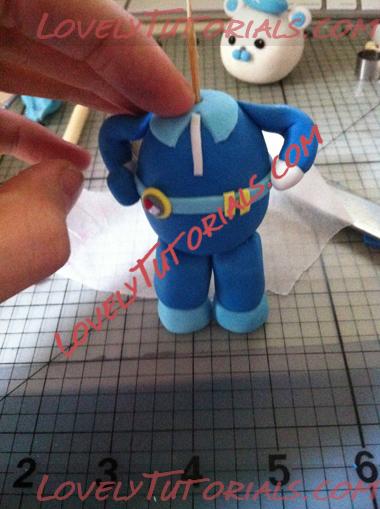
I’m not very proud of the arms or legs! But the arms are simply two blue ‘sausages’ that are flattened at one end and have a white hand at the other end.
The legs are blue sausages with flattened light blue balls at the bottom. The legs are attached with toothpicks into the body.
Название: 18.jpg
Просмотров: 0

Размер: 182.3 Кб
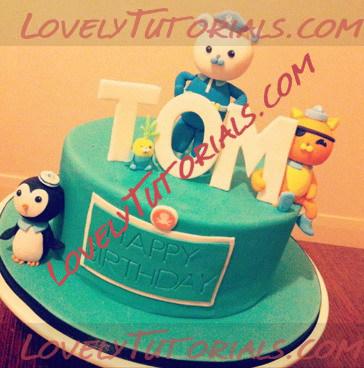
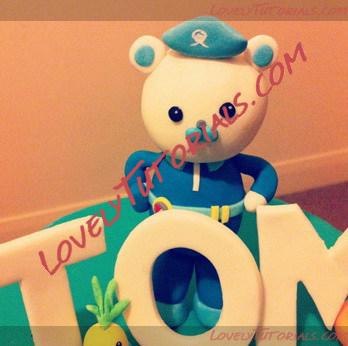
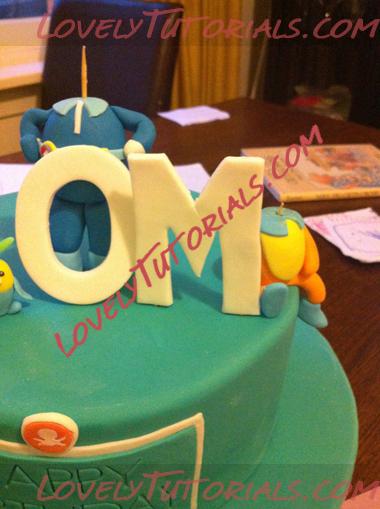
Now you know why I placed Captain behind the ‘O’ and ‘M’…. so it would draw attention away from his bad legs!!!!!
Название: 19.jpg
Просмотров: 0

Размер: 48.5 Кб
Старый 29.11.2012, 07:34
Ariana Ariana вне форума
Администратор
Регистрация: 07.09.2010
Сообщений: 7,940
По умолчанию How to make Tunip the Vegimal
Огромная благодарность Автору Bronnie Bakes за Мастер-класс

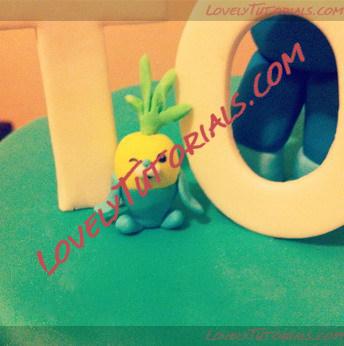
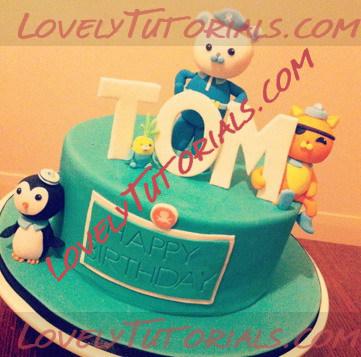
Tunip is a Vegimal (half animal, half vegetable)
Название: 1.jpg
Просмотров: 0

Размер: 58.2 Кб
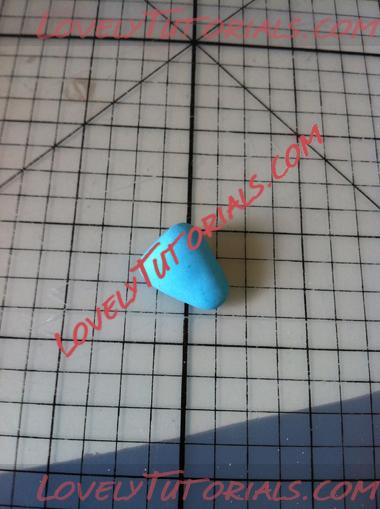
To start making Tunip, you will need some yellow and blue fondant or gumpaste. If you are using fondant, add a hardening agent so that it will harden once completed.
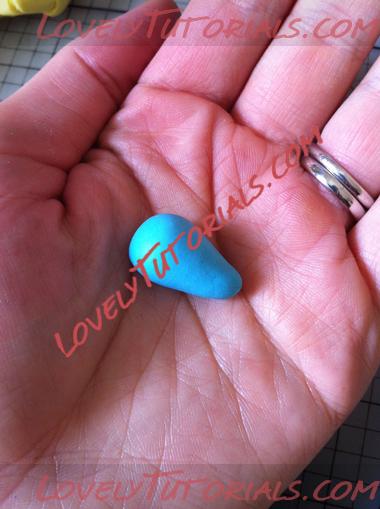
Roll the blue fondant into a cone shape
Название: 2.jpg
Просмотров: 0

Размер: 189.8 Кб
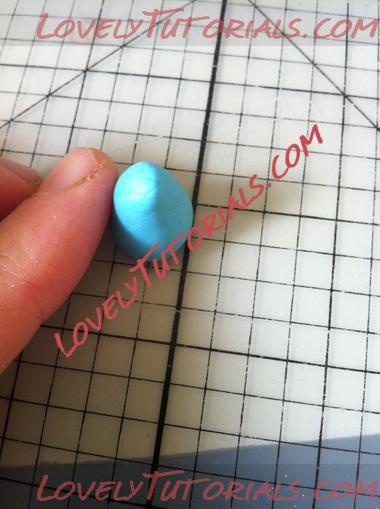
Tap the wider part of the cone on your mat to flatten and then set aside to dry for a few minutes.
Название: 3.jpg
Просмотров: 0

Размер: 170.0 Кб
Название: 4.jpg
Просмотров: 0

Размер: 176.2 Кб
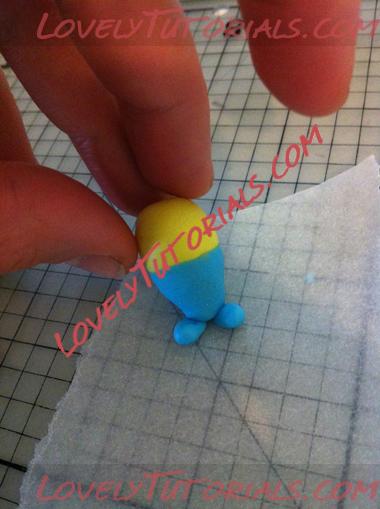
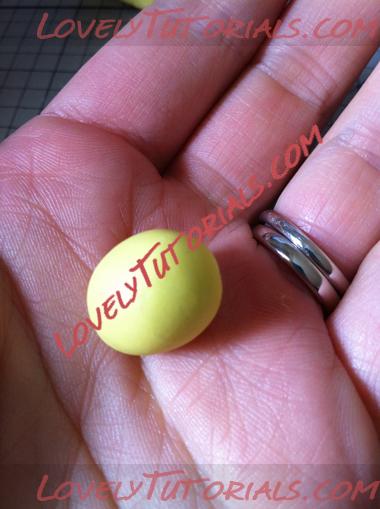
Roll out your yellow fondant into a ball shape
Название: 5.jpg
Просмотров: 0

Размер: 181.8 Кб
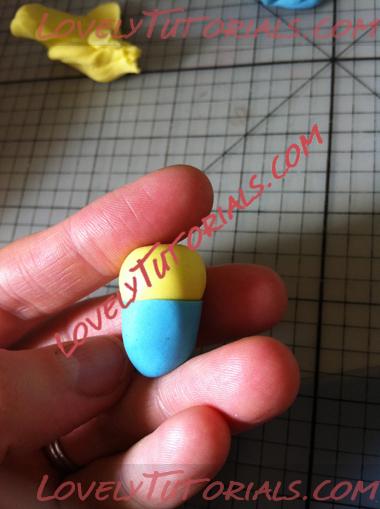
Attach to the blue fondant using some edible glue or water
Название: 6.jpg
Просмотров: 0

Размер: 157.6 Кб
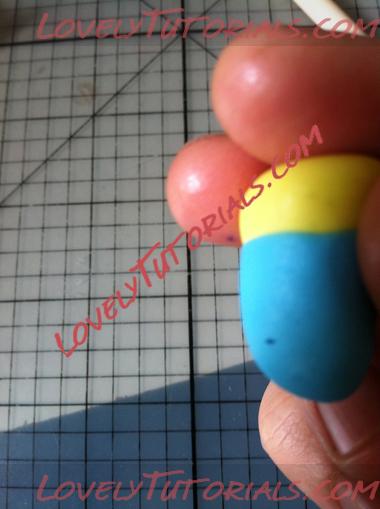
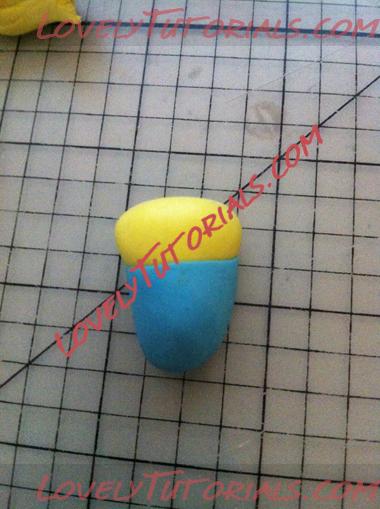
Using your thumb, smooth the yellow and blue together to get rid of the seam. Don’t worry about distorting the shape at this stage.
(apologies for the bad photo, but it was hard to take an action shot! I basically worked my thumb from the blue up to the yellow, smoothing it in together)
Название: 7.jpg
Просмотров: 1

Размер: 148.4 Кб
Название: 8.jpg
Просмотров: 0

Размер: 187.6 Кб
Gently roll Tunip so that the yellow part returns to a ball shape
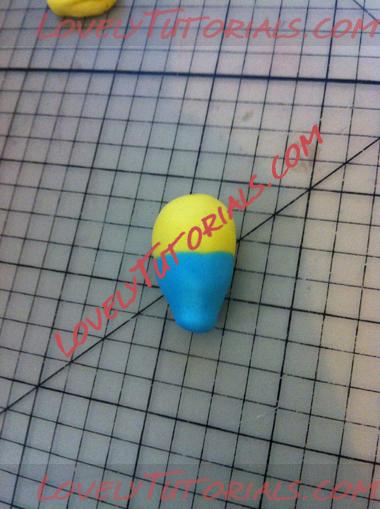
Название: 9.jpg
Просмотров: 0

Размер: 214.9 Кб
Make two small blue tear drops for the feet and then attach the body with some glue or water.
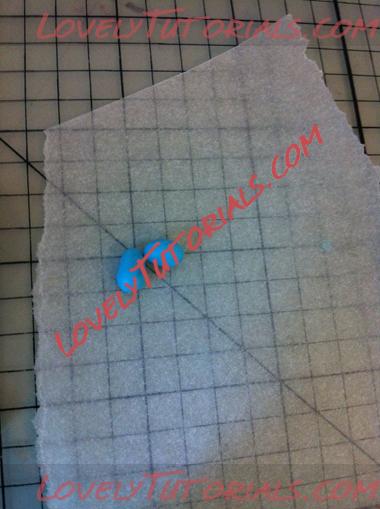
Название: 10.jpg
Просмотров: 0

Размер: 191.9 Кб
Название: 11.jpg
Просмотров: 0

Размер: 173.6 Кб
I found it was easiest to put something behind Tunip so that he remained straight whilst drying.
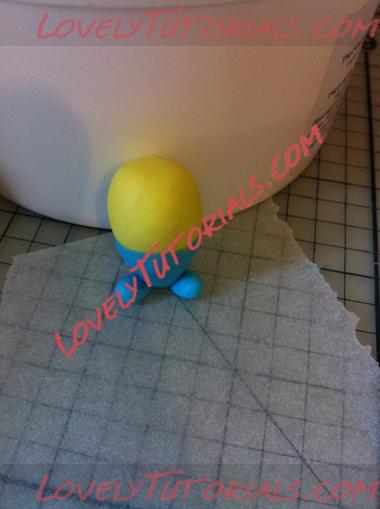
Название: 12.jpg
Просмотров: 0

Размер: 155.9 Кб
Roll out two teardrop shapes for the arms and flatten them.
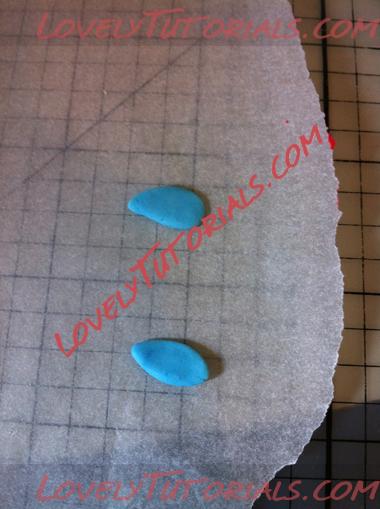
Название: 13.jpg
Просмотров: 0

Размер: 177.3 Кб
Attach to Tunip using some water or edible glue
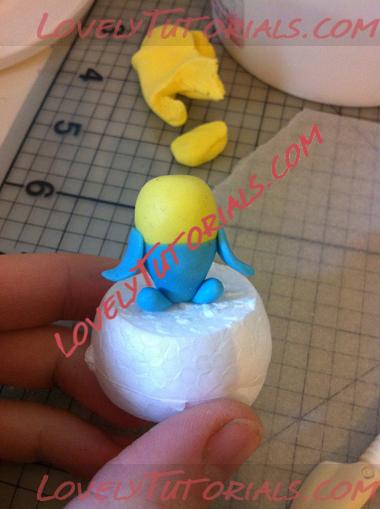
Название: 14.jpg
Просмотров: 1

Размер: 166.9 Кб
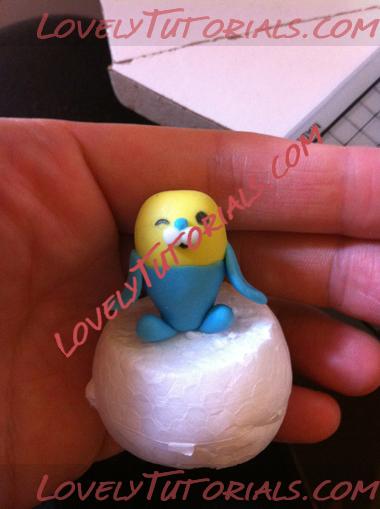
At this point I inserted half a toothpick into Tunip so that I could stand him up on half a polystyrene ball.
Make sure that after gluing the arms on that you ‘kink them up’ slightly at the bottom (hope that makes sense!)
To make the top of Tunip, roll out some green fondant into a teardrop shape. Also make a small hole at the top of Tunip’s head.
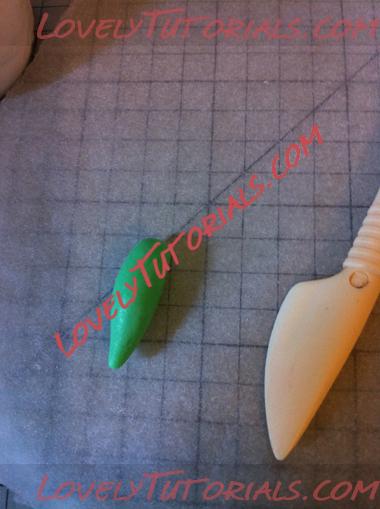
Название: 15.jpg
Просмотров: 0

Размер: 162.6 Кб
Cut the top into strips and then tidy up the rough edges
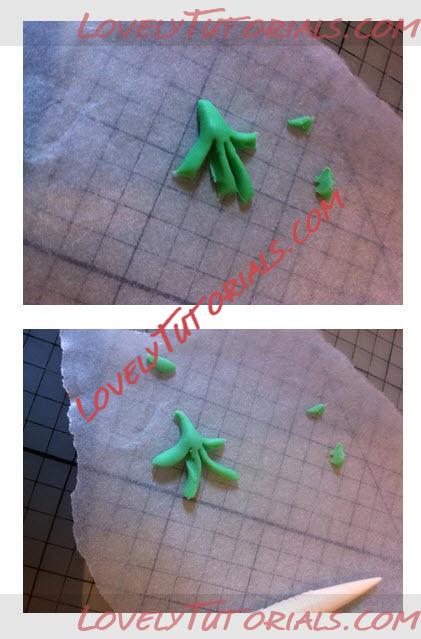
Название: 16-17.jpg
Просмотров: 0

Размер: 52.9 Кб


Leave the green to dry and using an edible marker, mark on Tunip’s face
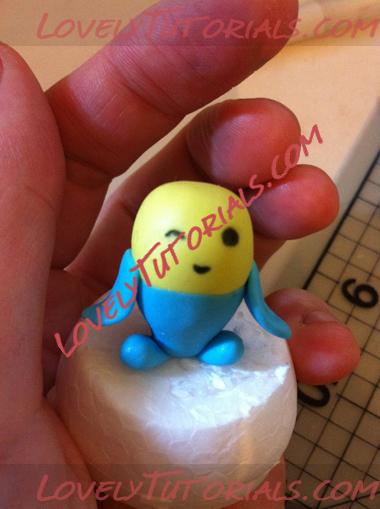
Название: 18.jpg
Просмотров: 0

Размер: 169.3 Кб
Roll out two small white balls and stick them together just above the black mouth. Add a smaller blue ball for the nose.
Название: 19.jpg
Просмотров: 0

Размер: 148.3 Кб
Stick on the green hair
Название: 20.jpg
Просмотров: 0

Размер: 159.7 Кб
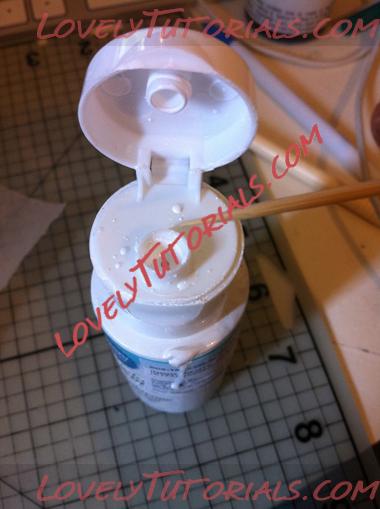
Using some white food colouring and a very fine paintbrush (or toothpick), mark a small dot on the eye
Название: 21.jpg
Просмотров: 0

Размер: 159.0 Кб
Название: 22.jpg
Просмотров: 0

Размер: 166.2 Кб
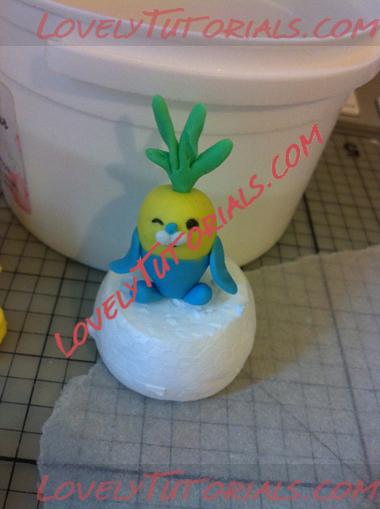
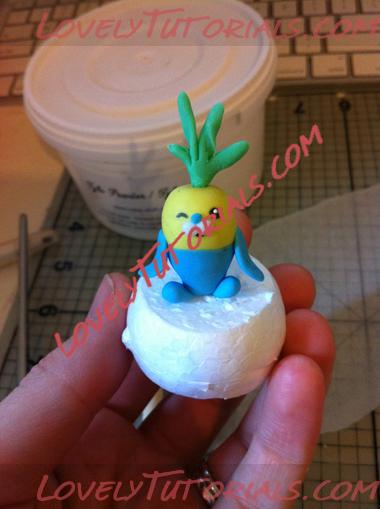
And that it is! You’ve just completed your first (and probably only) Vegimal
Название: 23.jpg
Просмотров: 0

Размер: 44.8 Кб
Старый 29.11.2012, 08:14
Ariana Ariana вне форума
Администратор
Регистрация: 07.09.2010
Сообщений: 7,940
По умолчанию How to make Peso the Penguin
Огромная благодарность Автору Bronnie Bakes за Мастер-класс

Название: untitled.jpg
Просмотров: 0

Размер: 83.4 Кб

Название: untitled2.jpg
Просмотров: 0

Размер: 66.2 Кб

Название: untitled3.jpg
Просмотров: 1

Размер: 110.0 Кб

Название: untitled4.jpg
Просмотров: 0

Размер: 66.2 Кб


Next up in our Octonaut tutorial series is Peso the Penguin
Название: 0.jpg
Просмотров: 0

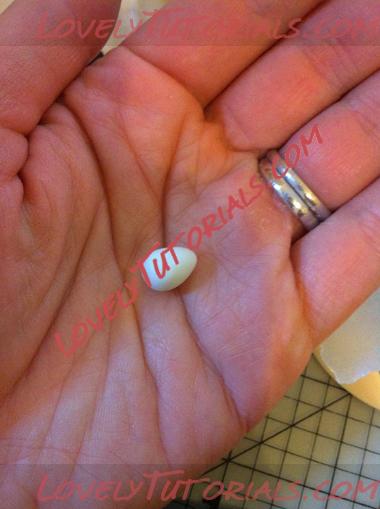
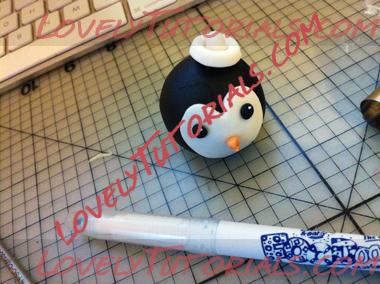
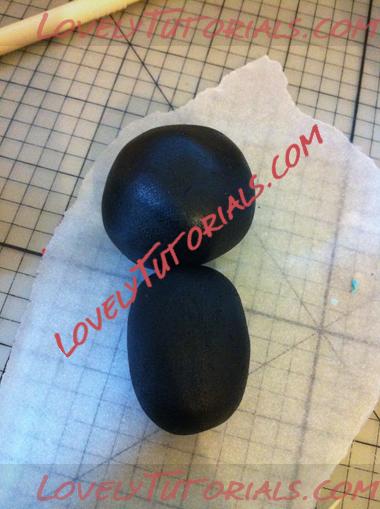
Размер: 58.9 КбStart with some black fondant mixed with a hardening agent (or black gum/sugarpaste), and roll out a ball for the head and an oval for the body. Peso has an unusually large head, so make sure you factor that in!
Название: 1.jpg
Просмотров: 0

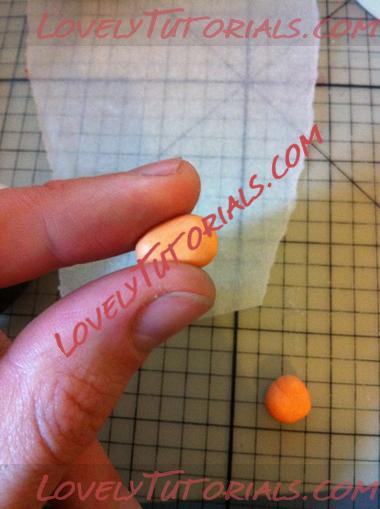
Размер: 182.7 КбRoll out some orange into two teardrop/triangle shapes
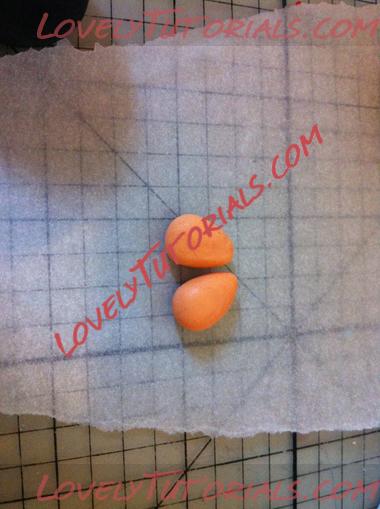
Название: 2.jpg
Просмотров: 0

Размер: 177.8 КбНазвание: 3.jpg
Просмотров: 0

Размер: 189.9 КбMake 3 incisions for the toes on the larger side, flatten the other side and stick Peso’s body onto the feet.
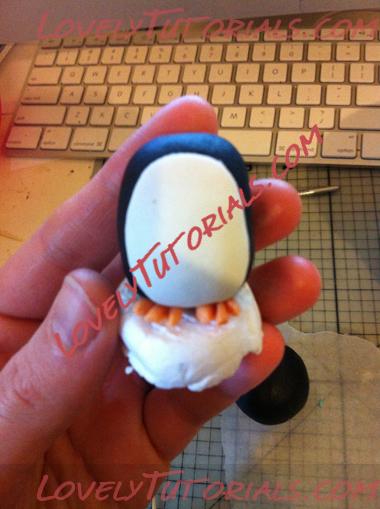
Название: 4.jpg
Просмотров: 0

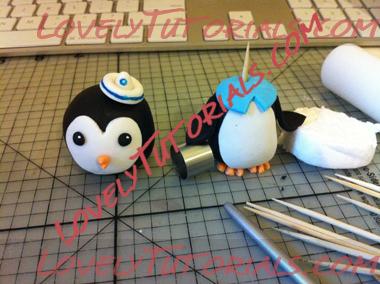
Размер: 202.6 КбI’ve also stuck on a white oval of fondant and a toothpick in the body before sticking Peso in some styrofoam to stand.
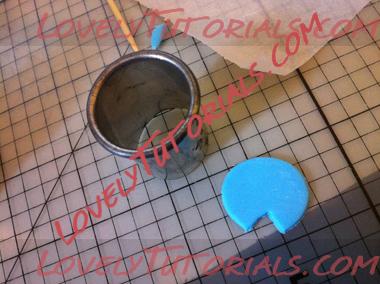
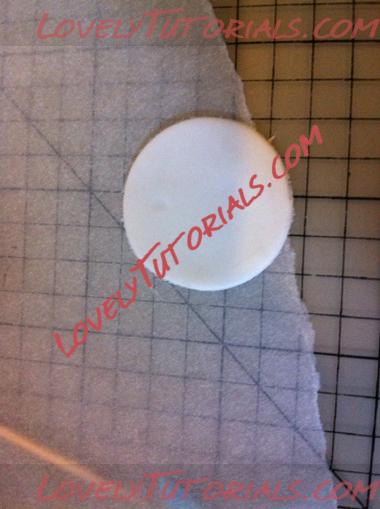
Next cut out a blue circle and cut a triangle from it
Название: 5.jpg
Просмотров: 0

Размер: 126.6 Кб
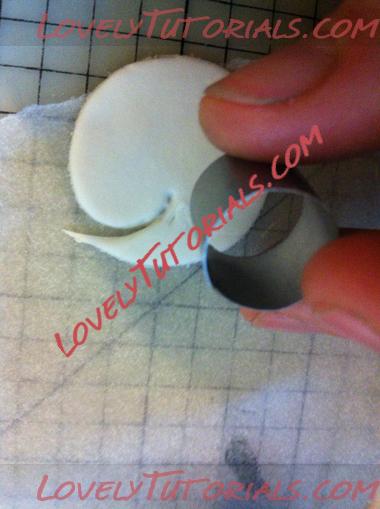
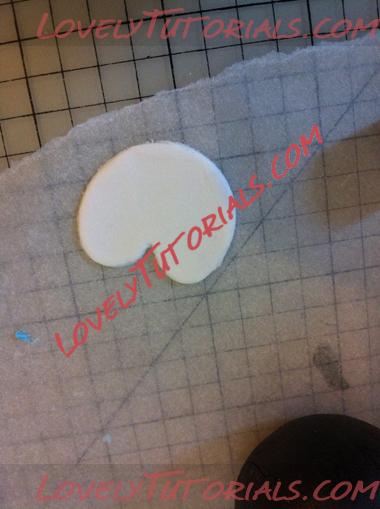
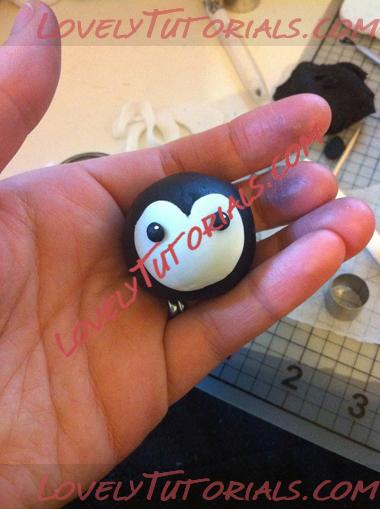
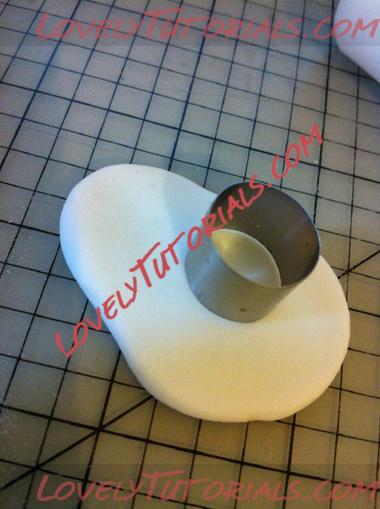
Cut out a white circle for the head and using a smaller cutter, cut out the bottom so that it looks like the top of a heart.
Название: 6.jpg
Просмотров: 0

Размер: 177.0 Кб
Название: 7.jpg
Просмотров: 0

Размер: 183.5 Кб
Название: 8.jpg
Просмотров: 0

Размер: 156.3 Кб
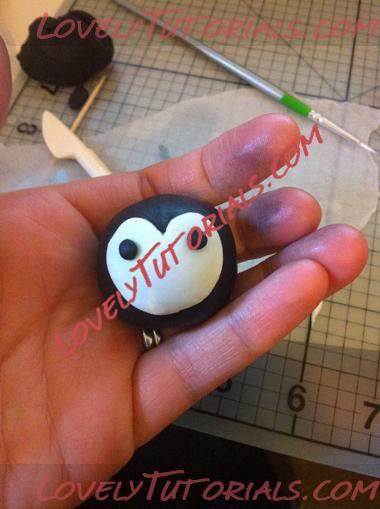
Stick onto Peso’s head and add two small black balls for his eyes
Название: 9.jpg
Просмотров: 1

Размер: 171.8 Кб
Using a toothpick or fine paintbrush, dot on some white edible colouring for the pupils
Название: 10.jpg
Просмотров: 0

Размер: 170.0 Кб
To make the hat, roll out some white fondant thickly and cut out a circle
Название: 11.jpg
Просмотров: 0

Размер: 201.6 Кб
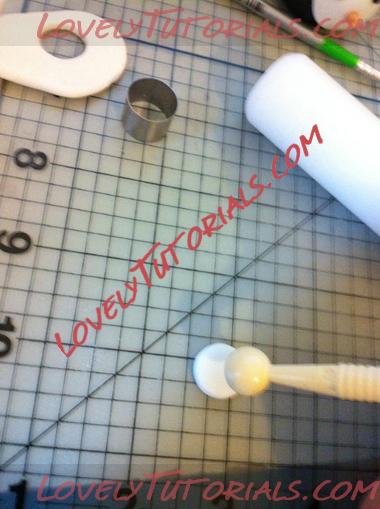
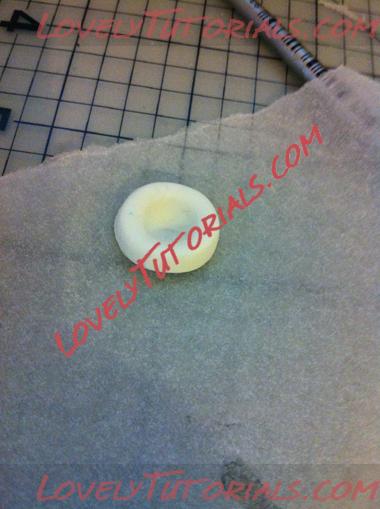
Indent the circle using a ball tool
Название: 12.jpg
Просмотров: 1

Размер: 175.4 Кб
Название: 13.jpg
Просмотров: 0

Размер: 217.6 Кб
Roll out a white cone and stick inside the hat using some edible glue or water
Название: 14.jpg
Просмотров: 1

Размер: 177.5 Кб
Название: 15.jpg
Просмотров: 1

Размер: 153.0 Кб
Using an edible marker or edible food colouring, draw on the hat markings.
This is where you need to look away, because my drawing skills are AWFUL!!!!!!! Название: 16.jpg
Просмотров: 1

Размер: 148.4 Кб
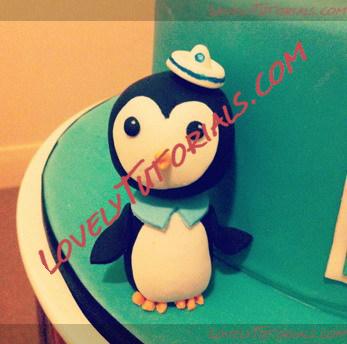
Add the collar to the body, a toothpick or piece of dry spagetti and the arms. Once everything is dry you can stick the head to the body.
Название: 17.jpg
Просмотров: 0

Размер: 49.2 Кб
Старый 29.11.2012, 08:57
Ariana Ariana вне форума
Администратор
Регистрация: 07.09.2010
Сообщений: 7,940
По умолчанию
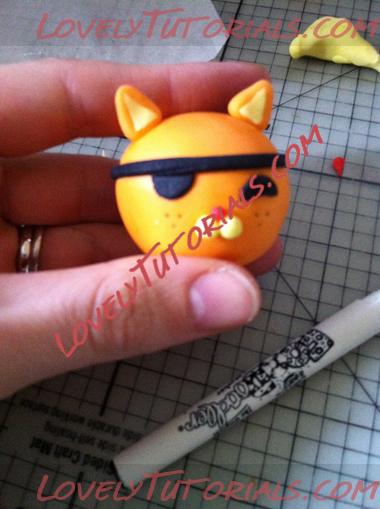
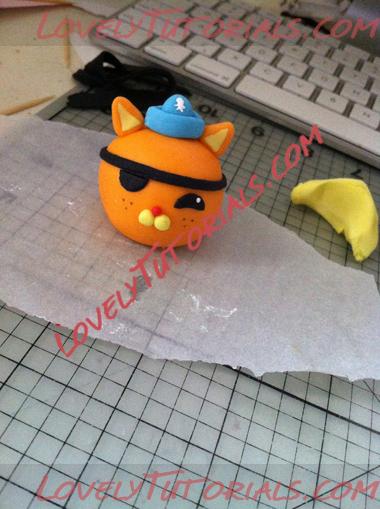
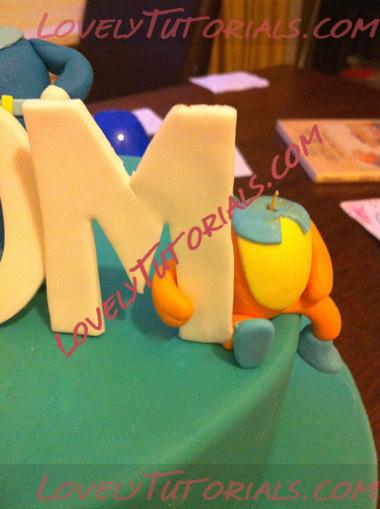
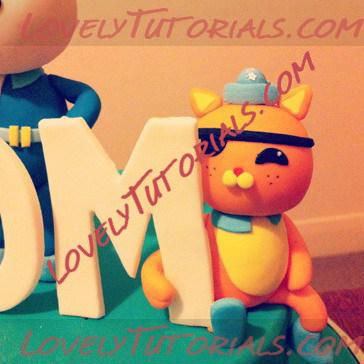
Next for our Octonaut Cake tutorials is Quasi
Название: 1.jpg
Просмотров: 0

Размер: 58.4 Кб
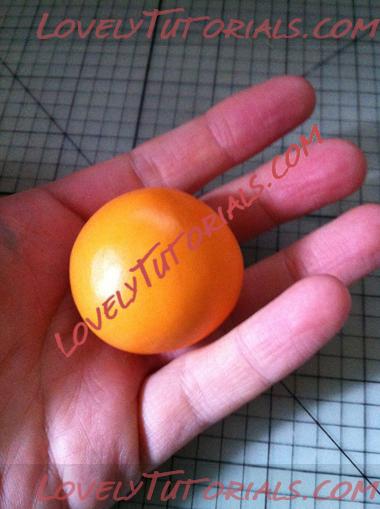
Start by rolling a ball of orange fondant (mixed with a hardening agent) or gum/sugarpaste for the head.
Название: 2.jpg
Просмотров: 0

Размер: 176.7 Кб
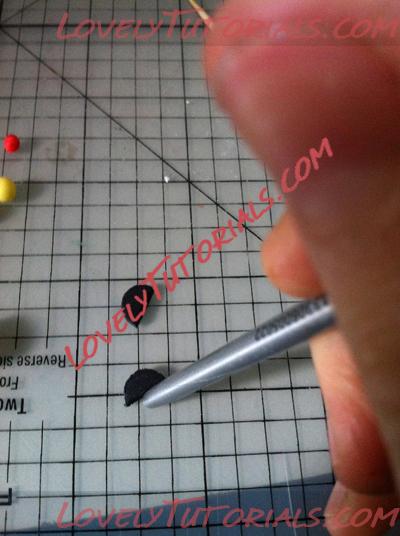
Roll out your black and cut out a small circle using a cutter or straw. Cut the circle in half. Using a paintbrush, slightly indent one of the semi circles.
Название: 3.jpg
Просмотров: 0

Размер: 178.2 Кб
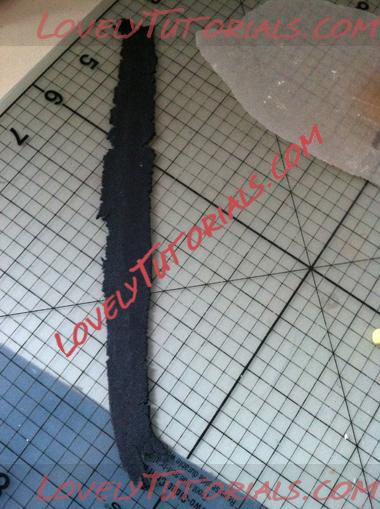
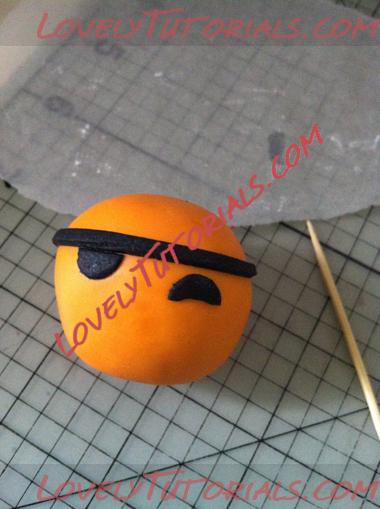
Roll out more black and cut out a thin strip for the eye patch.
Название: 4.jpg
Просмотров: 0

Размер: 195.6 Кб
Attach the eye patch and eye to the head with some edible glue or water
Название: 5.jpg
Просмотров: 0

Размер: 171.9 Кб
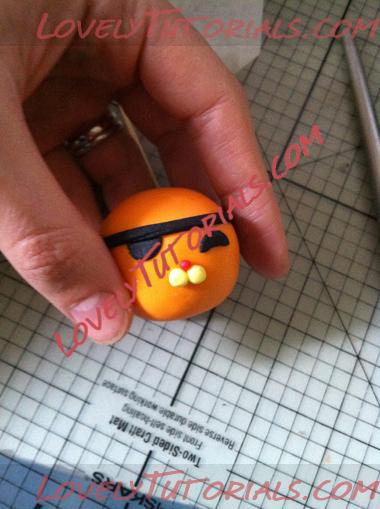
Add two yellow balls and a smaller red ball for the nose/mouth
Название: 6.jpg
Просмотров: 0

Размер: 178.5 Кб
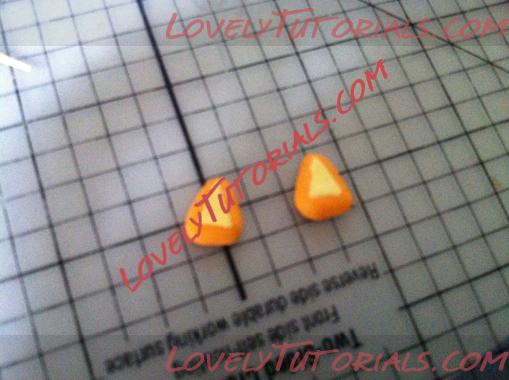
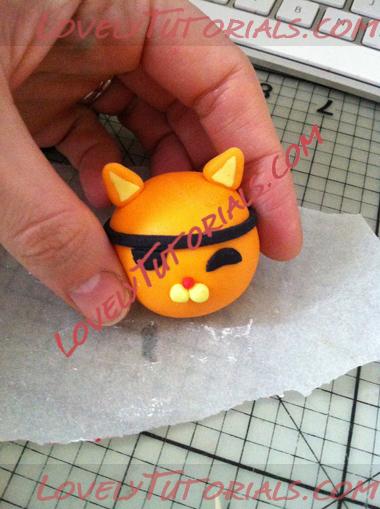
Roll out two orange triangles for the ears and stick a thin yellow triangle on top. Attach to the head.
Название: 7.jpg
Просмотров: 0

Размер: 179.8 КбНазвание: 8.jpg
Просмотров: 0

Размер: 193.6 Кб
Using an edible marker, mark on the ‘cheek dots’ (ha – my new made-up word!!)
Название: 9.jpg
Просмотров: 0

Размер: 177.4 Кб
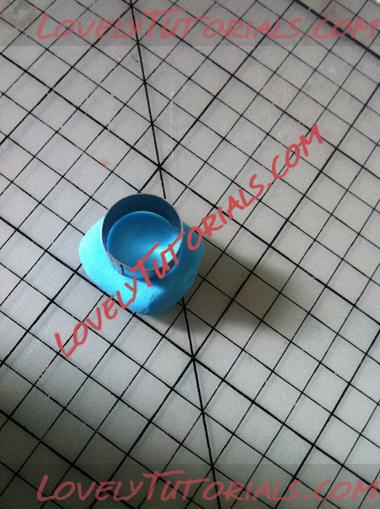
For the hat, cut out a thick circle of blue
Название: 10.jpg
Просмотров: 0

Размер: 212.6 Кб
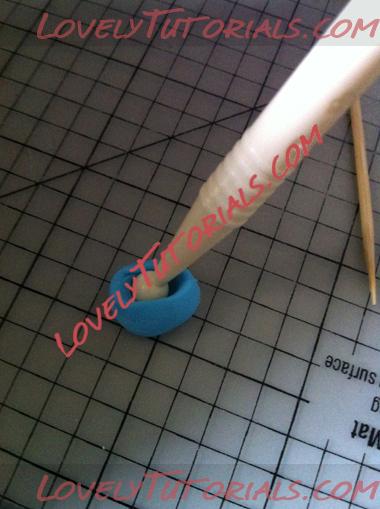
Using a ball tool, indent the centre of the circle
Название: 11.jpg
Просмотров: 0

Размер: 164.0 Кб
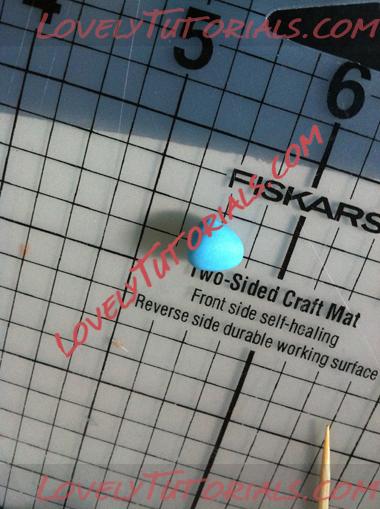
Roll out a triangle and attach that to the hat.
Название: 12.jpg
Просмотров: 0

Размер: 194.2 Кб
Using a fine paintbrush or toothpick, draw on the Octonaut ‘octopus’ shape on top of the hat. Also dot on the eye.
Название: 13.jpg
Просмотров: 0

Размер: 191.9 Кб
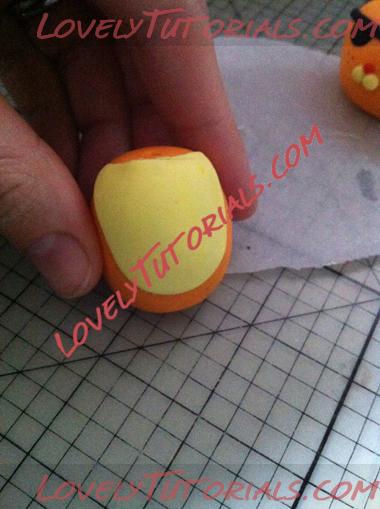
Roll out an orange oval for the body. Add a yellow oval (cut at the top) to the body.
Название: 14.jpg
Просмотров: 0

Размер: 175.3 Кб
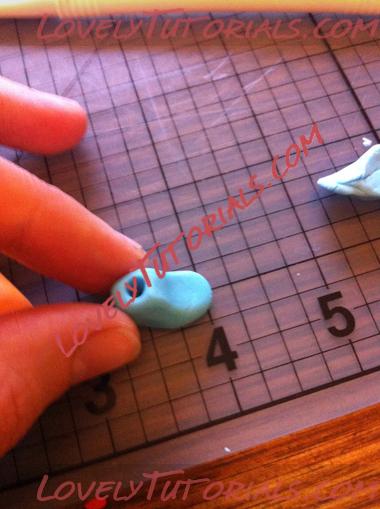
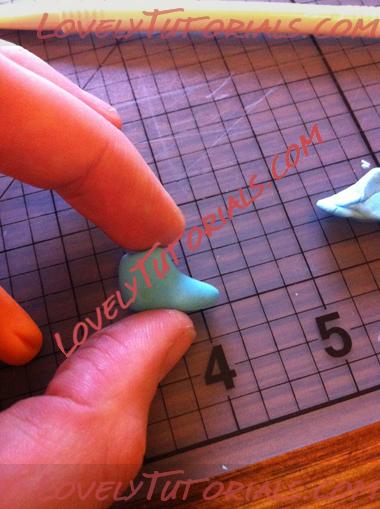
Roll out some blue fondant into a small L shape for the boot. Flatten the bottom of the boot and using a ball tool, mark in the top of the shoe for where the leg will go.
Название: 15.jpg
Просмотров: 0

Размер: 185.5 КбНазвание: 16.jpg
Просмотров: 0

Размер: 191.2 Кб
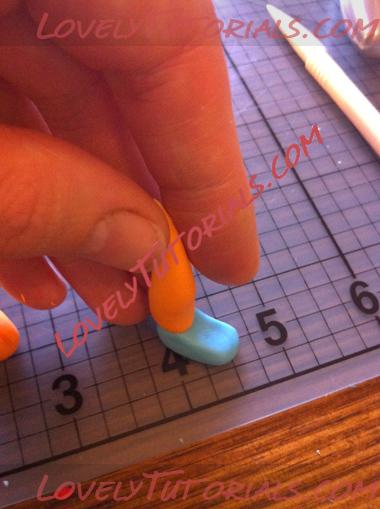
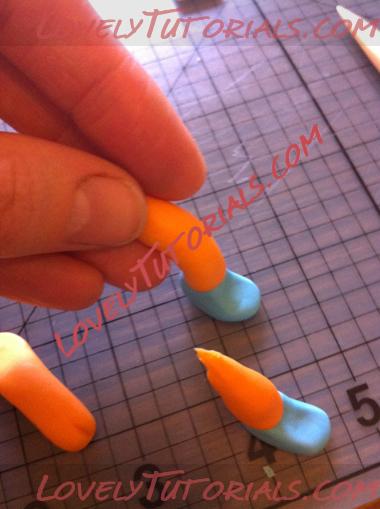
Roll out orange sausages for the legs and attach to the boots
Название: 17.jpg
Просмотров: 0

Размер: 173.7 КбНазвание: 18.jpg
Просмотров: 0

Размер: 164.2 Кб
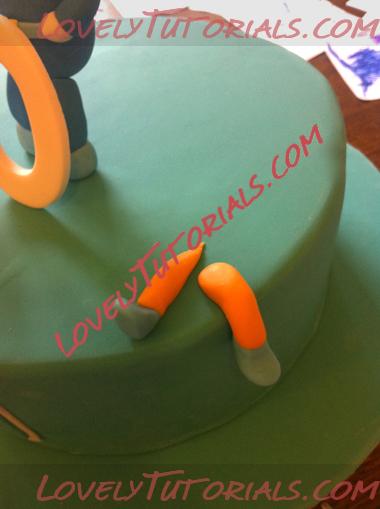
Attach the legs to the cake
Название: 19.jpg
Просмотров: 0

Размер: 134.0 Кб
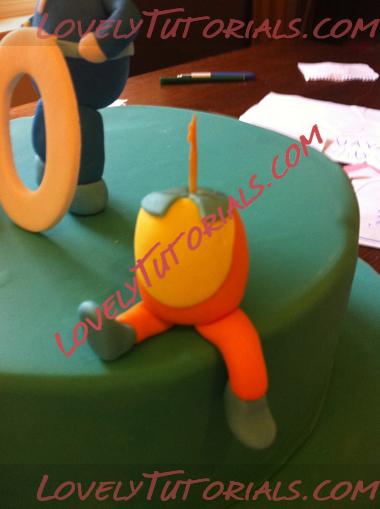
Attach the body to the legs
Название: 20.jpg
Просмотров: 0

Размер: 141.5 Кб
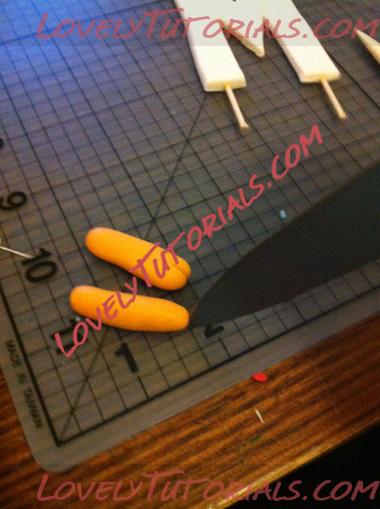
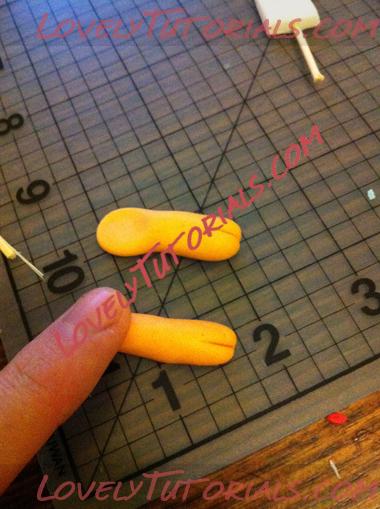
Roll out two sausages for the arms. Using a knife, make an indent for the hands and flatten the other side.
Название: 21.jpg
Просмотров: 0

Размер: 177.5 КбНазвание: 22.jpg
Просмотров: 0

Размер: 198.9 Кб
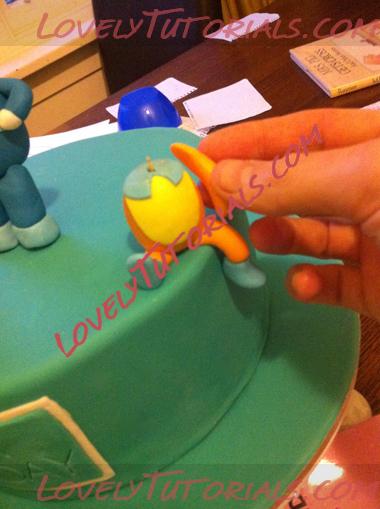
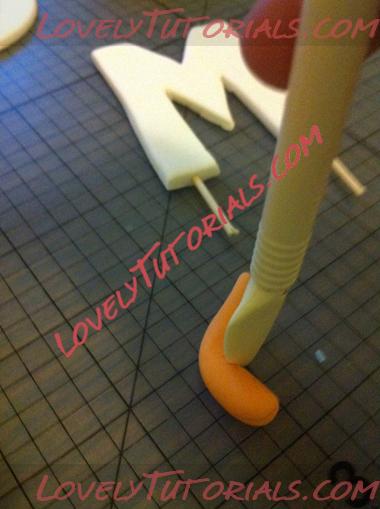
Attach one to the body and then attach the other around the giant letter (or, if you don’t have giant letters, just attach both arms in the same way)
Название: 23.jpg
Просмотров: 0

Размер: 180.5 Кб
Название: 24.jpg
Просмотров: 0

Размер: 162.0 КбНазвание: 25.jpg
Просмотров: 0

Размер: 196.1 КбНазвание: 26.jpg
Просмотров: 0

Размер: 184.6 Кб
Attach the head and Voila!

Название: 27.jpg
Просмотров: 0

Размер: 51.5 Кб
3d figures, addım-addım təlimat, adım, adım adım yönergeler, artesanatos passo a passo, bemutató, birthday cake, biscuit, bolando bolos, bolos decorados, cake decorating, cake decorating techniques, cake topper, cake toppers, cake tops, cerâmica plástica, character figures, characters, children's cake, cold porcelain, confeitando bolos, curso de modelado, decoracion de pasteles, decoración de tortas, decorada en fondant, decorare le torte, decorazioni, deko fondant, dekorace na dort, dekoracija, dekoracije, dekorasyon, dekorácie, especializada em modelagem de biscuit, fender, figur kager, figuras, figure making tutorials, figuren, figures, figurice, figurice od fondana, figurine on the cake, figurines, figurinhas, figurky, figúrky, figür modelleme, fimo, fixando a cabencinha, flower paste, fondan, fondant, fondente, fondente di zucchero, fotopostup, foundant, gebak, glazuur, gum pasta, gum paste, gumpaste, hand-made, handmade, how to, how to make tunip the vegimal, how-to's, instrucţiuni, instrukcijas, instrukcje, jak na, kage dekoration, kagedekoration, kakebaking, korak, korak za korakom navodila, korak-po-korak upute, koristeet ja koristelu, krok, krok po kroku, krok za krokem, krok-za-krokem, la modélisation, las instrucciones, las técnicas, le tecniche, les techniques, lukie, marcipanové figurky, marshmallow, marsipanfigurer, masa flexible, master-class, master-klasse, master-klasy, meistras klasės, metodikas, mistr třídy, modelado, modelagem, modelando a barriga, modelando a cabencinha, modelando a perninha, modelando as maozinhas, modelando o cabelinho, modelando o corpinho, modelando os bracinhos, modelando os pezinhos, modelare, modelerte figurer, modeling, modeling paste, modeliranje, modellazione, modelleme, modellering, modellieren, modellierpaste, modelling, modelling past, modelləşdirmə, modelovanie, modelování, modelování krok za krokem, modelowanie, motivtorten, návod, návody a postupy, návody na květy a lístky, opplæringen, orelhas, ozdoby, pamoka, pap, pas, pas-cu-pas, pas-à-pas et modèles, paso, paso a paso, passo, passo a passo, passo-a-passo, passo-passo le istruzioni, pasta de goma, pasta de miel, pasta flexible, pasta laminada, pintura dos olhos, pocelana fria, polymer clay, postupak za ukrasavanje, pravljenje figurica za torte, pâtisserie, předměty z marcipánu, schmelzend, schritt für schritt anleitung, schritt-für-schritt, schritt-für-schritt-anleitungen, sculpting, soggetti, souvenirs, stap, stap-voor-stap, stap-voor-stap instructies, steg for steg, steg för steg, steg-för-steg-instruktion, step, step by step, step-by-lépésre, step-by-step, step-by-step instructions, styrofoam, sugarcraft, sugarpaste, suikerglazuur, technieken, techniken, techniki, techniky, technikák, techniques, tecnicas de decoracion, tecniche, tehnici, tehnike, teknikker, teknikler, telgopor, the octonauts -how to make captain barnacles, topo de bolo, topo do bolo, topos de bolo, torte, torte decorate, torten dekorieren, torti, trin, trin for trin, trin-for-trin, trin-for-trin instruktioner, trinn, trinn for trinn, trinn-for-trinn-instruksjoner, trucs et questions sur la décoration de gateaux, tutorial, tutoriale, tutorias, tutorias/ideas para decorar los bizcochos, tutoriel, tutoriels, tutorijal, técnicas, udžbenik, ukrašavanje torti, uputstvo za dekoraciju, zuckerfigürchen, zuckermasse, सजा केक, ट्यूटोरियल मास्टर वर्ग, कदम, कदम दर कदम निर्देश, तकनीक, मॉडलिंग, モデル, étape, étape par étape les instructions, öğretici, 一步, 一步一步的指示術, žingsnis, žingsnis po žingsnio, 宗師級教程, 建模, 裝飾蛋糕, 黏土教程, 만들기 제작 과정, 슈가모델링, βήμα, βήμα προς βήμα οδηγίες, οδηγίες βήμα βήμα, παντεσπάνι art, τεχνικές, φροντιστήριο, декорация на торти стъпка по стъпка, инструкция, как сделать, крок за кроком, крок за крокам, покроково, полимерная глина, пошагово, пошаговые фотки, пакрокава, персонажи, миниатюра, мк, мк лепка "капитан барнаклс", моделиране, майстор-класа урок, майстар-клас, майстер-клас, майстер-класи, маршмеллоу, мастика, мастер-класс, лепка, ліплення, ручной работы, ручная работа, украшение тортов, сахарная мастика, уроки прикрашання, стъпка, стъпка по стъпка инструкции, торта стъпка по стъпка, техники, техника, техніка, туториал, туторіал, тэхніка, фигурки, фигурка на торт, фимо, фігурки, фігуркі, холодный фарфор, шаг за шагом, інструкцыя, інструкція


©2022 Lovely Tutorials
Content Relevant URLs by vBSEO