Огромная благодарность hungryhappenings за Мастер-класс
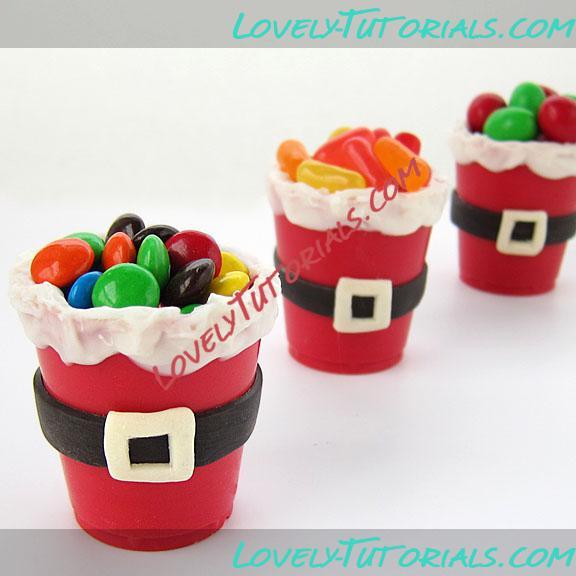
Before you begin, if you don't have experience working with confectionery coatings or modeling chocolate, read my detailed Chocolate Making Tips page (here.) If you work with pure chocolate, you can use them here instead of the confectionery coating/candy melts.
You'll Need:
melted red colored confectionery coating/candy melts (or use white and add red coloring)
melted white confectionery coating
small plastic cups - do not use paper cups or your candy cups will look dull not shiny
(about 2 1/2 inches tall - the bathroom cup size)
white modeling chocolate
black food coloring
powdered sugar to dust cutting board
Fill your Santa Suit Candy Cups with:
candies, nuts, trail mix, dried fruit, mini cookies, chocolate mousse, pudding, ice cream, etc.
Instructions:
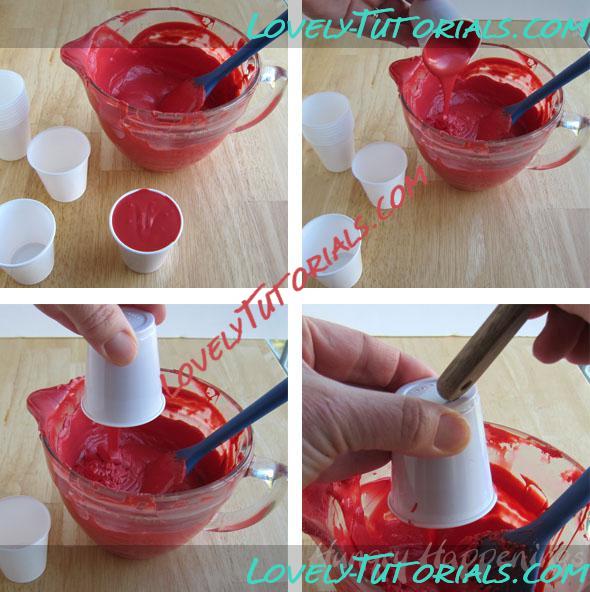
Allow your melted candy coating to cool enough that you can still pour it easily, but thick enough that it will coat your plastic cups with a thick layer. If your coating is really thin, you will need to do this process twice, creating two layers of candy coating for your cups.
Pour candy coating into a cup, filling it to the top. Let it sit at room temperature for 3 minutes. Turn it upside down and allow the candy coating to drip out. Tap the cup a few times to help remove the excess candy coating.
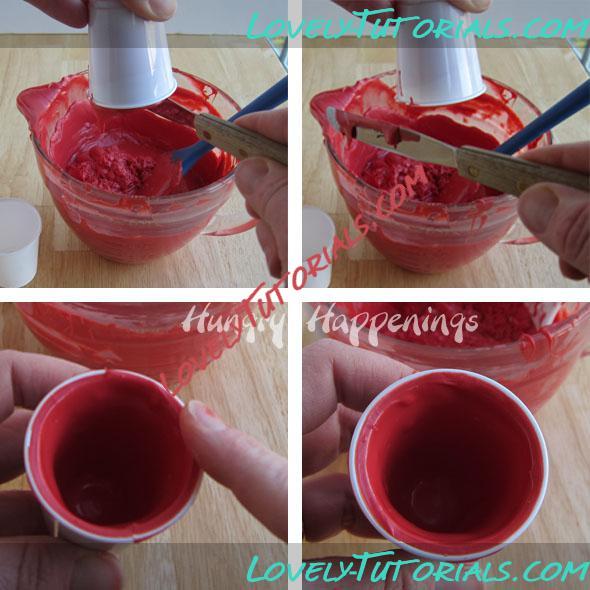
Use a spatula or knife to scrape across the open edge of the cup to remove the dripping candy. Wipe the edge of the cup clean using your finger. Place the cup in the freezer for 3-5 minutes until your candy hardens. Do not leave the cups in longer than 5 minutes or your candy may crack. Repeat to create as many cups as you want. You will have to re-heat your candy coating during this process to keep it at a pourable consistency.
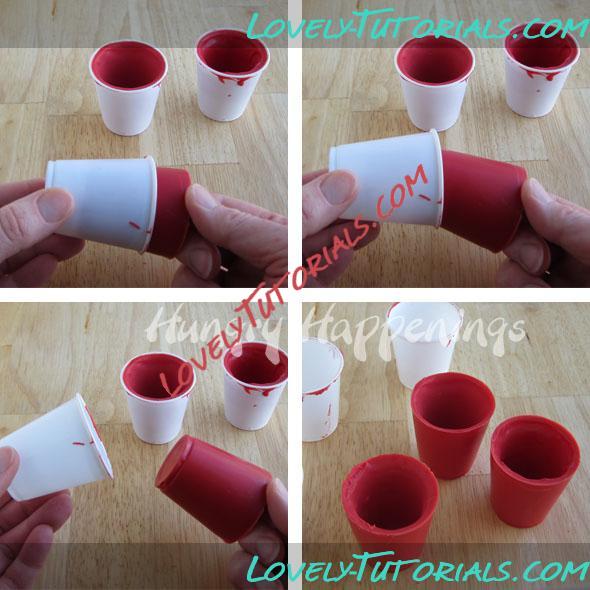
To remove the candy cups from the plastic cups, tug on them carefully and just slide them out. If you didn't do a great job of cleaning the edge of your candy cups, you may have to break the seal around the edge by running a small sharp knife around the edge to remove excess candy.
Allow your edible candy cups to come to room temperature before decorating.
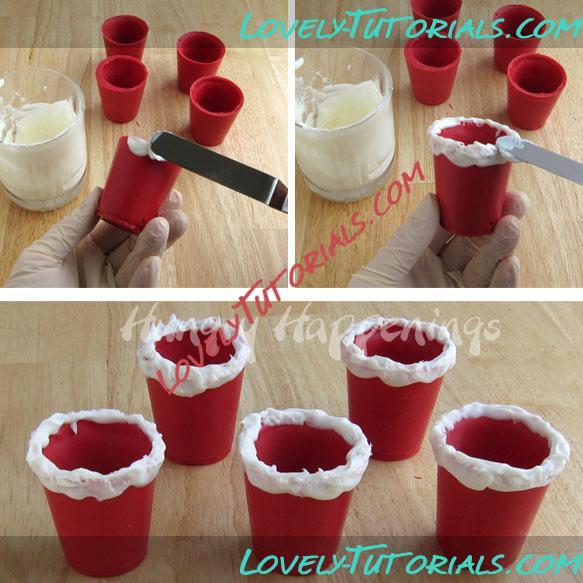
Allow your melted white confectionery coating to cool slightly so that it thickens a bit. Use a spatula or knife to frost just the top edge of each candy cup with the white candy coating. You want to create the look of fur. Freeze the cup for 1-2 minutes after adding the fur.
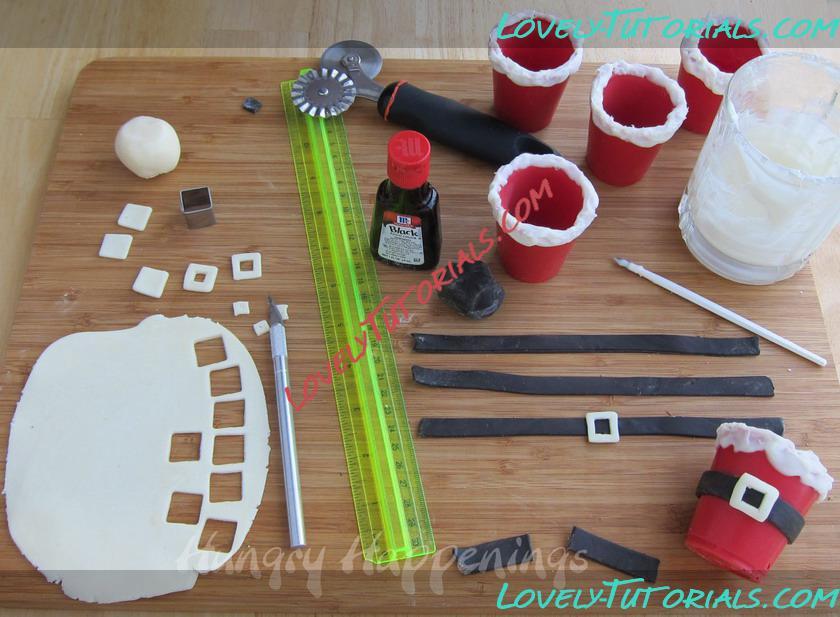
Color some of the white modeling chocolate using the black food coloring. Allow it to sit for 5 minutes before working with it.
Dust a cutting board lightly with powdered sugar. Roll out white modeling chocolate and some black modeling chocolate to 1/16" thickness. Cut small squares from the white (I used a small square fondant cutter) and long 3/8" bands from the black using a knife or pizza wheel. Cut a smaller square out from the inside of each small white square creating a buckle.
Lightly brush some white confectionery coating on the back side of a black belt and wrap it around the middle of your candy cup, cutting off any excess modeling chocolate. Lightly brush some candy coating (or corn syrup) on the buckle and attach it to the belt.
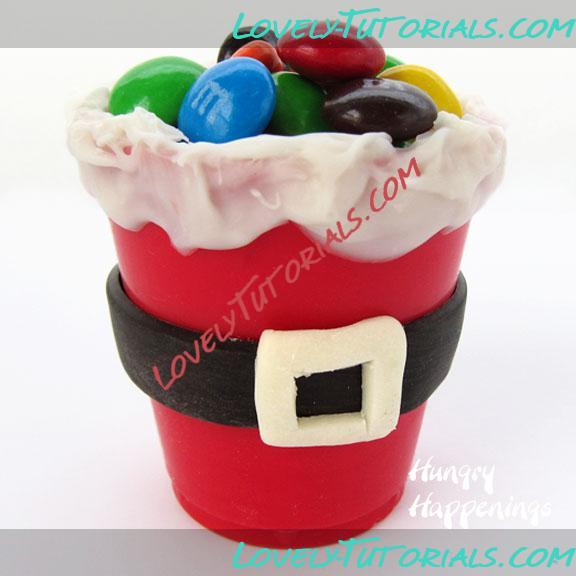
Fill with candy to use for party favors or fill them with chocolate mousse, pudding or even ice cream and serve for dessert.


